• Steel Soldiers now has a few new forums, read more about it at: New Munitions Forums!

  • Microsoft MSN, Live, Hotmail, Outlook email users may not be receiving emails. We are working to resolve this issue. Please add support@steelsoldiers.com to your trusted contacts.

What have you done to your CUCV today/lately? - Part 1

Status
Not open for further replies.

cpf240

Active member
1,479
5
38
Location
Free in Northern Idaho
Pmramsey - do those seats tilt at all? I'm wondering how they would work in an M1009, allowing access to the back seat. What are those seats from? Did they use the stock mounting locations in the floor pan?

I really like that M101A3 bed on there! I just might have to look for a project truck and do the same, thanks for the pictures!
 

pmramsey

Active member
463
190
43
Location
VA
Way cool mod, by far more functional than the stock pickup body. Would be a great conversion for M1031 owners that have no use for the maint box. I think you may have started something here. My five foot three girlfriend loves the swivel seat, hates climbing into my truck like a monkey.LOL. Nice work!
Your five foot three sweetie will hate these seats. However, they are far more comfortable than the bench seats especially on longer rides. With the bigger tires and the MRAP seats, it is an absolute climb into the truck. I am 5' 11". Without handles for climbing like on my Dodge, the technique is a hop, spring/jump to the seat. I need a simple step. The girlfriend would need to be good at chinups.

Actually, it is a great farm truck. I have two of these M1028s fixed like this. There is also a 10,000 lb Warn winch that is portable. It mounts to and sits between the front towing points or I can carry it around to the back and launch the winch from the rear using the rear towing points there.

One learns on one truck and perfects the next one. This truck has the fuel filler spout a bit too flat. The 2nd truck has a bit longer and more vertical drop to the tank. Live and learn...Thanks for your nice compliments.
 

pmramsey

Active member
463
190
43
Location
VA
Pmramsey - do those seats tilt at all? I'm wondering how they would work in an M1009, allowing access to the back seat. What are those seats from? Did they use the stock mounting locations in the floor pan?

I really like that M101A3 bed on there! I just might have to look for a project truck and do the same, thanks for the pictures!
Fixed seats except for the turning. I like the head protection offered. However, I fixed the seats to be about 5-inches off the back of the cab. I did not want the vibration and it allowed the seats to turn and face the open door as required.

Like the M105A3 beds, the M101A3 beds have smaller wheel-well intrusion into the bed area. I originally set out to use the M105A3 bed for the project but the fenders did not match up with the wheels and axles without cutting the bed. This destroyed the ability to use the standard stake sides, bows, and tarps on the 105. The M105A3 has the tail lights built into the bed.

I pull another M101A3 with the truck. I did find a use for the M105A3 trailers that did not work out as truck beds. The M105A3s have six-lug wheels so I pulled the taller 10 x 20s that come with the trailers and replaced them with the six-lug wheels from the M796 bolster trailers. The lowered M105A3s are level when pulled behind the CUCVs and the surge brake system works as designed. It is a win-win combination.
 

pmramsey

Active member
463
190
43
Location
VA
Pmramsey - do those seats tilt at all? I'm wondering how they would work in an M1009, allowing access to the back seat. What are those seats from? Did they use the stock mounting locations in the floor pan?

Ireally like that M101A3 bed on there! I just might have to look for a project truck and do the same, thanks for the pictures!
The stock mounts to the floor pan do not work. The backs do not fold forward. These seats are used in the 5-ton MRAP trucks. The seat height is fixed at installation. I removed the crushable explosion absorption feature from the MRAP seat as it made the seat far two high for the CUCV cab. I replaced it with a universal mounting frame that was only 1.5 inches high.
 

Keith_J

Well-known member
3,657
1,323
113
Location
Schertz TX
Mine will be a work in progress for the next year. Right now, I am fabricating a motor-compressor assembly for a 28 VDC electric air conditioning system. I figure the alternators are lightly loaded, especially the right one so at least 70 amperes should be available.

The compressor is a Sanden SB7B10 compressor, an efficient 100 cc displacement per revolution model. Peak efficiency is at 2000 RPM which is where the motor is also most efficient. The frame to join the two is made from 1" square tube, face and tail mounted motor and direct mount for compressor. This frame is 10" square and 20" long. The two are joined by a 3-piece Lovejoy coupling so motor-comrpressor alignment isn't crucial.

I've sourced a motor contactor that draws less than 1 amp at 12 volts, this will be used instead of the clutch for cycling. Still have yet to decide on a 14k BTU/hour evaporator unit. The compressor-motor will be mounted on the right side frame rail, outboard. This places them very close to the cab for optimum low pressure side efficiency AND makes for very short wire runs. 2 gauge wire isn't cheap.
 

llong66

New member
453
2
0
Location
kokomo, In
Replaced my power steering pump and found out why the old one failed, the PO had replaced on of the bolts holding the bracket to the block w a stud, it rubbed on the resevoure and wore a hole through it. I was also able to tighten the power steering belt more as I had more swing with the stud outa the way..cured my squeeling belt on start up! That makes me very happy!
 
479
0
16
Location
Madison, WI
I replaced the worn-out, dented, steering stabilizer with a Skyjacker 7055 stabilizer. It works great. The steering feels much better now. I wanted to get a dual inline stabilizer kit, but I didn't want to spend the extra $100.

I also replaced my speedometer and fuel gauge with ones from another 1009. It fixed both problems (non-working odometer/bouncy & noisy speedo and non-working fuel gauge).

There was about a 1/2 cup of really fine sand in my gauge housing, probably gumming up the speedo/odo and probably the fuel gauge too. So I cleaned out the gauge housing, and combined the best parts from the two gauge clusters, and added some LED lights to the gauges. I'll have to go out and check out what they look like now that it's dark!

Tomorrow I will be installing an Airtex E8153 electric fuel pump to replace my leaking mechanical one, and an inexpensive summit fuel pump block-off plate. And to replace all the accessory drive belts.

Plans for this week are to get the interior bedlined and to do the lower doors/rockers and bumpers also.
 
Last edited:

JSF01

New member
172
0
0
Location
Newport News, VA
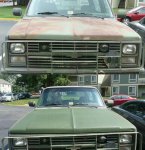
Well it looks like I will have a good break in the weather so I painted the hood to see how it turns out. Now hoping the weather predictions are right and will get 5 days of sunny weather.
Attached is the before and after shot, It will eventually need a second coat but even as is it's a great visual improvement.
 

Attachments

ARYankee

Well-known member
1,983
33
48
Location
Benton, AR
I put my new wiper motor in :) Although when I went to start it, it tried to turn over very slowly, then click-click, and then nothing. It seems my back battery was somewhat drained so I'll have to dive into this issue during the week and/or this weekend.
 

Tow4

Well-known member
Steel Soldiers Supporter
2,098
656
113
Location
Orlando, FL
This weekend I changed the coolant over to Rotella ELC. Also changed the upper radiator hose. The driver side alternator belt was loose (I tightened it) and cut half way through the hose. I made a guard for the hose so it doesn't happen again. I was going to change the lower hose too, but the upper hose looked pretty new. After inspecting the lower hose, it looks like they were both replaced at the same time so I left it on.
 

MarcusOReallyus

Well-known member
4,524
816
113
Location
Virginia
Well it looks like I will have a good break in the weather so I painted the hood to see how it turns out. Now hoping the weather predictions are right and will get 5 days of sunny weather.
Attached is the before and after shot, It will eventually need a second coat but even as is it's a great visual improvement.

Looks very good! :beer:

What did you use to paint it? Spray? What kind of paint?
 

JSF01

New member
172
0
0
Location
Newport News, VA
Looks very good! :beer:

What did you use to paint it? Spray? What kind of paint?
I used a roller to apply the paint. I used the Behr "CARC" paint formula from Home Depot that I had found on this sight. I think It came out pretty well at least until this morning. So why it had not rained last night, With my bad luck there ended up being a heavy layer of dew that covered every thing. While the paint did not bubble up like some people have reported happening it has left some streaks in the paint. on the positive side it was going to need a second coat any way once it full dries so the streaks will be coverd up, eventualy
 

Keith_J

Well-known member
3,657
1,323
113
Location
Schertz TX
Well it looks like I will have a good break in the weather so I painted the hood to see how it turns out. Now hoping the weather predictions are right and will get 5 days of sunny weather.
Attached is the before and after shot, It will eventually need a second coat but even as is it's a great visual improvement.
The hood on my 1031 looked like that so I sanded, pickled with phosphoric acid (it changes paint colors, watch out) and sanded again to bare metal. Then I primed with Rustoleum red primer and top coated with their camo green color. Looks good enough until the weather gets cooler. One can isn't enough for the hood so some red primer is showing.

I'm certain the water based paints will adhere to this coating.
 

Jersey 93 Ty

New member
99
0
0
Location
New Providence, NJ
Replaced the rubber fuel lines running into and out of my fuel filter base. I had been leaking diesel from somewhere in that area every time I ran the truck but I wasn't sure exactly where it was coming from. After work last night I started pulling parts figuring that those hoses where probably the 28 year old originals and in need of replacement anyway. It turns out that in the middle of the filter to engine hose, there is a metal bracket that wraps most of the way around the hose and looks like its meant to keep the hose from moving around too much. As it turns out, this bracket was bent slightly and had actually rubbed a hole straight through the hose!

I can't wait to see how this fix affects my miles per gallon and available power!
 

allenhillview

New member
272
3
0
Location
Jonesborough, TN.
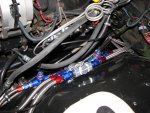
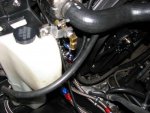
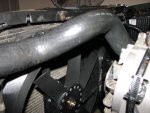
Finished 24V electric fans, oil cooler, oil cooler bypass, and in keeping sample valve turned out well.

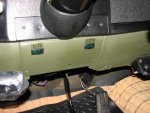
Also added override switches if automatic feature needs help on hill pull when towing before it reaches 180 degrees (thats when auto feature cuts in for fans to come on at 60% then 100% on each 10 degree increase). or off when winter gets here and not needed some times with A/C on.
 

Attachments

Last edited:
Status
Not open for further replies.
Top
AdBlock Detected

We get it, advertisements are annoying!

Sure, ad-blocking software does a great job at blocking ads, but it also blocks useful features of our website like our supporting vendors. Their ads help keep Steel Soldiers going. Please consider disabling your ad blockers for the site. Thanks!

I've Disabled AdBlock
No Thanks