txmytx_catahoula
New member
- 183
- -3
- 0
- Location
- Port Arthur, TX
Gave Blaze a well deserved bath and changed out the glow plug controller card. Wow, that's what the " WAIT" light looks like!! 
Steel Soldiers now has a few new forums, read more about it at: New Munitions Forums!

I like the A.My truck was converted to 12 volt, and an HR-6 compressor was installed in the place of the driver's side alternator. The emergency brakes work fine, but I didn't want to stop the truck in the northbound lanes facing southbound. The belts locked up the fan clutch soon after I made the turn onto the divided road. When I lost steering, I pointed the truck towards the first paved median in the road with the intent of stopping there. When my foot went to the floor, I felt the only option was to get the heck out of the direct line of fire and get to either the correct side of the road or to the middle of it. I limped the truck a block down the next paved area, and managed to get enough brake pedal to stop it and shut it down.
I stopped back at my building to run in and send a quick email to my supervisor with a quick summary of the events. I headed straight home so I wouldn't end up in rush hour traffic in an out of control vehicle.
CUCVLOVER - By sheer coincidence I wore my dark brown Propper BDU pants to work on Friday!!!
I used the rest of Friday afternoon wisely. I called AAA and waited for a flatbed to show up and haul my Police Interceptor to a shop so they can replace the intake manifold. The flatbed driver didn't know where the shop was. The only vehicle I had running without any problems was my 1930 Ford Model A! My wife had the Tahoe, and the Mighty Mite still needs some love. Picture this - my Model A (my avatar) leading a flatbed wrecker, with a black CVPI sitting on it, through 15 miles of twisting turning roads to the shop. I give lots of credit to the wrecker driver. He never tailgated me, and gave me plenty of room to stop.
Thank youI wanted to let you all know the GM part number for the A C Delco 13 G OEM glow plugs. A set of 8 is needed to keep your 6.2 happy this winter. Happy 6.2 happy owner. GM part # 5613939 is the correct part number. I hope that helps someone out. I have been using these for 20 + years without any problems. Changed a few but that goes with the territory. Last ones lasted 6 years in the Mule. Have a good day.
That's enough adventure for a lifetime. I'm glad there was no injury to anybody. Yikes.Friday afternoon, I jumped in my truck to head out for lunch from work. On the way there, the A/C compressor bearings seized, causing the belt to heat up and explode.
I agree! Heck with all that.That's enough adventure for a lifetime. I'm glad there was no injury to anybody. Yikes.
Yeah, really! Is that the norm?Thaks from here also; wife went by the local chevy place today and they quoted $17.72/ea plug. Holy Snails batman. That about right?
Will dealer have the removal tool?Thank you
I am going to do the plugs before long in mine.
I don't know when they where last changed, the heads have the same amount of rust as the injectors.
I will probably buy the removal tool when I buy plugs.
I don't know I figured my Napa or autozone etc. Would have it if not http://www.jjandaracing.com/contents/en-us/d9.html I'll order it.Will dealer have the removal tool?
Hey there's nothing wrong with being lucky!Turning a little as they came out. Call me lucky but I pulled 1 today that my Son was afraid of breaking off. Vise grips and a small pry-bar. I clamped it and pulled a bit and got a deeper bite and clamped and pulled and it popped out. He was astounded. Told me I was lLucky. I said i know. I have another 8 coming for this customers truck from the GM dealer. Good old 13G A C Delco's.

One of my Senior Maintenance NCOs told me the same thing about vise grips and a pry bar. Said he'd come over if I got one stuck just for good measure.Will dealer have the removal tool?
What removal tool? A vise grips and a pry-bar with some patience. And an occasional remove the nozzle to access the pre-chamber. . Only 4 or 5 times in 20 years from swelled glow plugs did I have to do the nozzle removal trick. All the others I just waited out and straight pulled them. Turning a little as they came out. Call me lucky but I pulled 1 today that my Son was afraid of breaking off. Vise grips and a small pry-bar. I clamped it and pulled a bit and got a deeper bite and clamped and pulled and it popped out. He was astounded. Told me I was lLucky. I said i know. I have another 8 coming for this customers truck from the GM dealer. Good old 13G A C Delco's.
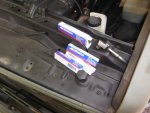
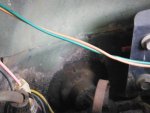
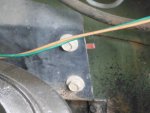
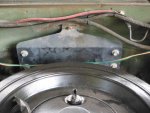
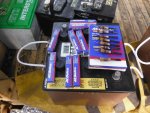
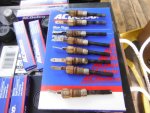
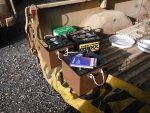
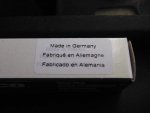
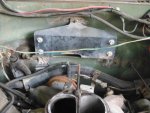 Today a had an M1028 Jersey Indian to install glow plugs into. By looking at the picture and the glow plugs can you tell which ones were working and which were not working? Also I checked the voltage and it was correct. Not sure why someone cut the wires. But they are hooked back up and operating as designed. I have a set of new 6 TL's to install after I change the right inner fender apron. These are very good glow plugs. They are made in Germany. Good stuff comes from Germany. They used to be made in Italy. They worked just as well. Thank you for looking. This is a customers truck and it had been starting hard and has a vibration after starting. I suspect that it needs motor mounts. The dipstick bolt is chewing away at the frame rail.
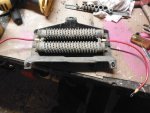
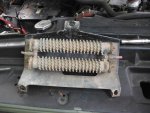
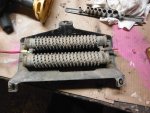
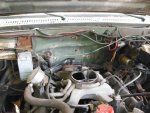
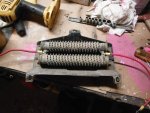
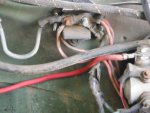
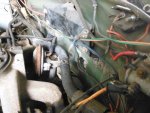
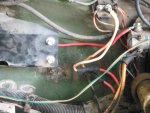 I also found a few of the fusible links had been over heated at one time. i replaced both of them and cleaned the 12 volt power point and installed new ground washers and serrated ground nuts and discarded the old rusty ones. Customer wants truck given the complete gone over. I am thinking M1028 Jersey Indian is a good name for this CUCV.
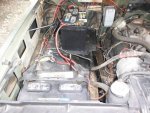
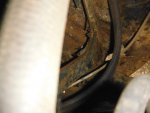
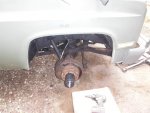
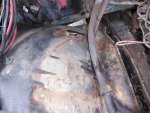
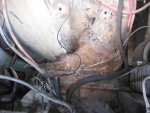
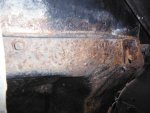
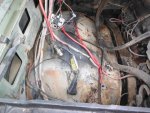
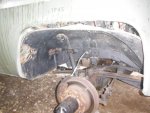
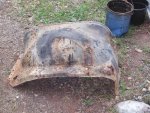
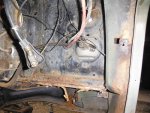
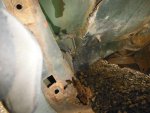
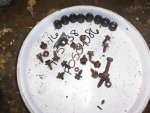 I wanted to show a few of the new guys how to change the inner fender aprons on a CUCV. I have seen guys tear the entire fender off to do it. That is absolutely not necessary. You are making to much work for yourself. Even if you like to work on your truck this is not needed. Unless you are looking to do lots of work. Because the deeper you go the more you will find. And it does not get pretty. I have the right inner fender off of the Jersey Indian. It will go back on with no major issues. But as you can see it has a lot of hidden puss and the fasteners that I removed are really not useable again. If you do this job I would make sure to have a small propane torch. It will prevent breaking bolts off and free the ones up that are frozen solid. I did not break any bolts off. I did have the luxury of an oxy ace set to cut some of the bolts and nuts. The inner fender reinforcements are not reusable on this Jersey Indian. I will have to make new ones from strips of 12 gauge Galvaneal steel. Sheet metal strips just don't cut it. I hope that helps you out. I will post more later. I have been rained out on this job for the day. The battery trays will both need some work. The mount was completely rusted off of the front battery tray. No problem I will make a new mount. It will last long then the OEM one. Used useable battery trays are getting hard to find but I can fix old ones quickly and make them stronger.
We get it, advertisements are annoying!
Sure, ad-blocking software does a great job at blocking ads, but it also blocks useful features of our website like our supporting vendors. Their ads help keep Steel Soldiers going. Please consider disabling your ad blockers for the site. Thanks!

