• Steel Soldiers now has a few new forums, read more about it at: New Munitions Forums!

  • Microsoft MSN, Live, Hotmail, Outlook email users may not be receiving emails. We are working to resolve this issue. Please add support@steelsoldiers.com to your trusted contacts.

What have you done to your HMMWV today/lately

JoeJrTheBarber

New member
268
20
0
Location
Chicago, IL
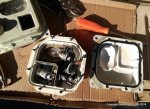
What's under the other port?
It's a male electrical plug that is wired to my two battery tenders to keep the batteries alive, block heater, and oil pan heater. Just plug in a extension cord and bam !
I have the block and oil pan heater on a separate switch so they aren't on during the warmer weather while the truck is "plugged in" ...
 

Wire Fox

Well-known member
1,252
161
63
Location
Indianapolis, Indiana
I never remember to take pictures...

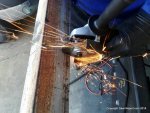
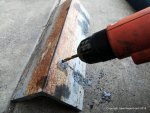
I had my old roommate come by yesterday so that I could return some tools to him and he could return a shelf to me, but asked him to bring his welder with him to tackle a little project... My driver seat has been out of my HMMWV for over a month now because I was sick of the rotten canvas being stuck to the seat base and the adjusters being completely seized. Removing it was obnoxious as two of the bolts had to be cut off, despite my best efforts. I tried doing one with about 5 or 6 different extraction methods, but ultimately, it just had to be drilled right out. I now need to re-tap it... Wanting to avoid that headache for a second bolt, in comes the welder. With the welding skills just beyond that of an untrained 6-year-old, I managed to screw the weld up about 3 times, casting some poor, defenseless nuts aside that were now filled with slag-laden welding wire. Fourth time, I finally get the settings and the prep done right that the weld quite solidly formed between the bolt threads and the nut, allowing me to wrench the stuck bolt out, nice and easy.

I really don't understand why it was deemed to be a good idea to stick low-grade hex-cap bolts in a spot where water commonly pools... I'm certainly putting in some much more durable hex-head bolts for the re-install. If I remember, I'll probably grab a picture of all of the failed attempts and the one good one, which are all on the garage floor right next to the driver's seat.
 
Last edited:

infidel got me

Well-known member
1,679
32
48
Location
Newberry, Florida
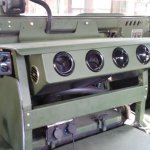
humac.jpg A/c finally installed....42 at vent. I left enough hose to flip the radio shelf down incase dog hose has to be removed. Way better than a red-dot at a fraction of the cost. OPINIONS VARY
 

infidel got me

Well-known member
1,679
32
48
Location
Newberry, Florida
Its a cold master a/c kit. This one is Humvee specific. This is the second one I installed. The first was in my 5 ton. Still working today(over three years) Good quality and a great price. I don't like the red dot kits because your bed is useless. cant see out rear window. and its to big for interior. I changed my mind on where to mount it and came up with this You will need a red dot compressor mounting kit available on upay. SUMMERS COMING
 
Last edited:

Dock Rocker

Active member
980
72
28
Location
Jackson ms
Its a cold master a/c kit. This one is Humvee specific. This is the second one I installed. The first was in my 5 ton. Still working today(over three years) Good quality and a great price. I don't like the red dot kits because your bed is useless. cant see out rear window. and its to big for interior. I changed my mind on where to mount it and came up with this You will need a red dot compressor mounting kit available on upay. SUMMERS COMING
Luckily GI Joe left me a compressor! Where would one acquire a cold master a/c kit?


Sent from my iPhone using Tapatalk
 

mleara

New member
26
0
1
Location
St. Louis, MO
Just bought my first HMMWV 2 weeks ago. M-126 with ballistic rear wall and Red Dot A/C. Today, I riveted the commander seat latch. Need advice on how to tell if my fuel gauge is bad or the sendingunfit? Gauge needle is buried to the empty side, all the way at the bottom, left.
 

Dock Rocker

Active member
980
72
28
Location
Jackson ms
Just bought my first HMMWV 2 weeks ago. M-126 with ballistic rear wall and Red Dot A/C. Today, I riveted the commander seat latch. Need advice on how to tell if my fuel gauge is bad or the sendingunfit? Gauge needle is buried to the empty side, all the way at the bottom, left.
Check the ground on the back of the instrument panel. If the ground is good test with a known working gage. If the known working gauge doesn’t work then it’s the sender in the tank.

Military Gauges suck and the grounds on hmmwvs suck worse.


Sent from my iPhone using Tapatalk
 

DREDnot

Well-known member
723
443
63
Location
Phoenix, AZ
Last edited:

infidel got me

Well-known member
1,679
32
48
Location
Newberry, Florida
a/c

humac8.jpghumac2.jpghumac3.jpghumac4.jpg 1st my truck
2nd condenser mounted- fabbed brackets to mount NOTE The p/s cooler has to be moved forward for condenser to fit

3rd compressor mounted with red dot kit. ( mentioned in above post)

4th drier location
 
Last edited:

infidel got me

Well-known member
1,679
32
48
Location
Newberry, Florida
a/c

humac1.jpghumac5.jpghumac6.jpghumac7.jpg 5th drier mounted
6th Plastic panel made for a cleaner look. Hide a/c hoses and electrics. ( held in place with Velcro)

7th radio shelf leg has 4" added at an angle to clear blower motor vs. doghouse

8th a/c hoses run along frame rail and enter through old radio wiring hole.

I left enough a/c hose to tilt or remove radio shelf incase dog house needs to be removed.

Lots of time and fab went into this so it would be as user friendly as possible.

Tried to keep it as if the military installed it.
 
Last edited:

shawnshumvee

Member
336
6
18
Location
Janesville WI
Not today but a year ago. Best kept secret under the hood. While not in the TM's... it could provide an insight to problems on or down the road.

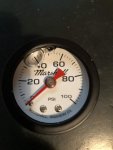
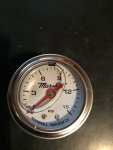
Fuel pressure, Go, NO-GO, White smoke signals??? Here's what I did. Epay, Marshall oil filled gauge, 0-15 PSI on the cheap $15. Add 1/8 pipe elbow. Remove the (junk, who uses it any way) test sender on top of fuel filter. Add elbow, add gauge. Build out as shown in pictures. This may not solve your problem, But adds to the ability to self-diagnose fuel pressure in the field. 5 PSI is 5 PSI. No guessing, NO smoke and mirrors.

View attachment 728377View attachment 728378

AND here's another, the "FOR SURE OIL" pressure. Same concept. Same type Marshall Gauge only 0-60 PSI. Mounted on bracket and plumbed (hard lined but could be a short hose) pointed forward to see with hood open. While one can have issues with the in dash military gauges, (mine work right) having a for sure test verification makes life easy... POP the HOOD and PEEK.

View attachment 728379View attachment 728381

CAM
Finally Found this post again. I seen your work on the external gauges and was wondering if you don't mind I steal your Idea? I already got my gauges. what size was all the piping? I think this project is cleaver and very useful. I did get the correct gauges?

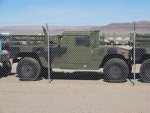
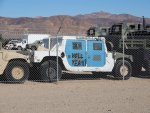
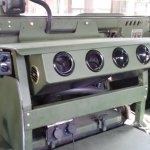
IMG_6841.jpgIMG_3901.jpgIMG_0894.jpgIMG_2337.jpg
 
Last edited:
Top
AdBlock Detected

We get it, advertisements are annoying!

Sure, ad-blocking software does a great job at blocking ads, but it also blocks useful features of our website like our supporting vendors. Their ads help keep Steel Soldiers going. Please consider disabling your ad blockers for the site. Thanks!

I've Disabled AdBlock
No Thanks