• Steel Soldiers now has a few new forums, read more about it at: New Munitions Forums!

  • Microsoft MSN, Live, Hotmail, Outlook email users may not be receiving emails. We are working to resolve this issue. Please add support@steelsoldiers.com to your trusted contacts.

What have you done to your HMMWV today/lately

belted_guns

Active member
70
169
33
Location
Prosper TX
Also in those pictures is my VIC3 installation with each seat having a FFCS and the MCS. I also installed two of the bluetooth adaptors so we can communicate on two cell phones, depending upon the MCS setup. If you look closely, I built hangers for each of the head sets. not perfect but it makes it really easy to don and dolf them.
 

Attachments

belted_guns

Active member
70
169
33
Location
Prosper TX
BTW, I took a headset to the gun range as ear protection, and it really works well. they include the ambient noise function so i can hear around me but it clips the gun noise. it seems to be equivalent to a set of standard ear muffs.
 

juanprado

Well-known member
Steel Soldiers Supporter
5,635
2,953
113
Location
Metairie/La (N'awlins)
Built and installed my interior lights for my 1151A1. there is a light over each door, and then two in the hatchback area, one facing forward when the hatch is down, and one facing aft when the hatch is down. each have individual buttons to control on/off, red, blue, green, white. and then I have a front master switch panel.
Can you share what materials -lights/switches/cabling/housings
you used?
Looks very clean & oe.
 

belted_guns

Active member
70
169
33
Location
Prosper TX
Can you share what materials -lights/switches/cabling/housings
you used?
Looks very clean & oe.
Those lights are a home brew. I got my parts off of amazon and 3D printed the housing. I wanted a water resistant, broad voltage input multi color and a push button on off (with memory) so that I can have them all on one color and then use the front switch to turn them all on-off and maintain the same color.
Note that I was not going for full on mil ruggedness, but commercial appearance. (I get the parts are chicom, but that is a choice I chose to accept)
1)RGB white UTV dome light (POVTOR) - very simple, potted electronics, with color memory (oh and they only work on 9-18vDC, They are bright. I used defusing filters on the drivers light to reduce the overall brightness. I blew 3 of them on 24before I realized they were not functional on 24v (works great on one battery - the company replaced the parts and are supposed to update their website to reflect 9-18vDC)
2) IP67 connectors, 2pin panel mount 13mm waterproof power connector, (SZJELEN)
3) 12gage (red-blk) copper power cable, Plenum outdoor rated
4) 1/4in braided PET sleeving, black, 100ft. works great in engine compartments for organizing cabling (brand: alex tech)
5) Stainless cable clamps (3/8 for the power, and 5/8 for combined vic3 highway and power cable, (Lokman brand)
6) Running the power cable under and around the engine area, I wrapped the braided cable with Tesa adhesive wiring loom cloth tape (tesa 51608) - this is great tape for wrapping cabling and is engine room and heat rated.
7) 10amp inline fuse located in the battery box and wired to the positive red wire.
8) I got the switch panel from federal military parts. It works. Not perfect, but nothing is. Do not buy their version of interior lights. The pictures they use do not match the incredibly cheap lights and there are no instructions, or even interest - I called them.
9) I designed my own light enclosure based upon the light view and dimensions. I printed it using a 3D printer with PA-CF for use in exterior, high heat environment. if you want the STL, I can provide it for you to do with it whatever you want. This is a gen one design and I found it good enough, but I would expect others to improve on it. It incorporates a single mount hole with an 1/4-20 lock nut glued to the inside. So one hole and bolt it in. The two part enclosure allows me to replace the light without having to remove the box.
10) I mounted each light, then built the cables. Not a hard process but it did take time to do. For the side lights, I painted the enclosures green to match the interior cab color. for the two mounted to the back hatch left them black.

Now I have plenty of interior light availability, and it does look appropriate as long as you are trying to match mil for mil. For me, it is good enough.

I can answer any questions on the mount and wiring.
 

Attachments

jake20

Well-known member
433
846
93
Location
Illinois
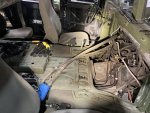
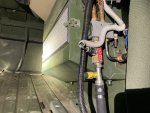
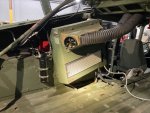
Rebuilt and re-mounted my Red Dot AC system. About half the fittings are new, all new hoses, flushed evap and condenser, new expansion valve, new condenser fans, and a new mounting solution. System is oiled and charged and blowing cold air with green lights on the ProTechT module.

These units normally stand up vertically in between the rear passenger seats, I didn’t want to lose the long space along the trans tunnel, so I mounted my evap unit sideways.

Many many hours of research went into finding all the required part numbers and sourcing components. Happy to share if anyone has questions.

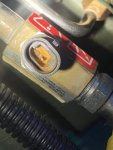
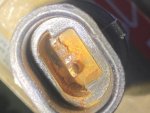
Also - if anyone has or has a lead on the low side pressure sensor, would be greatly appreciated. Part number RD-5-9165-0
 

Attachments

Autonomy_Lost

Well-known member
687
1,537
93
Location
Pennsylvania
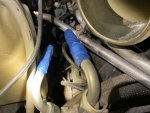
PSA: Clean your engine valley. I pulled out about 5 pounds of sand, dirt, nuts & bolts, leaves, tie wraps, etc. Drain was blocked and water was sitting in there.

I had immediate concerns about IP failure, especially because the water had a diesel smell. But fortunately after cleaning everything out and running the engine for about 20 minutes (and reving it a few times) I dont see a drop of fuel in there. No idea why I smelled diesel but if something is leaking its pretty damn slow and hopefully not the IP.
 

Gastrap

Active member
329
159
43
Location
Central Iowa
PSA: Clean your engine valley. I pulled out about 5 pounds of sand, dirt, nuts & bolts, leaves, tie wraps, etc. Drain was blocked and water was sitting in there.

I had immediate concerns about IP failure, especially because the water had a diesel smell. But fortunately after cleaning everything out and running the engine for about 20 minutes (and reving it a few times) I dont see a drop of fuel in there. No idea why I smelled diesel but if something is leaking its pretty damn slow and hopefully not the IP.
My engine valley was loaded with crap when the truck was delivered as well, and the drain tube was plugged solid. It's obvious that water sat in there for a long time covering the mechanical advance plunger. So far there's no leak or sticking of the plunger, I'll bet the threads on the lower two injection lines are pretty crusty.
 

jake20

Well-known member
433
846
93
Location
Illinois
Also PSA: If your engine is a Melton rebuild, the drain hole will be permanently plugged. I’ve also seen the rubber injection pump feed line dry rotted on a few trucks, thus a small leak.
 

Warhammer1

Member
43
93
18
Location
Plano, TX
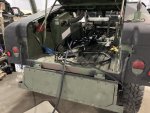
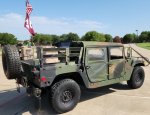
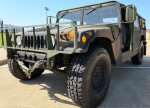
It's been a while since my original posts but slowly been wrench turning on my new-to-me street queen Humvee. Mainly PMCS stuff, nothing too creative:
- Oil and filter change
- Air filter inspection.
- Transmission oil and filter change
- Transfer case, front and rear diff fluid changes
- Fluid change on all geared hubs, plus spindle nut inspection (thankfully all ok). The front passenger drain plug was so tight I stripped that hex head, so had to buy a Harbor Freight extractor set. I spent so much time on that.
- Kascar ground kit install
- Center firewall rubber hood bumper replacement
- Tire rotation. I wish I knew about that crow bar trick when I did this.
- Lube job. I basically hit any grease nipple i could find
- Reverse backup light install with just a manual switch (vs that nice gear shift switch)
- 24-12v stepper install under rear passenger seat plus fuse block install under dash just to the right of driver's leg.
- Flightcom intercom system install powered with a 12v cigarette lighter, and purchased 4x used Avcomm aviation headsets off of epay. My commercial pilot relative says that headset brand is crap but it's ok for how I use them.
- Turn signal replacement. Mind boggling problems with my lights so I gave up and just replaced the unit with a cheaper one. Lucky for me it worked.
- Chopped up troop seat bench to fit my 4-seat Humvee. I got so tired and gave up on the seat portion, so I just installed the vertical seatback instead.
- Installed a used airlift bumper. It looked so easy on Youtube but it reality it was tedious. I still need that spacer so I can put my pintle hitch back on. I also need that plate so I can get my electric hookup receptacle back on too.
- Installed mud-flap kit and mounted a lit license plate holder to it.
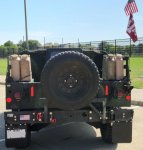
- Installed swing away tire carrier from Federal Military Parts. Another project that looked easy but because of the size and weight it was tough, but do-able. Just rigged a pulley system with my stepladder. Impressed with the build, finish and shipping, it worked out very well.
- Bought 4x Scepter used military jerry cans from gun shows and flea markets, so my next project is to figure out a good way to mount them to the Humvee. I am embarrassed to say that they'll be more for show than actual use.
- Insured it with Hagerty as a collector FMV for road use with stipulation that it cannot be used off-road. Safety inspections were a surprise - all they did was confirm I had 4-doors and that all lights were working.
 

Attachments

Top
AdBlock Detected

We get it, advertisements are annoying!

Sure, ad-blocking software does a great job at blocking ads, but it also blocks useful features of our website like our supporting vendors. Their ads help keep Steel Soldiers going. Please consider disabling your ad blockers for the site. Thanks!
I've Disabled AdBlock
No Thanks