• Steel Soldiers now has a few new forums, read more about it at: New Munitions Forums!

  • Microsoft MSN, Live, Hotmail, Outlook email users may not be receiving emails. We are working to resolve this issue. Please add support@steelsoldiers.com to your trusted contacts.

What have you done to your HMMWV today/lately

Gear Report

Active member
265
45
28
Location
Nc
Awesome! I heard SHOT was pretty good this year! I need to get out to it myself some time. Have been wanting to attend for a while. Maybe next year...
As for the part in red, check out Breton Industries. Friend of mine who's on here just ordered their Camo kit to convert his 2 door. No need to hunt down all of the individual parts. Kit includes just about everything except rear seat belts and anchors which are certainly easy enough to find. Kit was $2,200 with free freight shipping (they do prefer shipping to a business address).
Looking forward to the updates on the jack rails, swing arm, and hood mounted tool kit!
SHOT is a friggin' zoo. I had a team of 6 there this year covering range events and the show floor. It was exhausting!

Thanks. I just bought a bunch of used, but serviceable soft tops, rear curtains and cargo covers yesterday, so I'm good on that part. However, maybe I'll reach out to Breton and see if they care to participate in the Battlewagon project. Although, honestly, we have so many firearms coming in to review soon that I have to pace myself on the Battlewagon.
 

infidel got me

Well-known member
1,679
32
48
Location
Newberry, Florida
marker light.jpg Ok so here's the deal. I've been paying big bucks for led marker lights..... So I will let all my brother and sister mv owners in on a deal I came across. You can buy new marker lights at napa part # 26313r1 is red and 26313y1 is amber. Made by trucklite at $ 9.78 each. Then I purchased led bulbs from superbrite led's for a $ 1.59 each. Led bulb # is wled-a4-90 for amber wide and wled-r4-90 for red wide. Each light takes 2 bulbs--- I only used 1 bulb in each and they are bright enough. The good thing is you can simply replace a bulb rather than having to buy a whole new light. The napa light housings are grey, but can be painted any color you like. Happy lighting!!!!!!
 

Gear Report

Active member
265
45
28
Location
Nc
View attachment 666036 Ok so here's the deal. I've been paying big bucks for led marker lights..... So I will let all my brother and sister mv owners in on a deal I came across. You can buy new marker lights at napa part # 26313r1 is red and 26313y1 is amber. Made by trucklite at $ 9.78 each. Then I purchased led bulbs from superbrite led's for a $ 1.59 each. Led bulb # is wled-a4-90 for amber wide and wled-r4-90 for red wide. Each light takes 2 bulbs--- I only used 1 bulb in each and they are bright enough. The good thing is you can simply replace a bulb rather than having to buy a whole new light. The napa light housings are grey, but can be painted any color you like. Happy lighting!!!!!!
Do you need the napa housing, or will the bulbs you mentioned work in the standard housings?
 

infidel got me

Well-known member
1,679
32
48
Location
Newberry, Florida
Need the napa housing.. I replace the housing because 95% of the ones I've taken apart are crusty/rusty/nasty. The napa set-up comes with a new backing gasket and is a lot easier than sanding/repainting/rebuilding your old housing.
 

NormB

Well-known member
1,220
73
48
Location
Cloverly,MD
Drilled holes and sank a couple of rivnuts into back of truck below left-hand brake light for repositioning license plate frame/light.

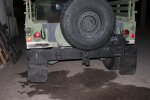
Plan on installing mudflats tomorrow - bought some 12x18 generic flaps off amazon and some 2-1/2" aluminum angle bracket and flat at the same time. Have holes drilled for flaps, figure best location for flap/mounting bolts is just below the YUGE box where wiring meets up below brake light just forward of the rear of the truck. Unfortunately that's where I HAD installed the lic. plate frame.

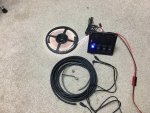
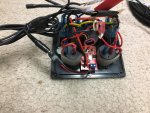
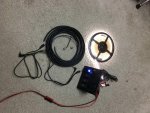
Tinkered with the light box innards a bit. Connected 10 meter string of 24 volt LEDs to box. I'd put in a voltage regulator yesterday (knob just above left-hand switch), gutted one I'd had on hand. They sell for about $5 online, just had to remove connector block and solder in a smaller one and some input leads. At 25.6V (two 12 volt batteries in series), the entire string of LEDs only draws about 3-4 Amps. I just guessed from the mfr's details, blew out a 3A fuse, but 5A is cozy. This will let me run 16gauge wiring to the strings I'll place across the two round bows in the PAX compartment (which are conveniently located a bit forward of head position for a sitting adult) with about a 1% voltage drop for the run. I went with a 24 to 12V converter for the USB ports and lighter and put in a couple of Bussman mini circuit breakers.

Why not keep the circuit at 24V? I'm thinking it will be nice to have this option fed by the 200A generator I have put aside, and I've known many fuses to hold out against a power surge while downstream components go "phht!" So it's a safety feature and pretty cheap to install. The entire box only draws about 6A with everything on, I've got a 10A fuse in-line (installed that a couple days ago. Conveniently it came with the truck, a 14g twin lead run with a yellow fuse holder), I fed it through a grommet in the battery box, put a 1/2" adel clamp on a 10-24 screw places through the clip that holds down the PAX tunnel side retainer tube.

Some 3.5mm jacks are on order, should be here tomorrow, and with the temp in the 60s tomorrow I should get some stuff done including measuring (twice) and cutting (once) the LED strips, soldering some 3.5mm plugs onto them, routing the 16g stuff and splicing in the 3.5mm jacks. I'll take pictures when it's all in place.

IMG_3125.jpgIMG_3129.jpgIMG_3124.jpg
 

StackJ

Member
Steel Soldiers Supporter
172
-2
16
Location
SoCal
Thanks for the post. Would you know the brake, running light #s from Superbrite?


View attachment 666036 Ok so here's the deal. I've been paying big bucks for led marker lights..... So I will let all my brother and sister mv owners in on a deal I came across. You can buy new marker lights at napa part # 26313r1 is red and 26313y1 is amber. Made by trucklite at $ 9.78 each. Then I purchased led bulbs from superbrite led's for a $ 1.59 each. Led bulb # is wled-a4-90 for amber wide and wled-r4-90 for red wide. Each light takes 2 bulbs--- I only used 1 bulb in each and they are bright enough. The good thing is you can simply replace a bulb rather than having to buy a whole new light. The napa light housings are grey, but can be painted any color you like. Happy lighting!!!!!!
 

Wire Fox

Well-known member
1,252
161
63
Location
Indianapolis, Indiana
Finally had a good, warm day with nowhere to be, so I seized the opportunity to wash the HMMWV. Removed all the vinyl, removed the bed filler panels and as much insulation as I could life up and out then proceeded to sweep, scrub, and hose down everything I could. Made sure that I cleaned up the wiper contacts, too, and put some dielectric grease on them to hopefully resist some water intrusion for a while. Unfortunately ran out of time to actually scrub the cargo cover. Most everything else is great and it's nice handling not-slimy, not-gritty vinyl. Unfortunately, I did discover that I have several broken turnlocks and the 2-man cab support poles are doing rather poorly-the long pole is bend just off the middle, the left rail has pulled out its rivnut from the A pillar, and the right rail just won't seem to align for reinstall (took a lot of effort to get it pop out), since it's overshooting its hole on the A-pillar. Everything could use new fasteners, too, because it's lots of old, rusty stuff that likely won't last much longer. That 2-man soft top kit with fresh doors near me is looking more and more appealing by the day...
 

NormB

Well-known member
1,220
73
48
Location
Cloverly,MD
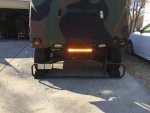
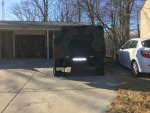
Got mudflaps installed, and repositioned the license plate bracket. Had to redo wiring in the thing as the mfr had the wire inside right next to the bulb, insulation melted and coated the bulb. I had some packard connectors with wire pigtails handy so I patched one in, replaced the bulb with a high-output LED, buttoned everything up and mounted a 3/8 compressor hose reel on the garage ceiling for use later - grinding off all those rivets to change out the driver's seat sometime real soon.

IMG_3133.jpg

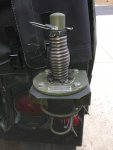
Oh yeah, bought a dual band 2M 70CM antenna from 86Hummvee a few months ago. Thing was all covered with gray silicone. Dismanted it and soaked everything in epoxy paint stripper. Buffed it out, gave it a coat of paint and made a cap for it out of a 3/4 PVC pipe cap. Just eyeballed where the stainless hitch pins went (Hillman Group 43978 .080 X 1-9/16 Hitch Pin Clip, Stainless Steel,)

drilled holes, made up some safety wire holders and voila. Rainproof.


IMG_3135.jpg
 
Last edited:

NormB

Well-known member
1,220
73
48
Location
Cloverly,MD
AFtermarket license plate frame/light.

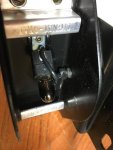
Meant to mention this. I got the frame through an amazon vendor. Looked pretty solid, got hooked into side lighting, worked. Noticed a couple nights ago it was DIM by several factors. I'd already bought a high-output LED lamp and had a BEAR of a time opening the thing. You'd think all you'd have to do is slide the lens over and pull up the other side as it comes out from under the opposite side.

You'd think wrong. Had to use channel lock pliers to bend the metal tab back a few mm to get the cover off.

As you can see from the picture, the (+) wire contacted the bulb, the heat melted the wire and the carbon/soot coated the bulb.

I had a length of 16g wire on hand with packard connectors so I routed one to the bulb - spliced into the wire - with another grommet, put everything back together and mounted it on the truck (photo somewhere a few messages ago).

Hint: don't take for granted that the part that works on the test bench will work in actual application. If it's simple, tear it apart, check seals, components, replace/reroute/rewire as necessary.

Now to leave a negative review on amazon...
 

Attachments

tokarev

Member
Steel Soldiers Supporter
243
5
18
Location
Safety Harbor Florida
Kascar grounding harness tonight - passenger side haftshaft seal last night .....getting ready to convoy over to the First Florida Chapter Winter Outpost Rally in Mt Dora FL next week.
 
Last edited:

NormB

Well-known member
1,220
73
48
Location
Cloverly,MD
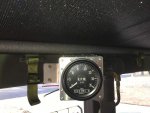
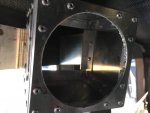
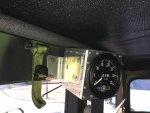
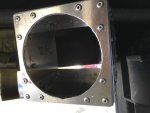
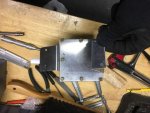
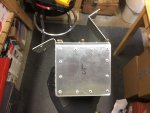
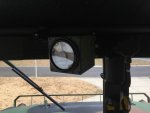
Started out with good intentions: warm up the beast, change the oil/filter and the little oil ring from the dipstick tube that's leaking a bit, but got into fabricating a box/mount for a tachometer (did poke around a bit underneath, lubing some of the shifter/TC/brake connections, drained the fuel filter a little, ran a 3/4 OD hose into the fuel tank proving yes, I CAN siphon out those 22+ gallons before dropping the tank to change out fittings/hoses, and stop all that leaking, but I need a much longer hose than I thought):

Thought some of you could use this to make your own (box is 4" square front and back, sides are only 3.75" deep (could have been 3.5"), cabling will go out the bottom, follow the center pillar down somewhere to get patched into dash light, sensors, etc. Already got a green LED for it to match the upgraded panel lights.

If I ever do anything like this again, I'd use my mill, as it was, I just used an old Craftsman drill press and a generic hole cutter with HSS bit. Had to use a "nibbler" to finish the hole for the meter as the 1/2" Al. corner "molding" inside was in the way so it's kind of rough, but everything fits. I used holes already in the window frame and may drill them out and put in 1/4" rivhuts for extra security and just for looks. Just need to use some epoxy putty for the gaps/corners, rough it up, prime it and hit it with some RAPCO "383".

Did start the truck and run it for an hour to charge up the batteries. It seems to like 65 degree weather a WHOLE lot more than 30 degrees or lower, but starts either way.

Tomorrow's supposed to be as warm, I'm thinking of running out to Laurel to Mission BBQ just for fun - and to get some lunch.

UNADJUSTEDNONRAW_thumb_7fd4.jpgUNADJUSTEDNONRAW_thumb_7fd2.jpgUNADJUSTEDNONRAW_thumb_7fd5.jpgUNADJUSTEDNONRAW_thumb_7fd6.jpgUNADJUSTEDNONRAW_thumb_7fd7.jpgUNADJUSTEDNONRAW_thumb_7fd8.jpgUNADJUSTEDNONRAW_thumb_7fd9.jpg
 

NormB

Well-known member
1,220
73
48
Location
Cloverly,MD
Nice work on the box; that looks good. [thumbzup]
How did you cut-and-square the aluminum plate; with a bandsaw?
Thanks. I just used a 10 inch Hitachi compound saw with a carbide-tipped blade. That thing will cut wood, plastic, aluminum, and soft steel - just have to make small cuts and go slow - aluminum cuts like butter.

To "square it up" I used my mill and a an angle plate on the first 4" piece, used it for a pattern for the rest. Actually screwed up a piece and almost ran out of material. Basically it's all from one 12x12 piece of .09" 6061 aluminum, the brackets from .063". Getting the angles on the brackets was pretty easy, used a vise and a 2 lb dead blow to roll the thinner material over a 3/8 mandrel (an old brass ball starter from a muzzleloading kit I keep around as a drift - among other things). Once I had an idea where the box would go, I cut a 2" piece of aluminum about 6" long, drilled holes to match the ones in the frame, eyeballed where the angle should go, took it to the vise, then back to the truck, to the bench belt sander, then drilled some holes and popped some rivets. That was the left side. Once installed, getting the angles for the right side was even easier.

It's not real exact, kind of rough, but seems to match the spirit of the truck pretty well. Something to do when I'm not doing patient care or paper care.
 

NormB

Well-known member
1,220
73
48
Location
Cloverly,MD
Wired in tachometer but it doesn't work (yet). Will troubleshoot that tomorrow.

IMG_3169.jpg

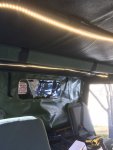
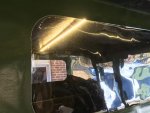
Got the light switch panel plugged in, still tinkering with wiring/connections, but the overhead lighting works great - it's on a dimmer. Just bought a 10M roll of 24V leds, ran a double row in the back (44" x 2) and side to side in the front a rear seat pax section (72" x 2). Wiring harness connects with 3.5mm jacks/pl

ugs for quick disassembly/rewiring if I ever decide to go without the rear cover or make it a 2-man. Front light bar is switchable fog-bright (only one at a time).


IMG_3173.jpgIMG_3174.jpgIMG_3175.jpgIMG_3176.jpg
 
Last edited:

M1097A2NUT

New member
22
0
0
Location
Jessup, PA
I made a "Backdraft Preventer" or divider if you will. There is a heck of insurgence of air that swirls up and enters behind the rear seats-especially for the passengers backside (aka my kids). Since the weather is getting colder the drop in air temp and quantity of air that enters in the back was significant-not to mention the rain that floods the interior due to the direct pathway to the inside of the cab.

So I took a piece of scrap 3/4" plywood, then I used a small piece of scrap paneling an traced the bed pattern on that an made a stencil to get the pattern drawn on the plywood. Cut it all out, did a couple dry fits, a little sanding and got it to fit with about a 1/8" gap around the whole piece. Lastly I made a couple of brackets an screwed it to the plywood an body, used some house window an door caulk to seal up the gaps to make it water tight. The canvas top goes right over it an latches into the tie down spots just like before and is not noticeable from the outside an its barely visible on the inside since I have a center seat installed. If I would have painted it camo it would probably look like a factory option!
Pics of how you mounted item highlighted in red please.
 
Top
AdBlock Detected

We get it, advertisements are annoying!

Sure, ad-blocking software does a great job at blocking ads, but it also blocks useful features of our website like our supporting vendors. Their ads help keep Steel Soldiers going. Please consider disabling your ad blockers for the site. Thanks!

I've Disabled AdBlock
No Thanks