infidel got me
Well-known member
- 1,679
- 32
- 48
- Location
- Newberry, Florida
Steel Soldiers now has a few new forums, read more about it at: New Munitions Forums!

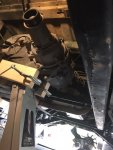
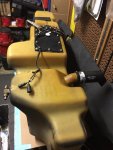
Hard work yes, but the end product is gratifying. Nice work!View attachment 681478View attachment 681479View attachment 681489View attachment 681490 Lots of work. Use stripper, sand, fill small cracks/dents/holes with bondo/ re-sand/ prime and paint. Will post pics. when finished. So far not to bad, just very time consuming!!!
I am in the process of doing the same thing. Started with pressure washer for the really loose stuff. Are you using regular bondo or a resin with glass fibers in it? I was concerned regular bondo would not adhere well and I have some decent size damaged areas...View attachment 681478View attachment 681479View attachment 681489View attachment 681490 Lots of work. Use stripper, sand, fill small cracks/dents/holes with bondo/ re-sand/ prime and paint. Will post pics. when finished. So far not to bad, just very time consuming!!!


Good deal in my opinion, I've paid as much as $100 for a tire shop to replace an O ring on a super single (M923)After some calling around trying to find a local shop I trusted an would be willing to work on a Humvee I was able to talk a shop into it-barely.
So I replaced the pitman arm an one CV shaft just in time to make my appointment. I had them mount 2 rear tires an wrestle the run flats in them, balance all 4 tires, and do a 4 wheel alignment. I dropped off alignment specs an new wheel o-rings for them also.
They had the thing all day an I was getting nervous to what the bill was going to be. So I went there right before they closed an it was just getting done. He said he had 2 to 3 guys on it at various times, wrestling the tires, heating up bolts on the control arm mounts to remove/add shims, heating up the adjustment sleeves on the tie rods, prying on this or that, etc. He said he isn't sure if he is ready to tell people he will work on them as this is their first one and it was a real learning curve. Lol. He was kinda worried about the bill I think (so was I) as he kept going on about how much time they had in it but couldn't charge me for everything since they had never worked on one before an were learning at the same time. Finally, he goes the total for everything is $244. I couldn't pay it fast enough! I think for what they did it was a very fair price. It goes down the road straight an smooth and handles a lot better.


 Replaced old style lift hooks. Also replaced delaminated windows. The windows were easy to change, except the screws that are in the upper channel were really hard to tighten up with a regular screwdriver. This tool I've had for 20 plus years and is a lifesaver. It ia a bodymans wheel opening tool. Back in the day when cars were made of metal and not plastic, chrome was used in the wheel openings-- this was the tool used to install/remove these trim pieces without removing the wheel. It can be used with the little palm screwdriver or a snap-on phillips.It will give you the extra torque needed for stubborn screws. P.S. Shout out to Steve at federal military parts.... Great customer service !!!
Where did you get the hooks...?View attachment 682353View attachment 682354View attachment 682355View attachment 682356View attachment 682354 Replaced old style lift hooks. Also replaced delaminated windows. The windows were easy to change, except the screws that are in the upper channel were really hard to tighten up with a regular screwdriver. This tool I've had for 20 plus years and is a lifesaver. It ia a bodymans wheel opening tool. Back in the day when cars were made of metal and not plastic, chrome was used in the wheel openings-- this was the tool used to install/remove these trim pieces without removing the wheel. It can be used with the little palm screwdriver or a snap-on phillips.It will give you the extra torque needed for stubborn screws. P.S. Shout out to Steve at federal military parts.... Great customer service !!!
Would you be so kind as to measure the voltage output on the three prongs of the round solar panel connector that goes to the push to test box? i.e. is one ground, one 12v and the other 24v and which is which...Next up is I've started to install one of my good deals I've grabbed from Findlay: PulseTech 24 PDU with battery tester and solar panel. The PDU is dropped into the usual spot beside the batteries, I have the tester routed to be adhered to the front of the battery box, and I've routed the large solar panel on top of the hood. I haven't 100% committed to the location of anything yet, so they're being secured with RTV and I'll see how it holds up. At the same time, I've also run the 14V lead from the alternator to the battery box, being careful about the routing. Made the cut of length I needed, but I need to order some good cable insulation to make sure the lead is protected to finish the job. It'll be installed shortly. (Plus I have enough material to make a 2nd one, so I'll finish them both one and offer one for sale in case someone doesn't want to go through the trouble of buying the wire, leads, and housing to make just one long wire.)
View attachment 682352


I'll do you one better, because this is exactly the information I was going to be looking for until I found a complete set for cheap. First off, the connector it uses is a standard 3-pin DIN connector (why did they use a non-weather audio connector?). Specifically, it looks just like this connector: http://www.rean-connectors.com/en/products/din-cable-connectors/nys321g with the gold contacts and everything. The image I took will even show "REAN" etched in the side. Second, it's only a 2-conductor wire (that appears to be a twisted pair), so pin 3 (and the housing) is dead. All the PDU does is pulse 28V across both batteries at once. It's 14V capacity is because it has a lead that will pull off of just one battery, so you shouldn't use this in place of a 14V transformer unless you have a dual voltage alternator. Last bit to note about the PDU itself is its ground lead is woefully undersize. It's using about a 16 or 18 AWG wire for its only ground, yet optimistically believes it's going to act as a master circuit breaker for the vehicle's accessories.Would you be so kind as to measure the voltage output on the three prongs of the round solar panel connector that goes to the push to test box? i.e. is one ground, one 12v and the other 24v and which is which...


how watertight is it with the new doors?Put a new soft top and a Luverne brushguard on the Battlewagon in the last week or so. Took some pictures this weekend. Big difference from the way I brought it home!
View attachment 682381View attachment 682380
COMPLETELY watertight...how watertight is it with the new doors?
