• Steel Soldiers now has a few new forums, read more about it at: New Munitions Forums!

  • Microsoft MSN, Live, Hotmail, Outlook email users may not be receiving emails. We are working to resolve this issue. Please add support@steelsoldiers.com to your trusted contacts.

What have you done to your HMMWV today/lately

3jacks

Active member
153
39
28
Location
Near Jackson, MO
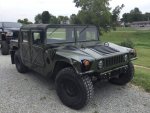
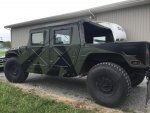
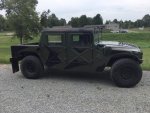
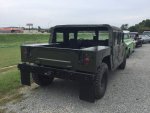
What shade of green is that ad is it eggshell or semi ,, very nice !!


Sent from my iPhone using Tapatalk
It's Rapco Forrest green and black but in a PPG paint with a matte clear. There are so many body dings and stuff that I just didn't want to fix and anything glossy would have looked pretty rough. Once you start doing the body work there is no end so I fixed the really bad stuff and went with it.
 

ersiv

New member
1
0
0
Location
Houston TX
Frame rail drain holes

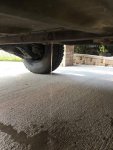
Long time reader, first time posting, just wanted to pass a minor mod along to the community from my recent experience moving families to high ground south of Houston as a result of Harvey. After a few days in water with my M998 I thought I should check the boots and grease all the fittings. While doing this I noticed water dripping from the passenger side frame rail out the rear. I thought this was strange because the end of the frame rail is not the lowest point even at the slight incline of my driveway. The back end of the frame has what looks like a ~3/4" hole in a block off plate and was plugged with dirt, sand, and leaves. This concerned me because I was unaware the front of the frame rail is open while the back is nearly closed and there are no drain holes in the frame rail.

A quick internet search revealed this report: Finite Element Analysis of HMMWV frame with proposed drain holes.

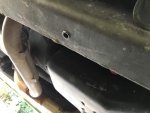
Seems like the Army was aware of this problem back in 1991, so this afternoon I drilled the 4 recommended 1/2" holes in the frame per figure 1-2 on page 6. After drilling the passenger side rear drain hole ~24oz of water poured out so I'm glad I made this mod and hopefully will not have rusted out rails in the future.
IMG_8736.jpg

I also painted the exposed metal and RTV'd a rubber grommet in the hole to combat future corrosion. TBD if it will make a difference, but in my mind it was better than leaving bare metal.
FullSizeRender.jpg
 

Bulldogger

Well-known member
Steel Soldiers Supporter
1,330
585
113
Location
Quantico VA
Broke mine, or nearly so. On Saturday at the Graves Mountain Rally. Particularly hard trail, first HMMWV up it was stuck for a while but we got him free. I tried to get up and put serious strain on my steering trying to jink back and forth for traction. We ended up having to back down, trail boss cancelled the ride. Some clunking in the steering led me to a near-torn off idler arm. Was able to crank down on the castle nuts on that side and get enough tension to drive her home, but no more off-roading until it's fixed.

There is a MOOG part that beefs up the steering, apparently it is a known weakness. I'll scrape together some cash and get on it. TheCaptain is ready to assist, since I helped him install those on his HMMWV with a similar defect.

Bulldogger
 

jeffy777

Member
190
4
18
Location
VA
Broke mine, or nearly so. On Saturday at the Graves Mountain Rally. Particularly hard trail, first HMMWV up it was stuck for a while but we got him free. I tried to get up and put serious strain on my steering trying to jink back and forth for traction. We ended up having to back down, trail boss cancelled the ride. Some clunking in the steering led me to a near-torn off idler arm. Was able to crank down on the castle nuts on that side and get enough tension to drive her home, but no more off-roading until it's fixed.

There is a MOOG part that beefs up the steering, apparently it is a known weakness. I'll scrape together some cash and get on it. TheCaptain is ready to assist, since I helped him install those on his HMMWV with a similar defect.

Bulldogger
As the HMMWV who was originally stuck(ME). First off I want to thank you for help and teaching me so much. It was a great time.

I probably screwed up the trail and made it hard on you and then everyone else to get up after my mess. Sorry about that. I have my excuse (stupidity) did know enough to state

I wanted to spend more time with you. Please help me know the MOOG parts you are referring to. I want to beef mine up for next year. If I can be half as good as you I will be happy. YOU BULLDOGGER ARE THE MAN!

Jeff
 

Wire Fox

Well-known member
1,252
161
63
Location
Indianapolis, Indiana
As for what I did for my HMMWV lately... I spend this labor day weekend laboring under/over/beside/and occassionally inside my HMMWV, specially working further on that transmission wiring harness I've been assembling. I finalized the last couple of wires I needed to make, nicely laid them all out, soldered and sealed splices where necessary, wrapped it all with non-adhesive vinyl tape, sheathed it all with monofilament nylon braid, and then secured all of that braid in-place. Seeing it all in one sentence almost makes it look like it was quick job, but I probably spent 14 hours across three days doing all of that. If you want to read the details on what I've done and see pictures, check out the last two posts I've made in my build thread, which there's a link to in my signature!
 

Awol

Well-known member
535
527
93
Location
MA
As for what I did for my HMMWV lately... I spend this labor day weekend laboring under/over/beside/and occassionally inside my HMMWV, specially working further on that transmission wiring harness I've been assembling. I finalized the last couple of wires I needed to make, nicely laid them all out, soldered and sealed splices where necessary, wrapped it all with non-adhesive vinyl tape, sheathed it all with monofilament nylon braid, and then secured all of that braid in-place. Seeing it all in one sentence almost makes it look like it was quick job, but I probably spent 14 hours across three days doing all of that. If you want to read the details on what I've done and see pictures, check out the last two posts I've made in my build thread, which there's a link to in my signature!
Oh I believe it! I've built plenty of electrical harnesses, and while they're not always super complicated, to do the job right it takes time.
 

Bulldogger

Well-known member
Steel Soldiers Supporter
1,330
585
113
Location
Quantico VA
That's no fun, Bulldogger.

But there's a memory to hold a lifetime of that particular day that particular time up on Graves Mountain. I got to try and make that next year!
You should come Rocky, no current MV necessary.

[I wanted to spend more time with you. Please help me know the MOOG parts you are referring to. I want to beef mine up for next year. If I can be half as good as you I will be happy.]

Jeffy777, it was great to meet you and Jeff Jr as well as Jean and Polly. I'll reply to this or my personal build thread for Brunehilde when I find the best source. I know that HummerPartsGuy has the Moog problem solvers, but he tends to be pricey. Available > cheap but out of stock, of course. I'll share what I find.

I will ask in a separate thread about what parts of my steering to target. I suspect a couple of ball joints are also bad, and have not taken the time to search the NSNs or civilian parts equivalents.

I too want to be able to thrash her harder next year. I fear my tires will be my limiting factor next year, though none are past 75% tread as of today. If I get involved more in the VA HMMWV club, I may start wearing them faster.

Anyway, FUN TIMES.

Bulldogger
 

kcobean

Member
178
3
18
Location
Sterling, VA
Broke mine, or nearly so. On Saturday at the Graves Mountain Rally. Particularly hard trail, first HMMWV up it was stuck for a while but we got him free. I tried to get up and put serious strain on my steering trying to jink back and forth for traction. We ended up having to back down, trail boss cancelled the ride. Some clunking in the steering led me to a near-torn off idler arm. Was able to crank down on the castle nuts on that side and get enough tension to drive her home, but no more off-roading until it's fixed.

There is a MOOG part that beefs up the steering, apparently it is a known weakness. I'll scrape together some cash and get on it. TheCaptain is ready to assist, since I helped him install those on his HMMWV with a similar defect.

Bulldogger
When you get your parts, let me know and I'll come help wrench!
 

General Hood

Member
712
2
18
Location
Fort Towson, OK
My fan clutch has never disengaged since I've owned the vehicle, and I should have left well enough alone, but I wanted to fix it. I found a good deal on a NOS time delay module and a NOS Cadillac valve, so that's where I started and that's where my troubles began. Cranked it up and the fan clutch blew out a large amount of power steering fluid. A fellow SS member was gracious enough to sell me a like new replacement fan clutch,I cranked it up once more and an elbow on the cooler blew out. New cooler on order but there is something wrong here and I can't figure it out. It's like too much pressure to be causing these new issues. I read the TMs, and no I don't have the recommended analyzer/tester, I'm just needing friendly advice here before I end up replacing everything and still have an issue. Thanks in advance
 

Bulldogger

Well-known member
Steel Soldiers Supporter
1,330
585
113
Location
Quantico VA
My fan clutch has never disengaged since I've owned the vehicle, and I should have left well enough alone, but I wanted to fix it. I found a good deal on a NOS time delay module and a NOS Cadillac valve, so that's where I started and that's where my troubles began. Cranked it up and the fan clutch blew out a large amount of power steering fluid. A fellow SS member was gracious enough to sell me a like new replacement fan clutch,I cranked it up once more and an elbow on the cooler blew out. New cooler on order but there is something wrong here and I can't figure it out. It's like too much pressure to be causing these new issues. I read the TMs, and no I don't have the recommended analyzer/tester, I'm just needing friendly advice here before I end up replacing everything and still have an issue. Thanks in advance
You might check the wiring to the Cadillac valve, and trace the wires back to the harness and as far beyond as you can. It's essentially a big solenoid. Mine was malfunctioning, and was the source of my fan being clutched in 100%. Checking the wiring connections and continuity didn't help, so I pulled it clear off. The Cadillac valve CAN be disassembled if you are careful. I don't recall that I took pictures, but I did get it apart and back together again, so it can be done. Mine was dirty inside, nothing specific. Just needed a breakdown to parade rest, wiped off and reassembly. The NOS valve may be gummy with age or some kind of assembly lube or moisture, etc... However, I would suggest making absolutely sure you've got the plumbing and wiring correct, as it could be the hoses are swapped. It is hard to see down by the steering pump, so take your time and use your camera phone at arms length and an inspection mirror as needed.

You'll get it!

Bulldogger
 

riderdan

Member
313
20
18
Location
Central Kansas
Something good happened :-D

When I got my truck I was in a hurry to get it registered, so I wired up the tag light and reverse light to a switch in the dash. But I wasn't happy with the non-military wiring (I used 20 gauge wire I had on hand, two conductor black and red) and the fact that the lights weren't controlled by the three-lever switch. I most always remember to turn off the lights because I can see the LED instrument panel lights, but other things not so much.

Anyway, this morning I went out to finish wiring up my interior light and the switch it's attached to. I was around back of the truck checking that the backup light worked (I had to re-do the power connection) when I noticed a packard connector hanging down from the rear passenger side light wiring. Low and behold, when I checked it with my meter, the connector turned out to be connected to the reverse switch. So I disconnected my hacked-up wiring job and connected the backup light to that connector. Now it's only on when in reverse (no manual switching) and only when the service/drive lights are on.

I decided to look at the tag light again, too. I had one extra set of packard connectors, so I made up a Y, put it in-line with the marker light, and hooked the tag light to it. Worked a treat. So after verifying that it all worked, I pulled out the hacked-up wiring and it looks much better underneath.

Plus, no more trying to remember to switch on the tag and backup lights manually. No more worrying I'll kill the batteries by leaving those on even if I remember to turn off the three-lever switch.

A good day wrenching.
 

General Hood

Member
712
2
18
Location
Fort Towson, OK
You might check the wiring to the Cadillac valve, and trace the wires back to the harness and as far beyond as you can. It's essentially a big solenoid. Mine was malfunctioning, and was the source of my fan being clutched in 100%. Checking the wiring connections and continuity didn't help, so I pulled it clear off. The Cadillac valve CAN be disassembled if you are careful. I don't recall that I took pictures, but I did get it apart and back together again, so it can be done. Mine was dirty inside, nothing specific. Just needed a breakdown to parade rest, wiped off and reassembly. The NOS valve may be gummy with age or some kind of assembly lube or moisture, etc... However, I would suggest making absolutely sure you've got the plumbing and wiring correct, as it could be the hoses are swapped. It is hard to see down by the steering pump, so take your time and use your camera phone at arms length and an inspection mirror as needed.

You'll get it!

Bulldogger
Plumbing is absolute correct, double and triple checked, plus I color coded everything during disassembly as a back up.
New cooler arrived today and I got it installed this evening. Cranked up the 998 and blew the seals out on the new fan clutch. I'm a little discouraged so the truck will sit for a few days while I come up with plan B
 

Double

New member
5
3
3
Location
CT
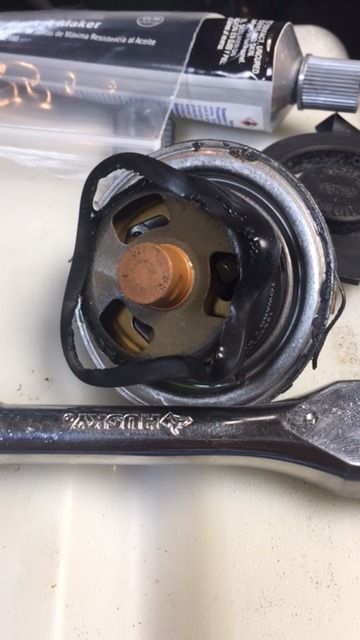
Changed my thermostat last weekend........


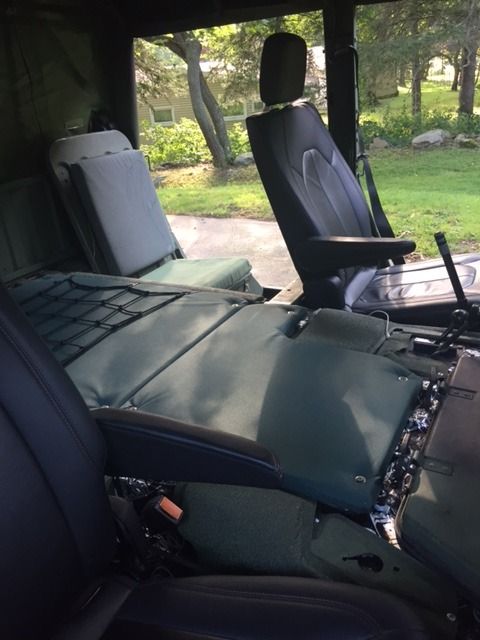
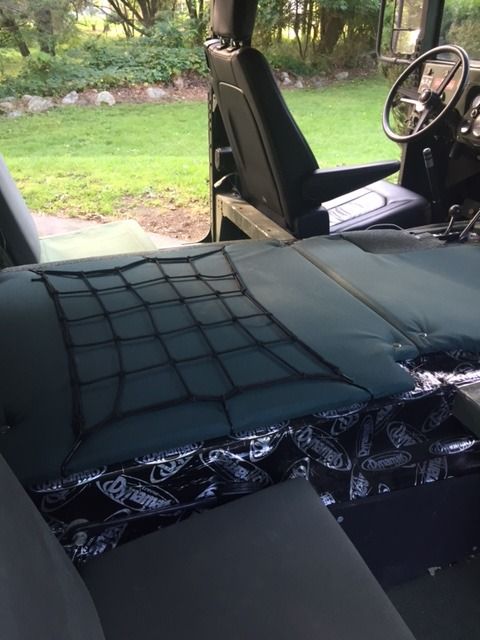
Then wrapped my plywood tunnel in outdoor canvas with an inch of foam under it.


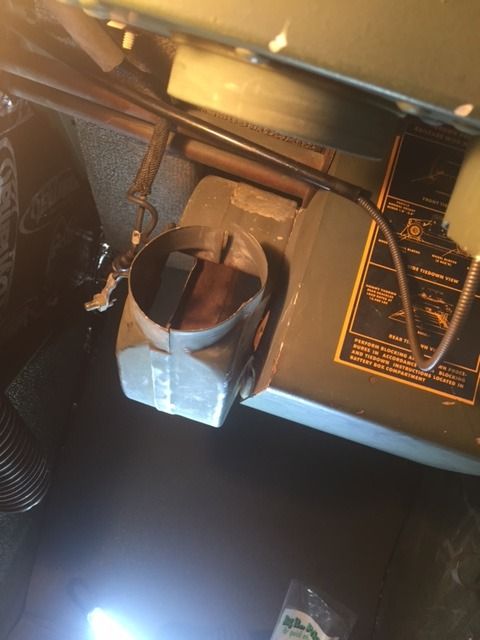
And then I did this...... went from this....


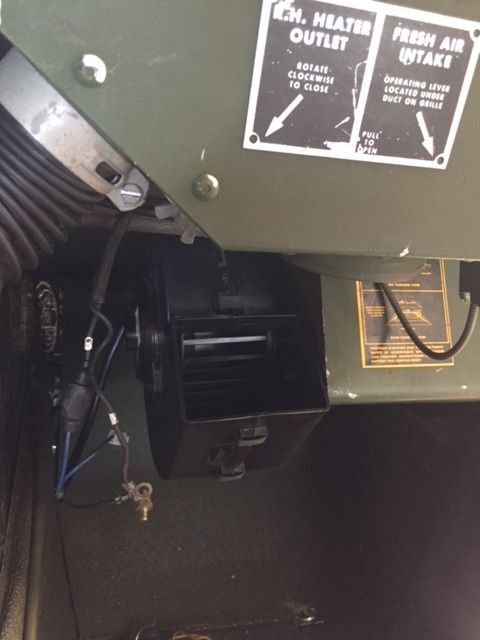
To this...


Winter is coming.... I Dont recommend the fan mod unless your dedicated to not going back to the old one. You have to cut the old one off because its riveted and make sure you have a 90 degree drill to make life easier. The new blower has a larger, better, and quieter has a more normal sound. oh and it pushes more air!
 
Top