• Steel Soldiers now has a few new forums, read more about it at: New Munitions Forums!

  • Microsoft MSN, Live, Hotmail, Outlook email users may not be receiving emails. We are working to resolve this issue. Please add support@steelsoldiers.com to your trusted contacts.

What have you done to your HMMWV today/lately

Ajax MD

Well-known member
1,569
1,414
113
Location
Mayo, MD
Awhile back I mentioned that my driver's rear tire was wearing oddly on the outside edge, chewing it up. You all recommended that I check the toe-out IAW the 20-2.

I checked everything. I did the "grasp and shake" tests. Spindle bearings, control arm bushings, radius arms are all very snug. No play at all.
Next, I did the string test. 3mm gap between the string and the rear of the rear tire on the driver's side and 1mm on the passenger side. 3mm is max allowed.
Next, I did the chalk-and-roll test. The distance at the "point of measurement" was shorter on the rear of the tires than the front of the tires, which indicates "toe out", which is correct according to the manual.

A bit of background:

When I first bought the truck, it had crappy bias tires. I hauled a$$ home, 80 miles at 55mph without a hitch. The bias tires looked perfectly fine.
I upgraded to 12-bolt wheels and M/T's. (Admittedly used). We've driven the truck many miles at slower speeds around town and I never noticed the odd wear pattern.

I did not notice this wear pattern until I drove the truck to work and back one day at 55-60mph. I'm beginning to suspect that the problem is the tire and not the truck. I have a low tread spare tire that has perfectly evenly worn tread. I've installed it and I'm going to cautiously drive the truck and observe the outside edge.

If it starts looking chewed up then I know that I probably didn't perform my measurements precisely enough and I'll try again. I'll try to entice some local-ish M998 owner to come work with me.
 

TOBASH

Father, Surgeon, Cantankerous Grouch
Steel Soldiers Supporter
Supporting Vendor
3,579
3,488
113
Location
Brooklyn, NY
Sent my rig in for:

4 speed 765R4 (700R4 upgraded variant) installation, along with new electric imitation X-door installation, rear Airlift-bumper installation, pintle extension, and assessment for lifting the frame 2" to allow install the Whipple AND assessment for installation of the Red-dot A/C. Also little jobs like installing the radio rack (might be temporary if I gotta change the doghouse to fit the Whipple). Gonna also install the front 12k winch and make a rear custom mount for a rear 12K winch.

Then gonna look into heating system upgrades IF this setup is lacking. Will first ensure all ductwork is intact as that is a primary cause of crappy heating IMHO. Ductwork falls apart with time so I will replace with something better.

If I need to make a custom doghouse, I will cover Whipple with 1"-2" of bubble wrap (to make a space to allow for engine motion), and mold a new doghouse inner over that made from heat resistant muffler type tape or something similar. Then fiberglass batting for heat and sound resistance, then a fiberglass outer/cabin side cover. Then figure out how to attach it all to existing mounting hardware. (Then of course I will remove the bubble wrap, as it is for templating only).
 
Last edited:

Coug

Well-known member
Steel Soldiers Supporter
2,975
4,356
113
Location
Olympia/WA
power steering pump was on the way out, so ordered a replacement.
Saturday it still worked fine, just noisy.
Monday turn it on to drive it and have no power steering.
Replaced the pump monday afternoon.
Had to go to NAPA for the pulley install tool (note: pulley removal requires a 2 slot puller, not a power steering pulley puller like in the kit from NAPA)
Spent hours trying to get the air bled out.
Finally, after advice from another member here who messaged me after I posted in another thread, got the air bled and everything working.


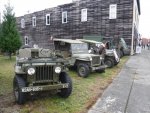
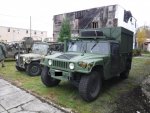
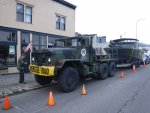
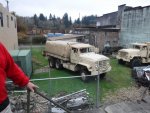
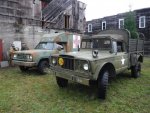
But enough of that. Last Saturday my truck got to spend some time with it's predecessors.

124633701_1061361284284620_3791678177479939431_o.jpg

124356076_1061361017617980_4974782203504282126_o.jpg

124492682_1061379147616167_2133921730272132311_o.jpg

124335554_1061379377616144_8708064316935053000_o.jpg

124317952_1061378560949559_7428564850467170068_o.jpg
 

Ajax MD

Well-known member
1,569
1,414
113
Location
Mayo, MD
So, I have performed the "string check" and toe-out measurement and checked all of my rear suspension components and spindle nuts yet I am still experiencing excessive wear on the very outer edge of my driver's rear tire. The chalk test indicates that the rear tires are toed out as they should be but the string test seems to indicate that they are within spec.

I'm not an expert at these checks. Perhaps I'm doing something wrong. What I can say for sure, is that according to all the sketches and photos I can find on the internet, the tire is demonstrating excessive "toe out" and not a camber issue.

I guess I'm going to follow the TM procedure for adjusting the rear toe, and toe the tire "in" just a tad and then see what happens. If this fails, I guess I'll try to find a shop with a bay large enough to accommodate the truck for a professional alignment.
 

Bulldogger

Well-known member
Steel Soldiers Supporter
1,330
586
113
Location
Quantico VA
So, I have performed the "string check" and toe-out measurement and checked all of my rear suspension components and spindle nuts yet I am still experiencing excessive wear on the very outer edge of my driver's rear tire. The chalk test indicates that the rear tires are toed out as they should be but the string test seems to indicate that they are within spec.

I'm not an expert at these checks. Perhaps I'm doing something wrong. What I can say for sure, is that according to all the sketches and photos I can find on the internet, the tire is demonstrating excessive "toe out" and not a camber issue.

I guess I'm going to follow the TM procedure for adjusting the rear toe, and toe the tire "in" just a tad and then see what happens. If this fails, I guess I'll try to find a shop with a bay large enough to accommodate the truck for a professional alignment.
Adjusting it a tad sounds like a good plan. One must keep in mind the TM alignment settings are for a truck routinely carrying troops and supplies, some 1/2 to 1 ton (per it's 1.25 ton rating) and thus the toe out/in of the loaded suspension will be evened out by the loading.
I recall reading several posts of folks who know they will rarely drive fully loaded adjusting the toe out/in to a more level setting, and thus making the "normal" setting closer to a few passengers and small cargo (maybe a quarter of third of a ton loading), instead of 4 troops in gear and heavy cargo/supplies, which for us civilians is non-typical use.
BDGR
 

Ajax MD

Well-known member
1,569
1,414
113
Location
Mayo, MD
Adjusting it a tad sounds like a good plan. One must keep in mind the TM alignment settings are for a truck routinely carrying troops and supplies, some 1/2 to 1 ton (per it's 1.25 ton rating) and thus the toe out/in of the loaded suspension will be evened out by the loading.
I recall reading several posts of folks who know they will rarely drive fully loaded adjusting the toe out/in to a more level setting, and thus making the "normal" setting closer to a few passengers and small cargo (maybe a quarter of third of a ton loading), instead of 4 troops in gear and heavy cargo/supplies, which for us civilians is non-typical use.
BDGR
Great, thanks for that. I routinely haul stuff but it's rarely heavy. Brush and yard waste, for example.
 

rcamacho

Well-known member
770
843
93
Location
Bainbridge Island Wa
Finally diagnosed a body water leak in the support structure under the A pillar/windshield frame. 3M Auto-body Sealant to the rescue...


So far no more leaks in the treated seams.

Sent from my iPhone using Tapatalk
 
Last edited:

Coug

Well-known member
Steel Soldiers Supporter
2,975
4,356
113
Location
Olympia/WA
*sigh*
As usual, the fun never ends.
Went to hang out with some random people in another town, mostly because it was a block away from a store I like in that area.
75 miles from home.
Nice night, clear weather but a little chilly.

As I pulled into the parking lot I thought I heard a funny sound under my truck.
Crawled under, didn't really see anything.

As I went to leave, it was worse. A couple of the other guys helped me narrow it down to the passenger side front halfshaft area.
Finally figured out my brake caliper mounting bracket is loose, and the lower bolt (only one I could see) was backing out, coming into contact with the halfshaft bolts sticking through the rotor.

Of course this is the one time I had no tools with me.

Managed to wiggle the bolt in maybe 1/4 turn, just enough to not contact the others.

Drove 2 miles to Walmart (luckily they were still open) at about 9pm. Bought a pair of 11" needle nose pliers with a 45 degree angle on the end.
Managed to turn the bolt in another full turn.

Called it good enough, and drove the 75 miles home.
Looks like the diff is leaking at the output seal on that side, so need to order a seal and do it while it's apart.

But hey, I managed to get home alright, so I'm not unhappy about the whole ordeal.
 

papakb

Well-known member
2,285
1,185
113
Location
San Jose, Ca
I recently went thru this with my truck too. I kept hearing a scraping sound in the right front and decided to investigate. When I grabbed the right hand caliper it wiggled and I could see the lower bolt was partially backed out. To tighten them it's necessary to remove the half-shaft, remove the caliper, and them pull off the disc rotor. That's when I was able to see the broken calpier mounting bracket. It had split dead center into 2 pieces and was dragging on the rotor hub. I replaced the caliper mount with a new one and reassembled everything using blue Loctite after cleaning everything up. So far (couple hundred miles) so good. About a mornings work with all the inspection I did on everything else while I was down there.

I do a monthly trip down under to see what else has come lose of fallen off!

One day I was in the middle of fuelling up when I heard a "tink" underneath. I looked down and in the middle of filling the tank with the engine shut off one of the starter bolts had fallen out! I tell you, it never ends.
 

Coug

Well-known member
Steel Soldiers Supporter
2,975
4,356
113
Location
Olympia/WA
Yeah, while I was doing my crawl under in the dark parking lot I also found one of my halfshaft boots leaking (different location) so I have a set of boots coming as well (12k axles ain't cheap).
I'm a little tight on money at the moment, so only have 2 of the bluehummer locking halfshaft bolt kits on order. My opinion is since this truck is still pretty low miles (4500) and I'm having to take things apart, I might as well spend the extra money for reusable parts rather than the torque to yield method where I have to replace the bolts and nordlocks every time it's apart. They don't cost all that much, but it does start to add up over time.
 

Ajax MD

Well-known member
1,569
1,414
113
Location
Mayo, MD
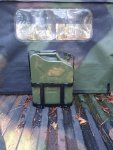
Mounted a Smitty Bilt holder and Jerry can....View attachment 820091
I'm also looking to mount a fuel can bracket. I'm running the 2-man soft top configuration with troop seats. I'm having a hard time deciding what the best place is, to mount the can. I don't want to interfere with the troop seats folding down, nor do I want to burn up valuable space in the cargo bed.
 

Coug

Well-known member
Steel Soldiers Supporter
2,975
4,356
113
Location
Olympia/WA
I'm also looking to mount a fuel can bracket. I'm running the 2-man soft top configuration with troop seats. I'm having a hard time deciding what the best place is, to mount the can. I don't want to interfere with the troop seats folding down, nor do I want to burn up valuable space in the cargo bed.
When in 2 man configuration I keep a scepter can or two in the rear passenger footwell area that is covered.
Only place I can think to mount a fuel can holder if you are a soft top would be against the cargo divider in the center. You lose a little cargo space, but it doesn't interfere with anything there.
 
Top