- 5,685
- 3,075
- 113
- Location
- Metairie/La (N'awlins)
I have seen the bracket separately but not just the light as they are sealed.
I think the military just replaced the whole thing.
I think the military just replaced the whole thing.
Steel Soldiers now has a few new forums, read more about it at: New Munitions Forums!

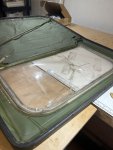
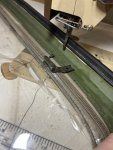
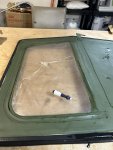
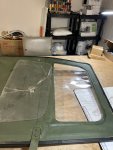
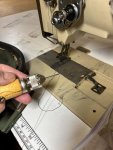
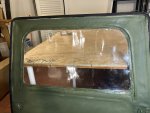

Diesel can be used to soften rubber.Of the two tops I got, the green one is just about trash with decent rain rails. The tan is in good shape except the broken and missing rails. So I pulled them off the green one and cleaned them up. I'm trying some rubber rejuvenator to soften them up. After two applications, it's noticeable. I'm not sure I'll enjoy stitching them on by hand but I'll get it done.
View attachment 930564
It was cloudy today, so I figured I would hook up the gauges and see if I did not get all the crap out of the lines. If the new compressor were crapped out, I would see a low high side reading.Seems my HMMWV repairs usually ends up being one step forward, three steps back...
It was sitting for several weeks since the beginning of Inferno Season here in Florida. I cannot take the inferno anymore in my old decrepit state and if I do go outside with the intent of working on the beast, I end of drenched from head to toe after about 15 minutes, ending up totally dehydrated, and exhausted! Like heat stroke. Wish I had a tree I could work under. Helmet top won't fit in the garage.
When I left it, AC blew ice cold.
Eventually I felt guilty and decided I better go out and turn it over just to give it a bit of exercise. I started right it up, and I turned on the AC and I start getting a huge belt squeal noice as soon as I turn on the AC. Wife even heard it inside the house! AC blows hot to add to my misery. Belts were replaced last winter. Pop the hood and AC belts look ok, but compressor is fighting it rotating in a jerking manner. Belts seem tight.
A few days later it was cloudy and raining out so I go out and pop off the belts and I can fell the compressor pulley is rough with the AC engaged. AC off the magnetic clutch disengages and it turns normally so no squeal.
So I order a new compressor, which was cheap since it is an aftermarket system, PAG oil, and new receiver dryer since it is common practice to replace with the compressor. Bought the flush for the lines in case.
Wait a few weeks more and a hurricane comes through so I have a day of no inferno and between rain showers I swap the compressor and receiver dryer, and evacuate and recharge the system. Blows arctic coldFor once a successful repair. I check all the fittings with my leak detector and all fittings seem leak free.
Just went out now to take it for a ride over to drop off a package and fill it with dino juice. Starts out ice cold. Byt then end of the ride, it starts to blow hot air again.
I'll wait for a break in the heat and whip out the gauges to see what I find.
Always something with this beast!


So it's now Sept 1st, and I just hit 19k. So I between July 19th to Sept 1st I've racked up 2000 miles. Not too bad. I guess I like driving it lolHit 17,000 miles today. Bought it with 15,917. Not too bad for about 2 months on the road!
View attachment 928115


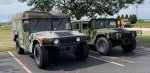
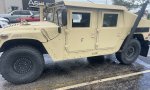
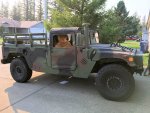
Is your M1151A1 lifted? Nice looking vehicle.First time I've had them both next to each other! The ambulance was a 2 man soft top when I got it 2 months ago from GP. Didn't intend on making it an ambulance originally but here we are. Still have a list of things I need to do to the ambulance but its all relatively minor stuff.
What kind of compressor is that? Nice job.Finished up the air compressor. Compressor is mounted on the bracket in the engine compartment. After the photo was taken the waterproof relay and circuit breaker got a healthy dose of RTV to further waterproof.
View attachment 931058
View attachment 931059
Output hose is routed to a 3 gallon tank which fits perfectly in the space between the rear cross member and the airflift bumper. The photo below is taken from the ground up.
View attachment 931060
The outlet for now is just a temporary port. I have to decide on a permanent solution eventually.
View attachment 931061
The compressor relay control circuit is wired in series to a pressure switch on the air tank (120-150 psi) and a toggle switch with a 7.5 amp fuse for safety. For reasons of convenience I have located the toggle switch behind the commander's seat.
View attachment 931062
What kind of compressor is that? Nice job.

I’m almost over the hump about adding some repro armor back to my 1151, that armor looks nice on yours, you may have just cost me some money.First time I've had them both next to each other! The ambulance was a 2 man soft top when I got it 2 months ago from GP. Didn't intend on making it an ambulance originally but here we are. Still have a list of things I need to do to the ambulance but its all relatively minor stuff.
Do you have any idea on what will you be asking on the classifieds?Thanks. The compressor is an Extreme Outback ExtremeAire High Output compressor, but it's milsurp.
I bought one of these refueling units on ebay to source the compressor:
View attachment 931068
Since the compressor came in a pair, I bought a second bracket too as I had intended to put the second setup in my M1152A1. Unfortunately I have to sell that truck to make room for the MRZR that's inbound, so the compressor and bracket will be headed to the classifieds here.
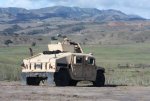
Thanks! Its the stock height, no lift.Is your M1151A1 lifted? Nice looking vehicle.
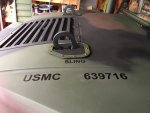
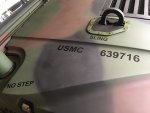
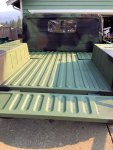
Which brand bedliner did you choose? In about two weeks I’m spraying lizardskin and bedliner and was just curious.Been adding back the markings to the truck. I am happy with the spray in bed liner I used... and the bear wants a ride... just need insurance...
I used Custom Coat. I am happy with how the bed turned out but I am NOT happy with Custom Coat. I ordered the 1 gal kit though Amazon that included the spray gun.Which brand bedliner did you choose? In about two weeks I’m spraying lizardskin and bedliner and was just curious.