• Steel Soldiers now has a few new forums, read more about it at: New Munitions Forums!

  • Microsoft MSN, Live, Hotmail, Outlook email users may not be receiving emails. We are working to resolve this issue. Please add support@steelsoldiers.com to your trusted contacts.

What have you done to your JEEP today

parrottt

New member
14
10
3
Location
Polkville, NC
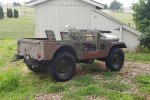
I've got an 1953 M-170 that I am working on, not to the extent that your restoration. Mine was best I can tell a Marine Corp radio jeep. Mine runs great and I am 3 years older than it and I leak, too. Getting ready to have it painted or I may try myself. Seats are hard to find, the holy grail. I adapted M38a1 passenger seats to fit on the drivers and the passenger side. As you can tell from the picture I am using it on my goat farm and with my Llamas.


Jeep Bill Wyatt and llama.jpg20200615_135359.jpg

I will post some other pictures.
 

parrottt

New member
14
10
3
Location
Polkville, NC
Nice looking M-170, it's great when they're put to work (they were built for it)!

Where did you pick up that beauty?
A guy in California, Christian Hazel an editor of a 4wd magazine, got it running and in derivable condition. He sold it to a guy in Arizona who sold it a guy in Raleigh and I bought it 3 years ago. Had the transmission and transfer case rebuilt, correct carburetor and balanced the tires. I drive it most days on the farm and around town. May paint it green and mark it Marine Corp.
 

dmetalmiki

Well-known member
5,523
2,028
113
Location
London England
I am trying to fabricate a generator and housing for My jeep of many years,
Unless someone in the community knows of a working or not Radio/engineering generator mounts and housing box that goes between the seats of the original war time radio jeep.
My jeep has the power take off engage levers, (one for the under floor winch and one for the generator). and the pulley drive on the transfer case already.
 

DeetFreek

Well-known member
219
351
63
Location
New Sharon IA
Well, it's been an ongoing task, got the engine back on the stand. Tore the bottom end apart, check the new seal fitment and decide in whether or not to build up the area that's missing near the main journal housing. I was leery of just using the seal by itself, the missing chunk was pretty much right at the trailing edge of thrust lip on the seal. I also plan to clock the seal ends at like 10 and 4 instead of 3 and 9 o'clock in hopes of keeping any oil seepage contained. 20200702_173930.jpg
I'd just as soon build up a ridge just in case the seal gets flattened out enough to create a gap. Then I'd really be kicking myself. So, layer upon layer is slowly being built up until I get to the point of having enough to reshape into the correct form. If it doesn't end up holding, I'll put the damn thing out of its misery and drive it off a cliff!
 

frank8003

In Memorial
In Memorial
6,426
4,984
113
Location
Ft. Lauderdale, Florida
Well, it's been an ongoing task, got the engine back on the stand. Tore the bottom end apart, check the new seal fitment and decide in whether or not to build up the area that's missing near the main journal housing. I was leery of just using the seal by itself, the missing chunk was pretty much right at the trailing edge of thrust lip on the seal. I also plan to clock the seal ends at like 10 and 4 instead of 3 and 9 o'clock in hopes of keeping any oil seepage contained. View attachment 805120
I'd just as soon build up a ridge just in case the seal gets flattened out enough to create a gap. Then I'd really be kicking myself. So, layer upon layer is slowly being built up until I get to the point of having enough to reshape into the correct form. If it doesn't end up holding, I'll put the damn thing out of its misery and drive it off a cliff!
If You don't like it enough then May I have it?
 

DeetFreek

Well-known member
219
351
63
Location
New Sharon IA
That does not look fun....
Just another hurdle, it's just a time sucker more than anything.

Hey, DeetFreek, if it gets to that point please remember to exit the cab before reaching the cliff:

- Because we plain like you being around, you see?!
Good call, I'm sure I wouldn't get too scuffed up since it's not like these things are known for breaking land speed records!


If You don't like it enough then May I have it?
Oh, I might be able to be persuaded to let it go! :p I can't honestly let this thing beat me though.
 

DeetFreek

Well-known member
219
351
63
Location
New Sharon IA
Ok, here goes nothin'. Been working all week on this. I'm doing a bit of redneckery, decided to build up the busted out area with some JB weld. Took it slow, did layer upon layer until I was satisfied with the height. This is the end result.
20200706_194242.jpg
20200707_174439.jpg
It appears that it engages the thrust lip on the inner side, let's cross our fingers!
20200707_174746.jpg
I went ahead and clocked the seal just as an added precaution. The main cap went back on ok, dabbed a little bit of sealer on the backside of block in case any oil tries to sneak through.

Got everything buttoned back up today, engine off the stand and on the hoist. Realized the last time it went in, I didn't line up the clutch disc. Now, I really have no idea if it was truly aligned or not. So, this time around I figured I'd better do it correctly. Of course, I don't have an alignment tool since this is the only vehicle I have with a clutch. Well crap....now what? Let's Google for ideas! By god, I came across one idea that worked pretty good. Find a socket that fits in the snout hole snugly, and then wrap the back end of the socket with tape until it's thick enough to take up the rest of the space.
Like so:
20200710_141252.jpg
Worked like a charm!

Engine is back in, bolted up and ready for fluids again. I'm really hoping this goes good this time.
 

bikeman

Well-known member
Steel Soldiers Supporter
2,894
501
113
Location
Ft. Bragg, NC
Well, put new batteries in the M38 after it not having been run for a few years... nada... Not sure where I'm going to start, starter .........
 

DeetFreek

Well-known member
219
351
63
Location
New Sharon IA
Well, put new batteries in the M38 after it not having been run for a few years... nada... Not sure where I'm going to start, starter .........
Start at the main switch, trace out to starter & solenoid. Does it still use the foot starter or is it keyed now?
 

Tracer

Well-known member
Steel Soldiers Supporter
6,543
13,912
113
Location
Hawthorne, NV.
Ok, here goes nothin'. Been working all week on this. I'm doing a bit of redneckery, decided to build up the busted out area with some JB weld. Took it slow, did layer upon layer until I was satisfied with the height. This is the end result.
View attachment 805798
View attachment 805782
It appears that it engages the thrust lip on the inner side, let's cross our fingers!
View attachment 805783
I went ahead and clocked the seal just as an added precaution. The main cap went back on ok, dabbed a little bit of sealer on the backside of block in case any oil tries to sneak through.

Got everything buttoned back up today, engine off the stand and on the hoist. Realized the last time it went in, I didn't line up the clutch disc. Now, I really have no idea if it was truly aligned or not. So, this time around I figured I'd better do it correctly. Of course, I don't have an alignment tool since this is the only vehicle I have with a clutch. Well crap....now what? Let's Google for ideas! By god, I came across one idea that worked pretty good. Find a socket that fits in the snout hole snugly, and then wrap the back end of the socket with tape until it's thick enough to take up the rest of the space.
Like so:
View attachment 805802
Worked like a charm!

Engine is back in, bolted up and ready for fluids again. I'm really hoping this goes good this time.
DeetFreek, I've used JB Weld for just about any repair you can imagine, and it has seldom let me down.
 
Last edited:

bikeman

Well-known member
Steel Soldiers Supporter
2,894
501
113
Location
Ft. Bragg, NC
Start at the main switch, trace out to starter & solenoid. Does it still use the foot starter or is it keyed now?
Foot starter... Electrical works, lights turn on... just no kick. so... going to put her up and see if I can get underneath to see if it's a simple wire out of place or if I need a new starter. I do recall (and I have "starter" in bold and top of my old "to-do" list for the Jeep) that the starter was having issues...
 

DeetFreek

Well-known member
219
351
63
Location
New Sharon IA
DeetFreek, I've used JB Weld for just about any repair you can imagine, and it has seldom let me down.
Well, it's back together and running again. Was drip free for about 15 minutes, then it decided to start. BUT, it's a very slight drip, at the present time it's liveable. I'm fine with this as long as it doesn't get any worse.
 

DeetFreek

Well-known member
219
351
63
Location
New Sharon IA
20200718_094615.jpg
It moved under it's own power for the first time in six years. Took a short jaunt to the local farm & home and forgot just how windy it gets with the glass down!
 
Top
AdBlock Detected

We get it, advertisements are annoying!

Sure, ad-blocking software does a great job at blocking ads, but it also blocks useful features of our website like our supporting vendors. Their ads help keep Steel Soldiers going. Please consider disabling your ad blockers for the site. Thanks!

I've Disabled AdBlock
No Thanks