• Steel Soldiers now has a few new forums, read more about it at: New Munitions Forums!

  • Microsoft MSN, Live, Hotmail, Outlook email users may not be receiving emails. We are working to resolve this issue. Please add support@steelsoldiers.com to your trusted contacts.

What have you done to your JEEP today

DeetFreek

Well-known member
219
351
63
Location
New Sharon IA
Finally got around to switching out the cannon plug on the light switch this evening. I'd originally tried to save it as best as possible, but the insulation was just too brittle. So I ordered a takeoff from John up at Midwest Military a few months back. Trimmed the old tape off, marked all the wires with corresponding letters assigned to the holes and started cutting! Soldered and sealed with heat shrink tube then taped it all back up. Back in business once again. received_1653808438355234.jpegreceived_1209356976329492.jpeg20230108_185736.jpg
 

exhogflyer

Active member
Steel Soldiers Supporter
159
141
43
Location
Albany NY
I got a deal on 7.00x16's from Coker Tire......10% off and free shipping! I've also finally got the correct M38A1 fuel pump for my Jeep. AND I have a shop local that will rebuild the starter. All this will be done early spring ( too cold in the barn right now).
 

DeetFreek

Well-known member
219
351
63
Location
New Sharon IA
After almost six months, I finally pulled the voltage regulator out last week, popped the top off and found this: 20230212_192401.jpg20230212_192347.jpg20230212_192339.jpg
Guess I can understand why the charging system wasn't functioning correctly now.

Ordered a new one, got it in this evening, and wouldn't ya know it, it finally has more than 23 volts at the batteries! VideoCapture_20230213-214508.jpg
Even got the government plate off the old one swapped over into the new one.
received_725173769219384.jpeg
So, new generator last summer, new regulator and new cable. Best not be running into charging problems anymore.

I'd even went so far as to start making a test cable out of the old one. I didn't realize they were braided sleeves, there's nothing wrong with the old one other than the insulation was toast. received_1461650117938584.jpeg20230207_174321.jpgreceived_962954881342878.jpeg
 

Maverick1701

Well-known member
1,433
181
63
Location
Lubbock, TX
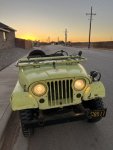
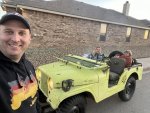
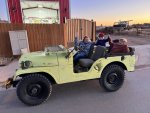
Over the weekend we all piled in the jeep for a nice evening drive around the neighborhood.
I had to reinstall the upper distributor housing (replaced that interior black cap with a non-damaged one) but it fired off w/out any major issues and ran as well as it has been....not great but okay enough for us to enjoy.

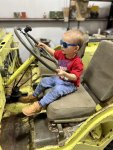
My 2y/o loves the jeep. While doing some work in the shop earlier today he was enjoying himself sitting in the jeep.

I'm still trying to formulate a plan on my winch but haven't made it very far. The aluminum frame introduces additional challenges for removing stuck bolts.

IMG_8138.JPG
IMG_8139.jpg
IMG_8142.JPG
IMG_8144.JPG
IMG_8193.jpg
IMG_8202.jpg
IMG_8212.jpg
 

DeetFreek

Well-known member
219
351
63
Location
New Sharon IA
How about what I've done to my Jeep in the last week?

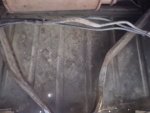
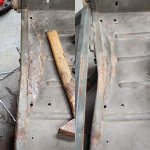
Way too much to write now, so I'll sum up lol. Went to replace a damaged bumperette on the '52C and ended up putting in a whole new crossmember! Somewhere along the way, this old horse backed into something way more stout than it, buckling in the rear crossmember and diagonal braces underneath the tub, wrinkling the tub floor and snapping the drivers bumperette which was jankily repaired.

I've now got the new crossmember on and the hitch plate is lined up and welded in place. Gotta shoot a little paint before the bumperettes and lift shackles go back on and then it'll be good to go again.

received_729556131983886.jpeg
This was the reason for the mess to begin with! A buddy sent me one of his take-offs from a project to replace this one.

20230227_213153.jpg
Thinking a little bit of fire could help take some of the bend out....it didn't.

20230228_210418.jpg
I ended up getting these mostly straight, and if I had any smarts, I'd weld on some small square stock to get some rigidity back in these.

IMG_20230227_212623.jpg
After taking out most of the wrinkle in the floor, there's still a little mushrooming. I'm not sure if I'll go back in and try to flatten it out anymore.

20230303_183345.jpg
Used the plasma cutter, torch, cut off wheel and Sawzall just to get all this off!

20230303_173833.jpg20230305_120224.jpg
I screwed up and cut into the backing plate, so I had to fab up a new one.

20230305_144110.jpg
A 15/16" socket helped square up the layers before welding it into place.

20230305_145251.jpg20230307_201848.jpg
 

Mullaney

Well-known member
Steel Soldiers Supporter
Supporting Vendor
7,711
19,750
113
Location
Charlotte NC
How about what I've done to my Jeep in the last week?

Way too much to write now, so I'll sum up lol. Went to replace a damaged bumperette on the '52C and ended up putting in a whole new crossmember! Somewhere along the way, this old horse backed into something way more stout than it, buckling in the rear crossmember and diagonal braces underneath the tub, wrinkling the tub floor and snapping the drivers bumperette which was jankily repaired.

I've now got the new crossmember on and the hitch plate is lined up and welded in place. Gotta shoot a little paint before the bumperettes and lift shackles go back on and then it'll be good to go again.

View attachment 892565
This was the reason for the mess to begin with! A buddy sent me one of his take-offs from a project to replace this one.

View attachment 892566
Thinking a little bit of fire could help take some of the bend out....it didn't.

View attachment 892567
I ended up getting these mostly straight, and if I had any smarts, I'd weld on some small square stock to get some rigidity back in these.

View attachment 892568
After taking out most of the wrinkle in the floor, there's still a little mushrooming. I'm not sure if I'll go back in and try to flatten it out anymore.

View attachment 892569
Used the plasma cutter, torch, cut off wheel and Sawzall just to get all this off!

View attachment 892570View attachment 892571
I screwed up and cut into the backing plate, so I had to fab up a new one.

View attachment 892572
A 15/16" socket helped square up the layers before welding it into place.

View attachment 892573View attachment 892574
.
Nice looking weld work!
Lots of pushin and movin and cuttin...

.
 

DeetFreek

Well-known member
219
351
63
Location
New Sharon IA
Bumperettes are on, lift shackles on and the taillights are no longer yellow! Hammered out some wrinkles and filled some of the extra holes.

I have a buddy that will be sending me a pintle hitch soon, so that will wrap up work on the tail once that's on.

20230312_104212.jpg20230312_104149.jpg20230312_104138.jpg

I can tell there's still a bow to the tub, the lights cant inward yet, and they're going to stay that way because that's above my pay grade lol! I know some of it stems from the light mount itself, especially the passenger side. I can see the bend in that mount, but if i were to straighten it, that would put the light at even a more severe angle. 20230312_104320.jpg20230312_104327.jpg
 

Mullaney

Well-known member
Steel Soldiers Supporter
Supporting Vendor
7,711
19,750
113
Location
Charlotte NC
Bumperettes are on, lift shackles on and the taillights are no longer yellow! Hammered out some wrinkles and filled some of the extra holes.

I have a buddy that will be sending me a pintle hitch soon, so that will wrap up work on the tail once that's on.

View attachment 892925View attachment 892926View attachment 892927

I can tell there's still a bow to the tub, the lights cant inward yet, and they're going to stay that way because that's above my pay grade lol! I know some of it stems from the light mount itself, especially the passenger side. I can see the bend in that mount, but if i were to straighten it, that would put the light at even a more severe angle. View attachment 892928View attachment 892929
.
Wonder if using a washer "ahead of the light box" on the left or right would turn the light to "straighter than it is"?
 

DeetFreek

Well-known member
219
351
63
Location
New Sharon IA
Pintle cleaned, painted and installed.

20230325_164916.jpg

Next up, exhaust. Ripped off the CJ appearing system, ordered midpipe and muffler and failed to check the downpipe. It was in good shape with the exception of the missing flange which I completely overlooked. Those of you with keen eyes will see what I failed to catch. Good thing I put some time in at a industrial muffler factory years ago so I could fix what was missing.
20230316_164427.jpg20230316_164540.jpg

Now, I could have just ordered the downpipe and waited a few days, but that's not how I do things. I had the material, I had some hours to kill, so I made the flange and used a piece of pipe from the previous setup as a slip pipe so I could bolt everything up and then set the length correctly.
20230316_190014.jpg20230316_203328.jpg20230316_212745.jpg

Everything in place, tacked the slip pipe onto the downpipe, took it off and finish welded it. Bolt everything on one last time, and it sounds like a Jeep again!
20230317_185141.jpg


During all this mess, had a bolt snap off in the exhaust manifold (not really surprised there) so yank the manifold off and drill/tap it out and install a stud like there should have been to begin with. 20230316_173125.jpg

After all that, cut off the flat tow hitch brackets that I'd only caught my shins on a few times. 20230323_192805.jpg20230325_164723.jpg
 
Top