• Steel Soldiers now has a few new forums, read more about it at: New Munitions Forums!

  • Microsoft MSN, Live, Hotmail, Outlook email users may not be receiving emails. We are working to resolve this issue. Please add support@steelsoldiers.com to your trusted contacts.

Working on the M37

Keith_J

Well-known member
3,657
1,323
113
Location
Schertz TX
If you have the same harness, it is quite easy to test out of the vehicle as the wires are color coded. Now, if you have a broken connection in the multi-pin light switch connector, it is pretty easy to take apart.

First, you must remove it from the light switch. Pull back enough of the tape to expose the troublesome circuit and remove the smaller nut on the back of the shell. This is the packing gland nut, it compresses the rubber insert, locking the wires and sealing them.

Now with a long 1/8" pin punch, push the connector out. Use heat and a wire brush to clean, then use proper 60-40 tin-lead rosin core solder. Or 63-37 electronic solder, NOT 50-50 acid core or any other solder. If you have a small drill bit, cleaning the solder socket will help the bond. IMHO, these are nickel plated because nickle oxide conducts but it is hard to solder. Removing the nickel plate allows the brass to make a much better physical connection.
 

mkcoen

Well-known member
Steel Soldiers Supporter
5,637
381
83
Location
Spring Branch, TX
With a little modification we were able to get the new brake light switch in yesterday. The factory switch has 2 male prong connectors and the new switch had 1 male and 1 external female (a larger 2 part prong with a hollow center). Keith was able to crimp the female portion into a male (no hormones required) and viola a 2 male prong connector.

With the brake lights working I went to the tax office and got a 30 day temporary tag so we could do some shake down cruises. Since the truck came from out of state I need to have a VIN verification done before I can register it and need to be able to drive it to the shop for that to be done.

This morning I dropped the windshield and took it for a spin with the intention of getting the VIN verification done. I made it about 3 miles (luckily to a Shell station for fill up) before it started spitting rain. I don't mind getting a little wet but I'm sure the wife doesn't want her seats soaked and I really don't want to try the new NDTs out on wet roads so turned around and went home.

40mph was about the max I felt comfortable with it at this stage. Speedo and all of the gauges except the fuel gauge worked fine. Fuel gauge could be anything from a bad float to wiring and it's low on the priority list right now.

Next couple fo steps are getting the turn signals working, Israeli bumper markings, figuring out/fabbing the bed stakes, and finally doing the woodwork. Almost there.
 

mkcoen

Well-known member
Steel Soldiers Supporter
5,637
381
83
Location
Spring Branch, TX
Last Monday was the inaugural event for the M37. Keith and I did a static display for Birdies For The Brave at the TPC Golf Course. It was nice that the first event was for Veterans and as it turns out so will the 2nd.

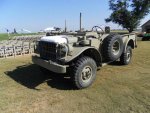
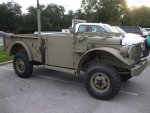
Tomorrow we'll be participating in the Veteran's Day Parade with the LoneStar MVPA in Austin. Lots of fun as we generally have 20+ vehicles show up. It will also be the first time the wife gets to drive in an event with HER truck (which she's name Ish-Mater - think CARS with a middle eastern theme).

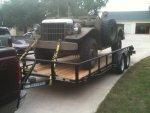
This last week was spent redecking the trailer I just bought so the 5600lbs wouldn't drop through the floor. The 6'4", 240lb 17 year-old that we're helping with a 1009 project almost went through the deck so figured we probably should take care of it.
 

Attachments

mkcoen

Well-known member
Steel Soldiers Supporter
5,637
381
83
Location
Spring Branch, TX
Did you use 2 x 6s for the flooring?
No we used 2x8s for all but the center and then a 2x10 down the middle. I unfortunately timed it just right to do it the week Home Depot stopped carrying 20' 2x10s so there is a section at the front that is short by 2'. I covered it temporarily with a piece of plywood until I can rip 2 small pieces of the left over 2x8s to fit in the gap.
 

M813rc

Well-known member
Steel Soldiers Supporter
4,218
3,258
113
Location
Near Austin, Texas
Mark, the M37 (and the re-decked trailer) looked great! Having watched it progress from "as aquired" to its current condition, I am most impressed. :beer:

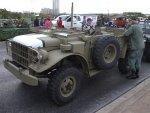
Here are a couple of pictures from the parade Sunday. The first one is a little dark because it was an uncivilized hour of the morning. I didn't get any of you during the parade because I was Tail-end Charlie in a group of 22 vehicles, and apart from distance, Sarge's M915 was directly between us.

Cheers

.
 

Attachments

mkcoen

Well-known member
Steel Soldiers Supporter
5,637
381
83
Location
Spring Branch, TX
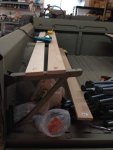
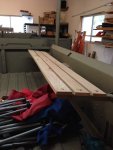
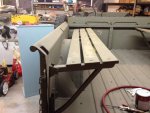
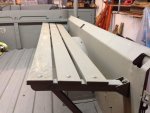
Wow! Hard to believe it's been over 3 years since we started on this project. What isn't hard to believe is that it still isn't completed yet. While I've taken a 2 year hiatus from actually working on the truck it has made numerous outings to include parades and shows. Unfortunately for the parade aspect I've never been able to transport any veterans in parades as the troop seats were never finished (I did haul a pack of cub scouts last Feb, including one that had a nose bleed all over the paint in the bed). So since Veteran's Day is coming up I decided I needed to finally get going on the seats - not that they're done yet but at least they're moving forward.

Today I bought some nice oak to do the job. Whoa am I tired now. Well off for the rest of the day and back at it tomorrow...okay I did more than just buy the wood.

Everything is installed and buttoned down but tomorrow I have to take it all back out, round the edges, paint it, then put it all back in again.

Since we don't run it with the top on and the windshield is generally always down, I doubt I'll do the bed stakes. For now I just want a spot for people to be able to sit while riding in the parades.

007.jpg006.jpg009.jpg008.jpg
 

Storm 51

Just a Grunt
Steel Soldiers Supporter
888
9
0
Location
Seattle, WA
The bed stakes form the backrest for the seats. There are military pads for both the seats and the backrests. The vets might appreciate the backrests; but riding (anywhere) is always better than walking.

I learned that last bit in the Army.
 

mkcoen

Well-known member
Steel Soldiers Supporter
5,637
381
83
Location
Spring Branch, TX
The bed stakes form the backrest for the seats. There are military pads for both the seats and the backrests. The vets might appreciate the backrests; but riding (anywhere) is always better than walking.

I learned that last bit in the Army.
They'll have to lean against the bed and wave. I'm not running an Uber service after all.
 

mkcoen

Well-known member
Steel Soldiers Supporter
5,637
381
83
Location
Spring Branch, TX
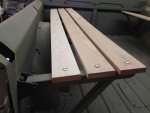
Knocked the sharp corners off the wood today with the router, lightly sanded everything and started painting. I thought the 2 year old quart of paint left over from the original spray job would work fine as it looked good when I opened the can and stirred it up. I got 1 side halfway painted before I started doubting the color match so went to touch up a couple of bare bolt heads on the truck. While it did look like a desert camo color it was more like the WWII pink version than it did Sinail Grey. So off to Home Depot with one of the door panels so they could match that. Much better. I should have everything painted and bolted back in by tomorrow afternoon.
 

mkcoen

Well-known member
Steel Soldiers Supporter
5,637
381
83
Location
Spring Branch, TX
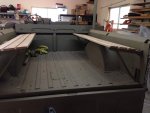
Wife has an online class tonight so I went back out to the shop to work on HER truck. I got the bottom and sides of the slats painted with 2 coats and once they had set up enough to touch I bolted them back in place and got 1 coat on the top. I'm going to let that dry completely then add at least another coat tomorrow.

Here's some pics. The 1st shows the difference between what the 2 year old can came out as over the original paint. Probably a little too noticable to get away with.

003.jpg005.jpg004.jpg
 

mkcoen

Well-known member
Steel Soldiers Supporter
5,637
381
83
Location
Spring Branch, TX
Wow, over 5 years since I've added anything to the thread. Not that I've got anything real to add. I started it up today and backed it out of the shop to take some pics for my new insurance carrier. Everything seemed to be working fine sitting in the shop but when I went to stop at the end of the driveway the brake pedal went straight to the floor. Luckily the parking brake still works just peachy and I was able to stop. Got the pics done and eased her back into the shop where it'll sit for about a month until a friend moves to town from WY and I can get him to help track down the leak and then bleed the system. He's not quite as cheap as my last mechanic but he needs the work.
 

Karl kostman

Well-known member
Steel Soldiers Supporter
2,308
893
113
Location
Fargo ND
Wow your work is certainly coming along nicely and because of the rust you have your hands pretty full! As you start to move forward other areas that have the potential to have a lot of rot in them are going to be cab corners and the front fenders just ahead of where the headlights attach to the fenders the 37 is notorious for problems in that area! As far as brake and fuel line and I know just how much fun it is to get your hands on nice long pieces of virgin tubing and the thrill of completing a beautiful flared end (all that fun ended for me 30 years ago) I can buy completely pre-bent and flared tubing for both the brake system and the fuel system for a whole lot less than you would thing and the crazy part is it all fits virtually perfect the first time, Yes I was completely amazed that every component was a pure bolt together and done, I have never bent another tube after buying my first complete kit! Good luck and be patient your doing a great job dont start taking short cuts or you will just be redoing it again!
Karl
 

mkcoen

Well-known member
Steel Soldiers Supporter
5,637
381
83
Location
Spring Branch, TX
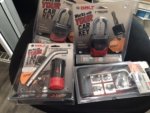
Not really working on the truck at the moment but I got a few accessories to go with the trailer it will be hauled on.

These are Bolt Locks which you set with your vehicle key. Now I’ll just have one key (an obvious one) for the receiver lock, coupler pin lock, a couple of pad locks, and I’ve got a cable lock coming. This should cover any locking needs for the trailer with just one key.
 

Attachments

Another Ahab

Well-known member
17,999
4,556
113
Location
Alexandria, VA
These are Bolt Locks which you set with your vehicle key. Now I’ll just have one key (an obvious one) for the receiver lock, coupler pin lock, a couple of pad locks, and I’ve got a cable lock coming. This should cover any locking needs for the trailer with just one key.
That saves a lot of headache. Brilliant!
 

John Mc

Well-known member
218
303
63
Location
Monkton, VT
Not really working on the truck at the moment but I got a few accessories to go with the trailer it will be hauled on.

These are Bolt Locks which you set with your vehicle key. Now I’ll just have one key (an obvious one) for the receiver lock, coupler pin lock, a couple of pad locks, and I’ve got a cable lock coming. This should cover any locking needs for the trailer with just one key.
Any chance you've got a link to that? I can't read enough from your photo to search for it
 
Top