• Steel Soldiers now has a few new forums, read more about it at: New Munitions Forums!

  • Microsoft MSN, Live, Hotmail, Outlook email users may not be receiving emails. We are working to resolve this issue. Please add support@steelsoldiers.com to your trusted contacts.

Working on the M37

mkcoen

Well-known member
Steel Soldiers Supporter
5,637
381
83
Location
Spring Branch, TX
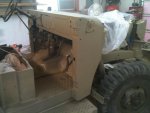
Keith_J was out again today and we got a full coat of primer shot on the cab and front end. It wound up going on fairly dry so we went over it with some 180grit just to knock down the high spots.

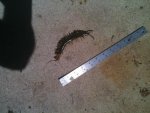
No shots of the truck but take a look at what tried to get into my shop while we were sanding. He's about 6" next to the ruler but that's after he scrunched up in death. When he was running around he was a lot longer than that.
 

Attachments

mkcoen

Well-known member
Steel Soldiers Supporter
5,637
381
83
Location
Spring Branch, TX
Paint on!

Okay the 1st couple of coats of color went on this afternoon. For not having painted anything since just after high school (coming up on 30 years for those keeping track) it went surprisingly well. Only hiccup was when I tried to use the longer air hose and wasn't getting enough pressure at the gun and had to switch back to my shorter hose.

As this isn't the final color I only put on 3 fairly thin layers to see how it would go. Once everything is dry I'll go back and inspect for runs/sags, sand those back down and maybe lay on 2 more coats. After that it's on to the Sinai Grey.

I did have to take the front fenders back off as they intrude into the engine compartment too much and stuff was in the way to get a good coat of paint on them. The area I cut in previously still wasn't wide enough to do it justice and since there's only 5 bolts holding them on I just decided to pull them and paint seperately.

Pic:
1) Overspray still in the air
 

Attachments

Last edited:

mkcoen

Well-known member
Steel Soldiers Supporter
5,637
381
83
Location
Spring Branch, TX
Looking good Mark. Wear long sleeves unless you like the crusty feeling on your arms.
Now you tell me. I also took my hat off to put my respirator on and forgot to put the hat back on. Now I've got that crusty feeling on the top of my head as well (except the strips where the straps went:?).
 

Keith_J

Well-known member
3,657
1,323
113
Location
Schertz TX
Rather have that crusty feeling (as long as it isn't CARC, done that once) than the smell of steel after grinding. Rust is the worst. That hand cleaner works well on fresh paint.

That longer black hose doesn't flow well at all. It won't run the long sander and the DA just barely operates. Almost like that abrasive 14" chop saw connected with a 14 gauge extension cord. When hooked directly into the generator, it spikes the current at 75%:shock:. That is 40 amperes but 25 of that is reactive power.
 

Barrman

Well-known member
5,266
1,782
113
Location
Giddings, Texas
Another tip probably a day too late.

Put a rubber glove over your paint cup cap. No matter how carefull you are, that little vent will get paint on it. Murphy's Law says that collected paint will then drip right in the middle of the biggest surface you are painting.

If you hold a rag over the nozzle of the gun and pull the trigger all the way. The rubber glove will inflate. Get all 5 fingers to inflate pretty good and when they are deflated, you are about 1/2 way through a full cup of paint. Blow them back up again and it will be a pretty good gauge of when you are going to run dry. Very helpfull when doing large panels and looking for a super nice finish coat. Like on the side of a M1010 for example.

Oh, Keith. You are so right about the taste grinding and cutting leaves.
 

mkcoen

Well-known member
Steel Soldiers Supporter
5,637
381
83
Location
Spring Branch, TX
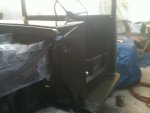
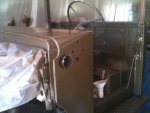
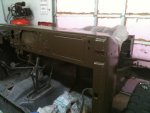
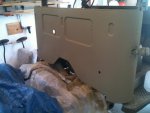
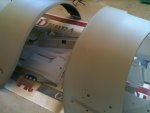
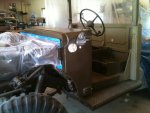
Here's a couple more shots of the OD paint.

I've started putting the Sinai Grey on and am not having much luck. I'm going with the Behr House Paint as the easiest way to get the correct color but can't get the viscosity correct. It's either too thick to spray or too thin to keep from sagging like crazy. I'm going to have to sand down the first try and see if I can't get it better next go around.

1) Lt Front Cab
2) Dash
3) Lt Fender
 

Attachments

mkcoen

Well-known member
Steel Soldiers Supporter
5,637
381
83
Location
Spring Branch, TX
After 3 months finally getting back to working on the M37. It's in the mid-70s today and, except for tomorrow, supposed to be around the same for the next week.

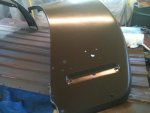
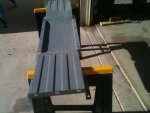
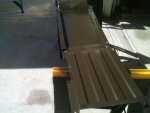
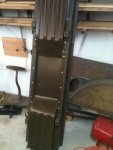
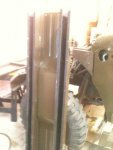
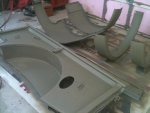
The floor of the tool box was pretty rough and Keith_J welded in 1 new section of it before I covered the whole thing in POR-15. The instructions for the POR say to prime it within 15 minutes but I was having serious fisheye problems so just let it cure without priming. It's nice and solid now so I just dusted it with a DA sander to knock the shine off and painted directly over the POR. It's turning out pretty good so I'm not too worried about it. As it will be under the truck and this isn't a "show piece" I think it'll be just fine.

Next up is the front bed panel and maybe I can start putting the bed back together.
 

Attachments

WarrenD

New member
726
9
0
Location
CT
I never had an issue with letting the POR15 cure for a day or two before priming. I was told several times by the paint supplier I bought it from to never sand it. Regardless, unless you run on salted roads for the next 10-20 years, it should be fine.
 

mkcoen

Well-known member
Steel Soldiers Supporter
5,637
381
83
Location
Spring Branch, TX
I was told several times by the paint supplier I bought it from to never sand it. Regardless, unless you run on salted roads for the next 10-20 years, it should be fine.
It'll probably be in TX the rest of it's days so no salted road worries. I was more concerned with getting it down into the new welds and where it was really pitted from rust. Neither of those areas got sanded.
 

Barrman

Well-known member
5,266
1,782
113
Location
Giddings, Texas
Mark,
There are some "welding primers" out there. I can't recall the exact name, but they are made with closed in spaces in mind like you have.
 

mkcoen

Well-known member
Steel Soldiers Supporter
5,637
381
83
Location
Spring Branch, TX
Mark,
There are some "welding primers" out there. I can't recall the exact name, but they are made with closed in spaces in mind like you have.
I wasn't really looking for a "weld thru" primer I just wanted to make sure to prime the areas that had been welded and had some extra POR-15 so just used that.

Here are a couple of shots of the bed toolbox once it was mated back up with the bed cross members. I was able to save a few of the old bolts but most of these are new.
 

Attachments

mkcoen

Well-known member
Steel Soldiers Supporter
5,637
381
83
Location
Spring Branch, TX
Have you made any more progress on this project?

Bert
I've been waiting for the weather to even out so I could start painting again. It's finally up where it's consistently 70+ this last week so I'll probably hit it again in the next couple of days.
 

mkcoen

Well-known member
Steel Soldiers Supporter
5,637
381
83
Location
Spring Branch, TX
I've been waiting for the weather to even out so I could start painting again. It's finally up where it's consistently 70+ this last week so I'll probably hit it again in the next couple of days.
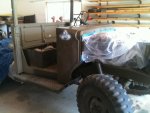
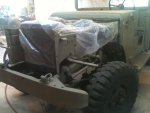
Well the "next couple of days" turned in to the "next couple of months." With the blood, sweat, (but no tears that I know of) supplied by keith_j we made some progress on the truck this week.

We finally got the viscosity of the Behr paint mixed right and was able to lay down some newly mixed Sinai Grey. We're doing it in pieces at the moment so all the cut ins can be done and then will likely do another complete coat once it's back together to catch the thin spots and any scuffs/scratches we cause in the reassembly. He's a few pics of what was accomplished the last couple of days.

The trickiest part right now is keeping my wife out of the shop. I want to surprise her that we're actually making progress.
 

Attachments

Top