• Steel Soldiers now has a few new forums, read more about it at: New Munitions Forums!

  • Microsoft MSN, Live, Hotmail, Outlook email users may not be receiving emails. We are working to resolve this issue. Please add support@steelsoldiers.com to your trusted contacts.

Working On The M561 Gama Goat

dmetalmiki

Well-known member
5,523
2,030
113
Location
London England
You may well find the steering eases up a whole lot after filling it. We fill ours with S.T.P. lasts well and does help the box. they are generally hard to steer in any event. (and) the rear steering box is easily accessable in the rear trailer.
 

mkcoen

Well-known member
Steel Soldiers Supporter
5,637
381
83
Location
Spring Branch, TX
TexAndy came by on Thursday and we got a lot accomplished including figuring out the steering issue.

I started the day off by pressure washing the driver's side of the crew compartment. It had accumulated several inches of gunk that was only partly taken care of by vacuuming. I hosed it down real good and then vac'd the residue out and dried things off. As dmetalmiki mentioned it's a bit tight down in the area where the fill plug is. I'm not particularly claustrophobic (I was a gunner on M60 and M1 tanks) but get that way a little when my shoulders are pinned. This was pretty close to that. Getting down wasn't really a big issue but I was worried (once down there) about getting back out without having to pull the steering wheel. I did take the time to commemorate the event with a photo. That's the clutch pedal on my forehead.

Steering Box Fill Plug.jpgMe and Clutch Pedal.jpg


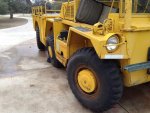
The LO states that the gear oil capacity for the front steering box is 1 pint. I added 16oz (that's 1 pint for those of you keeping track). Earlier we had swapped out the flat on the left center axle and now that the gear box was filled we put the front and rear up on jack stands and cranked the steering wheel as far as it would go in each direction. It took some effort to get it turning relatively easily and there are spots where it's easier than others but it does turn. After dropping it from the stands we took it for a spin - well we backed it down the driveway about 75' and then drove it back up testing how easily it steered. About the same as a deuce but definitely better than before.

Left Side Turn.jpgRight Side Turn.jpg

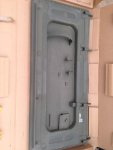
While we were tiding up the tools the FedEx man arrived with some new toys including my NOS tailgate.

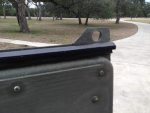
NOS Tailgate.jpgTailgate Seal.jpg

Another Ahab had asked about the tailgate seal and this one is about as well defined as you'll get.

A couple of other things we accomplished were repairing a partially melted battery post that was caused from arcing when we tried starting it the 1st time in NC and removing the 2 wooden storage boxes that the Forest Service added in the carrier. All in all a very productive day. Next stop is Brake City and I'm afraid we may be staying there a while.
 

papabear

GA Mafia Imperial 1SG
13,520
2,469
113
Location
Columbus, Georgia
The best I remember, "steering about like a deuce" is about as good as it gets. It will probably get a tiny bit better as you actually start using it and the lube gets worked into it and the rust gets knocked off.
 

dirtdobber

New member
41
0
0
Location
WILLISTON, TENN
I too got pinned under the steering wheel and got a little uneasy as I tried to figure out how to get myself out. I have bad knees and it wasn't helping any. I almost had to call my wife to come down and remove some of my heavy layers of clothing to help in the extradition.
 

TexAndy

Active member
1,427
16
38
Location
Bee County, Texas
The best I remember, "steering about like a deuce" is about as good as it gets. It will probably get a tiny bit better as you actually start using it and the lube gets worked into it and the rust gets knocked off.

Steering wheel needs knobs on it for increased leverage. Like the wheel on a ship.

HMS Canarygoat
 

mkcoen

Well-known member
Steel Soldiers Supporter
5,637
381
83
Location
Spring Branch, TX
Here are the other items the FedEx driver dropped off yesterday. All of these came from Red River Parts in New Boston, TX. I can't recommend them enough for some great items and awesome service!

009.jpg

From left to right in the photo are 2 new rear bumper brackets (they hold the rubber bullets that stop the tailgate from hitting the pintle hitch), Push To Stop plate (this goes in the bed for the switch to tell the driver to stop the vehicle), the mount that goes on the right front fender to hold the M60 machine gun (sorry I bought the last one), 2 battery hold down brackets, and finally the rack that goes on the front of the carrier.

Again these are great guys to deal with, quality NOS products, and reasonable shipping. I'm not getting paid to endorse them just really like to promote folks that have those 3 qualities.
 

Another Ahab

Well-known member
18,007
4,582
113
Location
Alexandria, VA
I too got pinned under the steering wheel and got a little uneasy as I tried to figure out how to get myself out. I have bad knees and it wasn't helping any. I almost had to call my wife to come down and remove some of my heavy layers of clothing to help in the extradition.
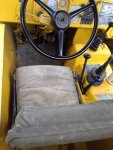
mkcoen, wondering if you could post a shot of the driver seat and steering wheel:

- Not totally picturing how tight that fit is there.

Be great if you could click a shot please next time you're doing something there with the camera.
 

mkcoen

Well-known member
Steel Soldiers Supporter
5,637
381
83
Location
Spring Branch, TX
mkcoen, wondering if you could post a shot of the driver seat and steering wheel:

- Not totally picturing how tight that fit is there.
026.jpg

Luckily the seat is removable with only 2 pins holding it in but you'll notice the entire cockpit area is as narrow as the seat is. In the selfie I was flat on my stomach with my knees bent over my back then you have to do an inch worm maneuver to get one shoulder free of the steering wheel and try to slide your head up between the wheel and side of the vehicle. I can understand why that's one area of PMCS that isn't done often enough.
 

Warthog

Moderator
Super Moderator
Steel Soldiers Supporter
13,774
234
63
Location
OKC, OK
In the selfie I was flat on my stomach with my knees bent over my back then you have to do an inch worm maneuver to get one shoulder free of the steering wheel and try to slide your head up between the wheel and side of the vehicle. I can understand why that's one area of PMCS that isn't done often enough.
I have got to see that picture. Mark the Contortionist.
 

doghead

4 Star General /Moderator
Staff member
Super Moderator
Steel Soldiers Supporter
26,246
1,182
113
Location
NY
I have replaced my front steering gear box and I needed assistance getting out of that area as well.
 

MWMULES

Well-known member
Steel Soldiers Supporter
In Memorial
5,580
349
83
Location
DESOTO, KANSAS
I had a bad 2 days back in the early 80's I went and volunteered to drive a goat from Topeka Ks to Camp Ripley Mn, Via interstate. Good thing was it was the advance party convoy and could drive 55, bad thing was at 55 the Detroit is a screaming demon. Getting in and out was a real pain like a formula V car and remember it would have been a lot easier with a removable steering wheel. I made sure I dove my assigned M151 home on the return trip.
 

OneLapper

New member
4
0
0
Location
NE Connecticut
I’m new this forum and have a particular interest in the Gama Goat, so I’ve been following this thread with quite a bit of interest. I’m new to MVs but own and restored an old Greyhound GM bus, including rebuilding it’s Detroit Diesel 8V71 engine. I’m a huge Detroit Diesel fan and actually came across the Gama Goat while looking for project with a DD 3-53 engine. I’ve downloaded the TMs and have read through most of them, I have to say the Gama Goat is a pretty cool machine!

I’m located in NE Connecticut and I see that there are a couple active SS members/Goat owners in the New England area. When the weather breaks I’m hoping that I can see some of these machines up close and maybe with some luck, pick one up. I’m a pretty good wrench too, so if there’s an owner out there that is looking for a hand working on one, I’d be thrilled to help out.
 

Another Ahab

Well-known member
18,007
4,582
113
Location
Alexandria, VA
I’m new this forum and have a particular interest in the Gama Goat, so I’ve been following this thread with quite a bit of interest.
Greetings OneLapper, you should go ahead and consider starting your own thread:

- That's preferred protocol here to avoid inadvertent thread hijacks (and it's funny because I'm one of the worst offenders).

- You could use your thread to help us track your progress starting a Goat "herd". And we could all give you a right and proper welcome, to boot.
 

OneLapper

New member
4
0
0
Location
NE Connecticut
Greetings OneLapper, you should go ahead and consider starting your own thread:

- That's preferred protocol here to avoid inadvertent thread hijacks (and it's funny because I'm one of the worst offenders).

- You could use your thread to help us track your progress starting a Goat "herd". And we could all give you a right and proper welcome, to boot.
No intent to hijack! More of a "thanks" to the OP for a great thread......
 

AMGeneral

Well-known member
2,301
115
63
Location
Connelly Springs, NC
Looks like you're coming along on the Goat nicely Mark,I do have a question,do your seat frames have a fiberglass seat pan under the canvas cushions or is it just the frame itself?
 

mkcoen

Well-known member
Steel Soldiers Supporter
5,637
381
83
Location
Spring Branch, TX
Looks like you're coming along on the Goat nicely Mark,I do have a question,do your seat frames have a fiberglass seat pan under the canvas cushions or is it just the frame itself?
Yes there are fiberglass frames. I've also seen other Goats with them as well.
 

mkcoen

Well-known member
Steel Soldiers Supporter
5,637
381
83
Location
Spring Branch, TX
I got a little more work done today but after taking a tumble out of the bed of the carrier I decided to take the rest of the day off.

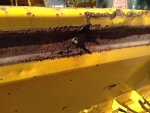
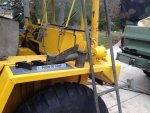
First thing I wanted to do was remove the step from the tailgate. I had thought that they used carriage bolts from the inside by taking the inner piece of plywood/sheetmetal off and drilling from the inside so not compromising the water tightness of the gate. I was wrong. Instead they simply drilled through the gate and mounted the step. I'm going to have to reconsider how to do it once I remount it on the new gate. I don't think I want to do it the same way they did but I'll need to research a little bit. If anyone has a M792 could you look at the gate and see how they bolted that?

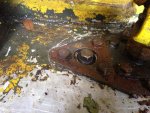
The 2 upper bolts went through the large piece of angle iron that runs along the top of the gate. There are 4 holding the angle on and then they drilled 2 more to secure the step. The first bolt came off fine, the second snapped, the third just turned so I grabbed the end with some vice grips in order to get the nut off, and the fourth still turned even holding it with the grips. I wound up just grabbing it tight and bending it until it broke.

You can see from the massive amounts of rust here that not all of the Goat panels are aluminum.
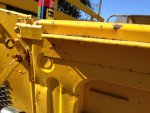

001.jpg002.jpg

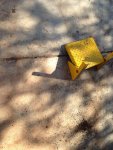
Here's the step after removal.

003.jpg

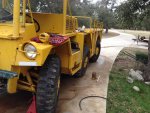
I pulled the remaining garbage (wooden boxes, blocks, dead 6TL batts, etc) out of the back. My plan was to pressure wash it this afternoon but a bruised knee and ego made me decide to just goof off the rest of the day.
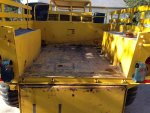
006.jpg

Next I pulled the expanded steel screens that were added over the non-stock tail lights. The stock lights will stick out beyond the recess (once I find some) so the screens wouldn't fit any way. The reflectors, which are now inside this area, are supposed to go above the opening. Inside should be the tail lights and B/O lights.
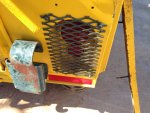
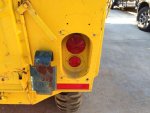
005.jpg008.jpg

Unfortunately the Forest Service stored the swim plugs for the hull in one of the wooden boxes that was anything but waterproof. If I ever want to try and swim this thing I'll need to find a few more of these.
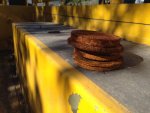
007.jpg

I may hit things again tomorrow as the temps are supposed to be up in the 80s. That'd sure beat pressure washing it at 38.
Next week I'm going to try and visit a friend to take pics of his Goat. I need to find out which holes are supposed to be there and which holes aren't.
 
Last edited:

mkcoen

Well-known member
Steel Soldiers Supporter
5,637
381
83
Location
Spring Branch, TX
Did a little more tinkering today. I pulled the rotted tailgate off and couldn't really see anything worth salvaging off of it so pitched it in the trailer headed to the dump. Removed the splash shield off the front of the carrier. It has one of the rungs snapped off so I had Red River send me a replacement and installed it. The question I have for those who've worked on these vehicles before is - what all holds the splash shield in? The old one is bolted in the center of the carrier and then the 2 end uprights are drilled and pinned in the stake pocket. The new one also bolts in the middle but there are no holes in the uprights to pin it. Was that a unit modification or was it a Forest Service modification?

001.jpg002.jpg
 
Last edited:

Another Ahab

Well-known member
18,007
4,582
113
Location
Alexandria, VA
You might already have mentioned this, but I can't recall:

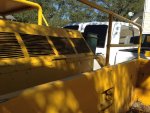
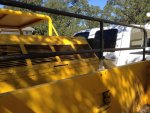
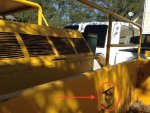
- Are these (threaded caps?) in the bed for an electrical connection or something?


Goat.jpg
 
Top
AdBlock Detected

We get it, advertisements are annoying!

Sure, ad-blocking software does a great job at blocking ads, but it also blocks useful features of our website like our supporting vendors. Their ads help keep Steel Soldiers going. Please consider disabling your ad blockers for the site. Thanks!

I've Disabled AdBlock
No Thanks