• Steel Soldiers now has a few new forums, read more about it at: New Munitions Forums!

  • Microsoft MSN, Live, Hotmail, Outlook email users may not be receiving emails. We are working to resolve this issue. Please add support@steelsoldiers.com to your trusted contacts.

Working On The M561 Gama Goat

dmetalmiki

Well-known member
5,523
2,030
113
Location
London England
We had a machine gun mount there on ours, but I removed it as it obsructed the door opening wide enough. Ours did not look quite like the one you have though as I remember.
 

dmetalmiki

Well-known member
5,523
2,030
113
Location
London England
You might already have mentioned this, but I can't recall:

- Are these (threaded caps?) in the bed for an electrical connection or something?


View attachment 541500
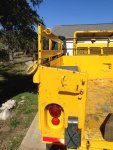
We have heavy duty connectors which go to a power distribution unit, which powers a mobile cooker and heating unit for boiling water.. And there was a small fold down bench to hold the cooking unit in place. (we removed all this.) I have seen these units in armoured cars Tanks and recovery vehicles. (although) I believe they are a standard british army item.
 

Warthog

Moderator
Super Moderator
Steel Soldiers Supporter
13,774
234
63
Location
OKC, OK
There is also a button for the passengers to signal the driver to stop.
 

mkcoen

Well-known member
Steel Soldiers Supporter
5,637
381
83
Location
Spring Branch, TX
Ever say you're going to get something done even if it kills you? Well I think the WH Express is trying to commit manslaughter. I already took a header out of the carrier that cost me a silver dollar sized piece of skin off my knee then today I got my feet wrapped up in the vac cord and did a face plant in the driveway (sorry no video). Sprained my wrist pretty good and I have to keep it hidden from the mrs or she won't let me play when no one is around.

I've got a couple of things going at once today. I've one of the brake drums unbolted and was waiting for some advice on how to get it off (thanks Doghead) and while that was simmering I started stripping the rear of the carrier. I'm going to have to wait for it to cool off a bit (yes this is TX. Sorry for you folks in MA) as the stripper is drying a little too quickly. Probably some time after 4pm it should be shaded enough I can finish it off. While the chemicals are cooking I'll get back to the brake drum and get it removed.

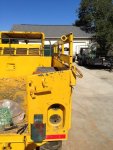
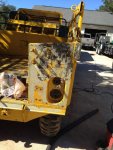
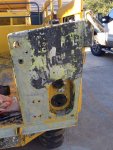
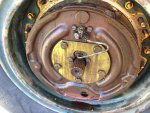
Here's a couple of shots of the stripping in process. I removed the cheapo tail light, reflector and bumperette. I'll need to get Keith_J to fill in a couple of extra holes the Forest Service put in the recess just in case I ever decide to try and float it.

001.jpg002.jpg003.jpg004.jpg
 
Last edited:

Another Ahab

Well-known member
18,007
4,582
113
Location
Alexandria, VA
Here's a couple of shots of the stripping in process. I removed the cheapo tail light, reflector and bumperette. I'll need to get Keith_J to fill in a couple of extra holes the Forest Service put in the recess just in case I ever decide to try and float it.

Going for a float seems like part of what makes a Goat special:

- But guessing that it's a mess afterwards, regressing all the axles, bearings, etc.

That right?
 
Last edited:

mkcoen

Well-known member
Steel Soldiers Supporter
5,637
381
83
Location
Spring Branch, TX
Well the first hub I started working on (not off yet) had about a pint of chocolate syrup in it. I know I read about oil in the hubs in one of the many Goat threads but don't recall which one so it's on to 'search' or just re-reading everything. I may actually hold off on the brakes until the copy of the -20 I just ordered shows up. Hopefully it's in a format I can share since the one in the TM section isn't working.

In the meantime I'll get more of the yellow to disappear. The weather is supposed to be decent the next couple of days so maybe I can get the back and at least one side finished.
 

Keith_J

Well-known member
3,657
1,325
113
Location
Schertz TX
I need to keep up with the schedule of my better half so we can work as a team...just have a little more drywall here to properly finish so my better half won't be filing for divorce.

I would recommend working on mechanical now. The yellow will only get easier to remove with weathering. Then the innate ugly USMC paint will remain.
 

mkcoen

Well-known member
Steel Soldiers Supporter
5,637
381
83
Location
Spring Branch, TX
I need to keep up with the schedule of my better half so we can work as a team...just have a little more drywall here to properly finish so my better half won't be filing for divorce.

I would recommend working on mechanical now. The yellow will only get easier to remove with weathering. Then the innate ugly USMC paint will remain.
I don't know anything about drywall work but I can run a roller if you need help priming/painting.

I got the info for removing the brake drums from another thread that DH directed me to. The issue I was running into today was that I couldn't identify the Jack Bolt holes. Once I got a look at them on the other thread I determined that all of the ones on my Goat are packed with NC red mud (the reason I couldn't locate them). Now that I know where they are I can get them cleaned out and pull the 1st drum to determine why it had so much oil in it. I also need to determine the condition of the pads and whether I need to get some different ones. I've been looking at pics of really nasty drums/backing plates and heard the story of DH's head wound while working on his so I'm geared for the worst while hoping for the best. We'll see tomorrow.
 

Keith_J

Well-known member
3,657
1,325
113
Location
Schertz TX
You are in LUCK! The drywall is all hung, taped and floated to level 5 flat but yes, prime and paint is still in progress. Prime now, as I had to prove texture is cover up for poor drywall skills.

Yes, it looks like fun as it is so,etching I have yet to see. Primary and secondary brake shoes, a first in military vehicles for me. Those pictures from Germany are not encouraging.
 

mkcoen

Well-known member
Steel Soldiers Supporter
5,637
381
83
Location
Spring Branch, TX
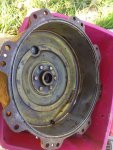
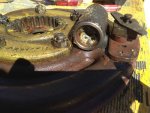
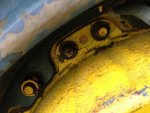
Got the left front brake drum off this morning. For those attempting this the Jack Bolts are 5/16 Fine Thread and there are 4 spots around the drum. Once you have the drum off I would suggest you immediatly back the Jack Bolts out of the opening. If you try to set the drum back and these are still extended you're likely going to crack the ears on the drum. Here's a shot of one of the holes that was filled with mud.

001.jpg

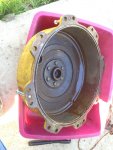
After cleaning those out and tightening down the bolts the drum slide off easily. I had drained a large amount of oil out yesterday so there wasn't much left but residue.

002.jpg004.jpg

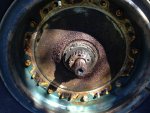
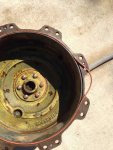
Everything looked in pretty good shape so I cleaned things up a little bit just to get a closer look.

005.jpg006.jpg

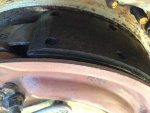
The pads look in great shape and while there's a little bit of surface rust on the drum there is no wear to it at all.

007.jpg

I'll have to see how the other pads look but if they're all the same I'll start believing the odometer might actually be correct (686 miles).

I need to research the drum gasket a little more but the one installed on this drum seemed to be a bit too large by 2" or so. Someone had also used what appears to be a silicone sealant on the inside of the groove as it has rubber glue consistancy.

Absolutely no fluid when I cracked the bleeder valve so I imagine the system is pretty empty. As the Forest Service had a bottle of Dot3 on the dash when we picked it up I'm guessing they put some of that in. I'm going to blow out the lines and replace it with Dot5 (have you priced any of that lately???) before buttoning everything back up.
 

doghead

4 Star General /Moderator
Staff member
Super Moderator
Steel Soldiers Supporter
26,246
1,182
113
Location
NY
The oil that came out of the drum, was more likely BFS.

Mine was like that too.

I tried cleaning the shoes, and also used a torch to boil the fluid off the shoes.

Learn from my experience and buy new shoes and install them instead.
 

doghead

4 Star General /Moderator
Staff member
Super Moderator
Steel Soldiers Supporter
26,246
1,182
113
Location
NY
I bought my kits at napa.

The shoes are readily available new on ebay.

M715 shoes are not the same, but can be modified to work.

For the cost, I regret I did not just replace them(based on the work and performance achieved). Please heed my advice.
 

Keith_J

Well-known member
3,657
1,325
113
Location
Schertz TX
If it is glycol brake fluid, the shoes can be salvaged with acetone. Silicone brake fluid requires dichloromethane or worse, carbon tetra chloride. You won't find either at Home Depot.

Getting new wheel cylinder overhaul kits might be interesting but as the Goat uses modern servo brakes, it is a single diameter cylinder. Unlike the M37 which has different diameter cylinders for primary and secondary as it isn't servo brake design or the M35 which uses same diameter cylinder but boosted brakes...

I have the Motive brake bleeder tool which will make life easier. Yes, silicone DOT5 is silly in price. Have you tried that mega online retailer named after a South American river?
 

M813rc

Well-known member
Steel Soldiers Supporter
4,242
3,348
113
Location
Near Austin, Texas
Terrible winter we are having in Texas, it was a blizzard-like 83 here yesterday. (Actually, the daft part here is it can be 83 one day, and 30 the next).

Two good used tail-lights in hand for you Mark, including the proper lenses.

I'll almost miss the yellow paint. Almost. I'm sure a row of small Waffle House logos will do, though.

Cheers
 

mkcoen

Well-known member
Steel Soldiers Supporter
5,637
381
83
Location
Spring Branch, TX
I had invited Keith_J to lunch just to unwind from the work yesterday, this morning, and my many bruises (including ego) from working on this. I had some nice pizza while Keith had a disgusting burger with Bleu cheese on it and we got to discussing the brakes. He decided it was best he come over and make sure I wasn't screwing things up. So....

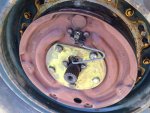
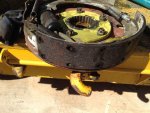
After lunch we pulled the backing plate and shoe assembly. I have to say this is a much easier task than on the M37. There was a lot of schmutz on everything and evident that the Dot3 had mixed in the area with the Dot5.

008.jpg

I cleaned that up while Keith dove into the pads and wheel cylinder. The cylinder was pretty nasty looking but after taking it apart it wasn't too bad inside. More cleaning, a little hone action and everything was put back together and reinstalled.

009.jpg010.jpg

As I mentioned the brake drum O-ring does not fit correctly. Keith thought it might be a reaction to the Dot3. In any case we left it out for now. Not going to be floated any time soon so not a pressing matter.

011.jpg

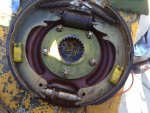
The right front looked much better when we got the drum off of it. The pads are date stamped '91 so obviously had some work done at one point. Also the wheel cylinder dust caps say "Made in Taiwan" compared to the factory ones on the left front. I have my fingers crossed that the left front was so bad due to it's proximity to the master cylinder and that the Dot3 intrusion didn't make it much further. Here's the right front assy just after we took it off.

012.jpg

We did find a set of the Jack Bolts in carrier drums so now have the issued items to pull the drums off with.
 
Last edited:

mkcoen

Well-known member
Steel Soldiers Supporter
5,637
381
83
Location
Spring Branch, TX
Cool, making progress anyways.

Did the schmutzed up WC actuate freely or was it stuck?

Did the MC have fluid in it?
Both WCs were stuck. Luckily a wooden dowel took care of that. The MC had some Dot3 in it but looked pretty clean otherwise.
 

Keith_J

Well-known member
3,657
1,325
113
Location
Schertz TX
Master cylinder looked new, just sediment on bottom. It pumps fine and seals look also new. Just needs good wheel cylinders on back 4 and a good flush, first with alcohol and then dry air. I have a Motive brand pressure bleeder which will seal with the top for full purge, flush and bleed. It kicks donkey on CUCV bleeding, it will do the same for gamma goats.

The one sticking point was getting axle splines lined up, we had to Jack the right front to rotate to alignment. We pushed the axle in and couldn't get the center bolt to grab on first attempt.
 
Top
AdBlock Detected

We get it, advertisements are annoying!

Sure, ad-blocking software does a great job at blocking ads, but it also blocks useful features of our website like our supporting vendors. Their ads help keep Steel Soldiers going. Please consider disabling your ad blockers for the site. Thanks!

I've Disabled AdBlock
No Thanks