• Steel Soldiers now has a few new forums, read more about it at: New Munitions Forums!

  • Microsoft MSN, Live, Hotmail, Outlook email users may not be receiving emails. We are working to resolve this issue. Please add support@steelsoldiers.com to your trusted contacts.

XM1027 - CUCV Crew Cab Build

tim292stro

Well-known member
2,118
41
48
Location
S.F. Bay Area/California
You make it sound so easy.
Even so, it's still a full day of work with three people and a forklift...

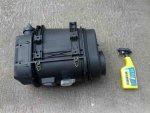
Here's a picture of the engine air-filter from store.Airflo.com out of Oregon (Donaldson PSD10, p/n: D100031):
IMG_20130914_140309_small.jpg

Shown with a retail Rain-X bottle for scale (a quarter was not big enough to see :naner:) - it requires a little banging on the passenger inner-fender to fit, but it will flow up to 700CFM at very little resistance (< 8" H[SUP]2[/SUP]O), so the turbo and engine should respond very well to the throttle inputs. It will be plumbed out the passenger fender on the way to the snorkel intake - so I won't be grabbing warm air from the engine compartment to fuel the fire :evil:.
 
Last edited:

tim292stro

Well-known member
2,118
41
48
Location
S.F. Bay Area/California
As I said in my last post - a full day of work with three people and a forklift... But we did it!!

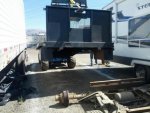
Started a bit out of order, moving the axles (this is my friend and Air Force buddy Matt driving the lift):
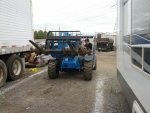
IMG_20130915_095229.jpg

Then we spent 3-1/2 hours getting 8 bolts off the flatbed - this was difficult not just because they were rusted in place, but because we couldn't get the wrench on the nuts (welded on tools boxes and other small stuff like the gas tanks and suspension in the way...) - that and we couldn't actually see the nuts:
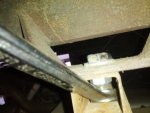
IMG_20130915_120047.jpg

Anyway, they came off eventually using some magic (Jedi stuff, they are still usable) - and we got to play with the forklift again:
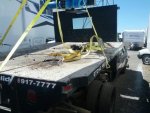
temp.jpg
temp_2.jpg

Matt and Pedram (high school friend I mentioned I reconnected with earlier in this thread, not pictured in any pictures actually - lucky guy :) ), cut off the clearancing steel for the flatbed that had been welded to the frame:
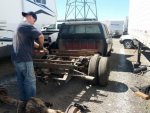
IMG_20130915_134722.jpg

Then we got to work stripping the front clip and separating the cab from anything attached to the engine:
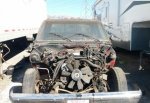
IMG_20130915_162420.jpg

And we pulled the cab and set it aside:
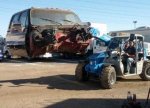
IMG_20130915_171709.jpg

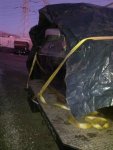
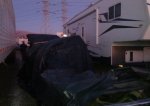
And as you can tell by the long shadows it was already after 4PM by this point (a bit after 5PM if memory serves). We then tore into the engine mounting and systems - retaining as much on the engine and tranny as possible for cucvnut (another Matt). After the sun really started going down, we had the engine out, shrink-wrapped, and dropped into the delivery truck (Pedram's):
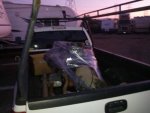
IMG_20130915_193647.jpg

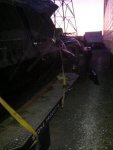
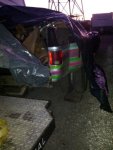
And though we didn't take pictures as we were doing it (sunlight was fading fast), we did get the original pickup bed on the original frame, and the body safely stored on the flatbed (now on the ground behind the truck). This is the perfect configuration for me to work on the frame and engine bay. The axles are "roughly in place" (I do need to remove the original suspension to do the 4WD suspension work).
IMG_20130915_193719.jpg
IMG_20130915_193711.jpg

Continued...
 
Last edited:

tim292stro

Well-known member
2,118
41
48
Location
S.F. Bay Area/California
IMG_20130915_193732.jpg

And everything was tucked in for the night:
IMG_20130915_193638.jpg

Then we had to deliver the engine and tranny to cucvnut - just a 20 minute drive, little traffic, didn't get separated. Of course my phone's navigation has a spell check that auto corrected south to north, and we ended up about 4 blocks from where we should of been... Fortunately cucvnut's friend Steve who we were meeting was understanding. After rigging up the engine hoist, we unloaded - and popped the overload valve on the hoist (this was a "wet" engine and transmission with all accessories - probably about 1500lbs). We did manage to get it safely to the ground, so all tasks were completed, and there were no injuries :). Nothing was broken that wasn't planned, and we managed not to knock out the power poles that supply Mountain View - but Matt and Pedram are now mocking me about Austin Powers, where the guy is yelling "Nooooo...." when he's 100 feet away from the roller and still manages to get run over. Apparently I was yelling "look out for that power pole" with 20-feet to spare...

Returned the forklift this morning at 6AM - so thanks to Ahern Rents (especially Sarah) for being flexible about the weekend rental with the will-call pickup (since they're right next door).

Anyway - Tylenol, Advil, Gatorade - and I still feel it this morning. Mostly in my hands (we used almost exclusively hand tools to do this job). One M***** ****er of a day, but still managed to do it all.


Thanks to Pedram and Matt for the manual labor - and thanks to cucvnut for providing an engine compartment to drop the 454 in - I'd have hated to see it just go to the junk yard.
 
Last edited:

tim292stro

Well-known member
2,118
41
48
Location
S.F. Bay Area/California
I should also mention that I arranged the rear-filler door and a good chunk of the fender from HAWKMAN Saturday, that will make it possible for me to install the third tank on the truck and have it look like it came that way from the factory. Thanks to HAWKMAN for working with me on that, I appreciate the time you took to get what I was asking for right.

Also got notice from UPS a bunch of parts are to be delivered today and tomorrow from last Monday's spending spree. Parts are also starting to ship from the in-laws, after they picked them up from 2002ford, so I'll be getting them soon as well.

Thanks again to both of those guys for supplying parts at reasonable prices :)
 
Last edited:

BleedDemon

Member
109
2
18
Location
Lake Charles, LA
I should also mention that I arranged the rear-filler door and a good chunk of the fender from HAWKMAN Saturday, that will make it possible for me to install the third tank on the truck and have it look like it came that way from the factory. Thanks to HAWKMAN for waorking with my on that, I appreciate the time you took to get what I was asking for right.
Three fuel tanks?
 

tim292stro

Well-known member
2,118
41
48
Location
S.F. Bay Area/California
Three fuel tanks?
Two 20/34 gallon saddle tanks (engine will draw from Driver's side only), and one 40 gallon center rear where the spare would normally go (and where the air compressor and tank are attached right now). The idea is that with a 48kW PTO genny later, I want to be able to do rated output for 24-hours and then still be able to drive to a gas station to refill for the next day with a 100 mile reserve range. I should end up with about 100+ Gallons of diesel accessible on-board. Three "Reverso" brand reversible transfer pumps will move fuel from the rear tank to the two saddle tanks, and keep the two saddle tanks level. That's the only other automation I'm putting in the chassis.

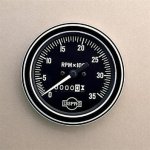
Running the genny from the PTO is also why I'm putting in a tach with an hour meter:
R8598__67791.1348170826.1280.1280.jpg

If I don't run the genny, and assuming I get over 20MPG, I should almost be able to drive coast to coast on one very expensive fill-up. :driver:

The other side of that is, my dash is going to look like something out of a commercial jet-liner with all of the mechanical gauges.
 
Last edited:

Pfab

New member
2
0
0
Location
Fremont, CA
Hey buddy. Just catching up here for future things. Glad you got the crap off the frame. But I don't understand why you put the bed back on the frame without clearing things up. Now you have more work to do to just move it out of the way again. Maybe your plans are different from what I expected to see. But anyways. Lets keep going.

Oh yeah and my tailgate now has more character to it. I didn't really think a 1500# motor with tranny would do that much damage to it. Oh well. If anyone here has a spare white 06 GM tailgate they need gone that's in decent shape let me know. Oh full size that is.
 

Pfab

New member
2
0
0
Location
Fremont, CA
Pfab what motor is your avatar ?
That my friend is a 1995 Land Rover 4.2 with all new parts. I converted my Discovery1 from a 3.9 to a 4.2L. Land Rover used the same Buick 215 V8 from the 60's in most of their trucks today. This truck came with a 3.9L. They did have a few different bores. 3.5, 3.9, 4.0, 4.2, 4.6, and I think they also went back to a 4.4L.They are known for having slipped liners and cause the head gaskets to fail and mine went out a few months after I bought the truck. The 4.2 only came from the long wheelbase Range Rover Classics. The 4.2 was supposed to be the most reliable. So I did a complete overhaul. And painted the valve covers and manifold to match the camel trophy rigs they have. It came out great.
 
Last edited:

tim292stro

Well-known member
2,118
41
48
Location
S.F. Bay Area/California
Yesterday on my way home I shimmed up the bed with lumber - it's off the air-bag support cross-beam. I have enough space to get that out without pulling the bed again. Biggest reason for putting the bed on the truck was "space" - I only have a 10x40 stall to keep everything in. I'll be doing the front suspension and engine bay work first, then will fit the cab back down on the frame where I will need to cut the firewall and floor so that the new engine and transmission will fit under the floor. While the cab is off the flatbed again we can cut that up and set the pickup box back on the ground behind the truck.

How we have it stacked right now gives me a few key things:
  1. I can get to the front suspension and engine bay to do the work there completely unobstructed
  2. The bed is off the ground so that I can do some sheet metal work that I needed to do
    • Add the third filler door
    • Make a new front wall to the bed with a headache rack and an exhaust cutout
    • Replace the broken fiberglass fenders that were sitting on the ground
  3. The cab is not sitting on the ground, so rust isn't as much of a concern as it otherwise would be, and I can continue working on the cab cleanup where it is.
    • Need to add a clutch pedal and master cylinder to the firewall
    • Need to replace the steering column (HMMWV column should be arriving this week)
    • The rusted out floor pan on the passenger side - I can get to the top and bottom fine where it is (no frame in the way)
    • I noticed some corrosion in the C-pillar on the passenger side - I want to take a closer look at that (hopefully don't need to find a new cab corner...)
    • Need to clean up all of the extra "aftermarket" holes that are everywhere in the ceiling panel, floor pan, and firewall. Only water tight pass-throughs and the planned drain holes should remain
    • I can start mocking up the dashboard in cardboard or 1/8" MDF - I have a lot of gauges to fit in there...
    • I am adding some door latches to all 4 doors, it should grab in 6-points (including the factory hinges) when I'm done. It will still open using a single inside and single outside release.
    • Front two doors are getting a new lock system of my own design.
    • Replacing all of the power lock actuators and window motors with 24Volt hardware
  4. I also need to drain that passenger side fuel tank of 91 octane - probably run it through a filter and drop it in my truck for the next few weeks. I can get to all of the hanger bolts as-is, so that won't be complicated.
  5. Need to tear out the rest of the under-cab electrical and plumbing - I'm not keeping anything but the brake lines original (unless I find damage).
  6. Need to start mocking up the exhaust after the engine, transmission, and transfer case are in and the cross-members welded on


There is still a bunch of stuff left to do at this stage - and I'm booked for the next week and a half on other stuff. With my luck we are probably looking at a wet and early winter - so I'm have my fingers crossed that the weather holds out. :beer:
 
Last edited:

tim292stro

Well-known member
2,118
41
48
Location
S.F. Bay Area/California
I haven't confirmed this, but it seems like Grote discontinued their entire military lighting line. Last month parts were difficult to find at a bunch of vendors - and this month nobody says they can even order them (most are removed from Grainger even). I think I got the last four fixtures for my set from an e-place purchase today - but not in the correct metal color (I was going to repaint them all lusterless 686A anyway).
 
Last edited:

tim292stro

Well-known member
2,118
41
48
Location
S.F. Bay Area/California
Last night, received 24Volt high flow fuel pump (primary pump - keeping mechanical as secondary fail-safe), and pre-cleaner top for the "snorkel". I'm going to bring the TopSpin to the cab and make sure it doesn't block to much view at the top of the passenger side of the windshield - it also uses a 5" pipe for the intake (everything is big :)).

IMG_20130918_101556.jpg
 
Last edited:

tim292stro

Well-known member
2,118
41
48
Location
S.F. Bay Area/California
Got the first box from the in-laws last night (front end parts from 2002ford purchase). Didn't have a chance to open it yet. I also received the Truck-Lite front turn signal fixtures I'm going to slide into the original housings. It was a pain to find a 24Volt Front/Turn/Park LED fixture in 2x6 oval - you can find them in 4" round all day long (and 12volt makes it even easier). Weird.

I have company visiting for the next few days, so other than updates on receiving parts, I'm probably not going to do much more on the truck than give tours to those who are visiting :(

Hopefully I'll get to pick at it a few times though :jumpin:.


[EDIT:] HAWKMAN has informed me the rear filler stuff is on the way, and the last detail items are arranged (pending payment from me next week) from lavarok - Sorry lavarok, I've been using a "c" at the end or your username for the last few weeks :( [/EDIT]
 
Last edited:

tim292stro

Well-known member
2,118
41
48
Location
S.F. Bay Area/California
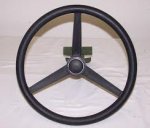
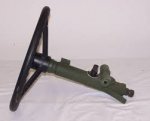
Received two more boxes of front end parts from the in-laws (SS Member 2002ford purchase). Also received the HMMWV steering wheel and column from BPB Surplus (snagged these images from Google cache):

front.jpgside.jpg

I will be attaching that to the new dash board I'm building from scratch. Much better than the O'Reilly-special hardwood racing steering wheel it had IMHO.
 

tim292stro

Well-known member
2,118
41
48
Location
S.F. Bay Area/California
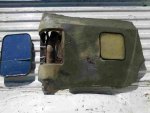
Received my third filler door from HAWKMAN - Thanks!! Exactly what I was looking for and then some :).

1380130924105.jpg

Also received the passenger-side HMMWV mirror - these mirrors are larger than the OEM CUCV side mirrors (both vertically and horizontally) and also feature a blind-spot mirror element which I'm addicted to. Rained like crazy Saturday (bummer), will be looking to get back to the truck this coming weekend.
 
Last edited:
Top