• Steel Soldiers now has a few new forums, read more about it at: New Munitions Forums!

  • Microsoft MSN, Live, Hotmail, Outlook email users may not be receiving emails. We are working to resolve this issue. Please add support@steelsoldiers.com to your trusted contacts.

Bringing back to life a 2009 HMMWV M1165A1 from GovPlanet - total newbie, please help...

T9000

Well-known member
Steel Soldiers Supporter
488
368
63
Location
California
Yup, radiators that go in the turbo H1 are not the same length as the ECV turbo HMMWV.
So if you call a company and look for a radiator for a turbo HMMWV, you may end up with a shorty. Some folks dont know the difference between humvee and H1.
Exactly right! I did say that mine is longer and offered to drive to their place so they can see it and maybe make some like Mogman said, but they said, no need we are already making them, it's on our web site (the short one).

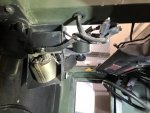
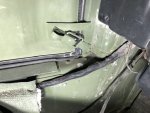
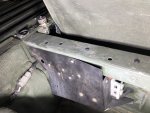
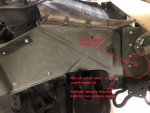
BTW Action, you seem very knowledgeable, I am thinking to remove the engine bay side panel to get access to the radiator front corner, where the leak seems to come from, I could also feel there are some hoses underneath, on the other side of the panel, and maybe that's what's leaking and not the radiator as it happened with several fuel hoses so far:
Panel1.jpg

Please see my comments about the two screws & bracket in question that I am thinking to remove instead of the screw above that appears to be held by a nut on the other side which I cannot reach without removing the whole radiator and heat exchanger, which is what I am trying avoid.

EDIT: I meant, "Instead (of removing the top bolt held by the other side nut), reamove bracket held by the two screws below" (forgot the comma after instead)

What do you think/ recommend?
 

Action

Well-known member
3,576
1,559
113
Location
East Tennessee
View attachment 855891
What do you think/ recommend?
You told them that yours is longer. 😆
As for the nut you can’t reach. I can, and that us how i remove the splash shield. I guess you could unbolt the bracket instead. Then the other 2 bolts across the bottom of shield, and one (forward) of the 2 bolts by the air filter. Remove the 4 bolts at the front of the splash shield. There are not nuts on the back.
if you need to remove the panel that the turn signal wiring screws into..,there are 2 phillips screws. One on top, one on side. You dont need to reach the back. There are j-clips.
It will probably be easier to get the splash shield out if you remove that forward panel first. Go ahead and unscrew the electric connector. The panel can just hang down out of the way.
 

T9000

Well-known member
Steel Soldiers Supporter
488
368
63
Location
California
You told them that yours is longer. 😆
As for the nut you can’t reach. I can, and that us how i remove the splash shield. I guess you could unbolt the bracket instead. Then the other 2 bolts across the bottom of shield, and one (forward) of the 2 bolts by the air filter. Remove the 4 bolts at the front of the splash shield. There are not nuts on the back.
if you need to remove the panel that the turn signal wiring screws into..,there are 2 phillips screws. One on top, one on side. You dont need to reach the back. There are j-clips.
It will probably be easier to get the splash shield out if you remove that forward panel first. Go ahead and unscrew the electric connector. The panel can just hang down out of the way.
Hahaha, I didn't realize how the longer part sounded until you brought it up, and on top of that, there was a lady who answered the phone that I told it to...hilarious

Yes, I did mentally calculated that the forward panel needs to move first in order for the splash guard (thank you for the correct term :) to clear the air cleaner at the back. And yes, the forward panel is threaded so no nuts to deal with...I presume now that you confirmed there is a nut on the other side, I can see how you maybe reach it from the top, by moving that rubber cover at the heat ecxhanger edge.

By the time I am done with all these items, there will be many beers I owe you, I would send the order for pickup at a local Costco or Walmart by your place if I know what your favorite beer is? :)
 

Action

Well-known member
3,576
1,559
113
Location
East Tennessee
Hahaha, I didn't realize how the longer part sounded until you brought it up, and on top of that, there was a lady who answered the phone that I told it to...hilarious

Yes, I did mentally calculated that the forward panel needs to move first in order for the splash guard (thank you for the correct term :) to clear the air cleaner at the back. And yes, the forward panel is threaded so no nuts to deal with...I presume now that you confirmed there is a nut on the other side, I can see how you maybe reach it from the top, by moving that rubber cover at the heat ecxhanger edge.

By the time I am done with all these items, there will be many beers I owe you, I would send the order for pickup at a local Costco or Walmart by your place if I know what your favorite beer is? :)
The rubber seals on top of the splash guards should be leaning out away from the radiator. The metal tabs hold it up against bottom of hood. Bend those tabs towards the tire.
 

Mogman

Moderator
Staff member
Moderator
Steel Soldiers Supporter
7,018
9,702
113
Location
Papalote, TX
Yup, radiators that go in the turbo H1 are not the same length as the ECV turbo HMMWV.
So if you call a company and look for a radiator for a turbo HMMWV, you may end up with a shorty. Some folks dont know the difference between humvee and H1.
Not all turbo HMMWVs are ECV
 

T9000

Well-known member
Steel Soldiers Supporter
488
368
63
Location
California
Ok I am back in the trenches…under the truck…I fixed the fuel leaks including at the check valves and everytime I think it’s finally all good…boom…there is another leak further down the line…now it somewhere towards the top of fuel tank…it’s very small…few drops over 1/2 day and only after I fill up….it’s either the top breather hose or the top seal…is there a way to drop the fuel tank without removing the drive line?

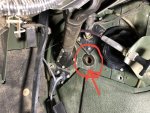
i also have a small play in the steering wheel/ column (the steering wheel turns about 1/2” left or right without the tires), where right around where the wheels are straight and when I started looking at it, found this opening (marked in red in the picture below) which appears to be for a hose or harness…is something missing?


E2E1DA68-5911-420A-84D5-75088A5A39B7.jpeg
 

Action

Well-known member
3,576
1,559
113
Location
East Tennessee
There is an access panel on the tunnel to get to top of fuel tank. If it is the big rectangle seal under the metal plate, drop the tank to replace. I remember reading somewhere not to fill it up.
the access panel may be under your rear evaporator, near the RH rear seat.
 

T9000

Well-known member
Steel Soldiers Supporter
488
368
63
Location
California
There is an access panel on the tunnel to get to top of fuel tank. If it is the big rectangle seal under the metal plate, drop the tank to replace. I remember reading somewhere not to fill it up.
the access panel may be under your rear evaporator, near the RH rear seat.
Ok, I will remove the evaporator to check for the access panel.
In the manual it said it is OK to fill the tank, but after you mentioned it, I did a search and voilà!..found this article saying to only fill the tank to 3/4:


There is a note in the article saying that manual in TM 9-2320-387-10 it indicates filling to only 3/4, but I could not find anything in the one I have from June 2009.
Are they referring to a newer manual version from September 2012? Does anyone have that?
 

Action

Well-known member
3,576
1,559
113
Location
East Tennessee
Ok, I will remove the evaporator to check for the access panel.
In the manual it said it is OK to fill the tank, but after you mentioned it, I did a search and voilà!..found this article saying to only fill the tank to 3/4:


There is a note in the article saying that manual in TM 9-2320-387-10 it indicates filling to only 3/4, but I could not find anything in the one I have from June 2009.
Are they referring to a newer manual version from September 2012? Does anyone have that?
Newer manuals are restricted access.
Dist Restriction CodeC U.S. GOVERNMENT AGENCIES AND THEIR CONTRACTORS ONLY
 

T9000

Well-known member
Steel Soldiers Supporter
488
368
63
Location
California
Looks like a body plug to me.
OK, good, on the other side there is a sleeve seal like that would normally wrap around a hose or cable and it feels waxed to repel water and thought maybe there was something that was removed. Thanks!
 

T9000

Well-known member
Steel Soldiers Supporter
488
368
63
Location
California
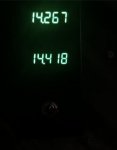
I built a little box with two voltmeters to check how well the two batteries are balanced. It has a disconnect switch to not draw any current when it is off.
Right now they are within 24mV of each other (the truck is OFF and didn't drive it for about two days), which is not too bad, but if they drift too far apart, the higher voltage one will start to carry more and more current and wear out sooner.
Next step, I am boosting the voltage to be higher for AGM batteries (about 14.5 to 14.7 and to be balanced within one millivolt or so between the two batteries.
The mean voltage right now is about 28.5V, or about 14.25V per battery (if it was evenly divided, but it isn’t).
14.25V is on the low side for an AGM battery.

Volts.PNG.png
 

Mullaney

Well-known member
Steel Soldiers Supporter
Supporting Vendor
7,778
19,912
113
Location
Charlotte NC
I built a little box with two voltmeters to check how well the two batteries are balanced. It has a disconnect switch to not draw any current when it is off.
Right now they are within 24mV of each other (the truck is OFF and didn't drive it for about two days), which is not too bad, but if they drift too far apart, the higher voltage one will start to carry more and more current and wear out sooner.
Next step, I am boosting the voltage to be higher for AGM batteries (about 14.5 to 14.7 and to be balanced within one millivolt or so between the two batteries.
The mean voltage right now is about 28.5V, or about 14.25V per battery (if it was evenly divided, but it isn’t).
14.25V is on the low side for an AGM battery.

View attachment 857267
.
Neat idea!!
Seems like monitoring both batteries independently is a smart plan too.
 

T9000

Well-known member
Steel Soldiers Supporter
488
368
63
Location
California
.
Neat idea!!
Seems like monitoring both batteries independently is a smart plan too.
Well, I am one of those guys that needs to know what’s going on inside lol…if everything is automated and working correctly then is one less thing to worry about , but I feel better knowing, at least until I learn more about the truck and until I make/ install an automatic battery charging booster & balancer .
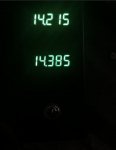
Here are some values with the engine running where the back battery charging voltage is higher by at least 0.15V while the front one is well below the AGM charging voltage of at least 14.5V, which over time will lead to sulfation and capacity loss:


6B9720A2-7CF9-4647-8DD2-55D549E0C1C2.jpegF9DE7A07-191E-47FC-B01A-ABD5D3C1E54F.jpeg

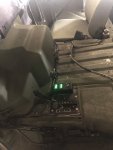
I installed it temporarily by the shifter until I find a good place for it along with other things I am planning to add.

A734FA08-4319-487D-AF69-C6E5FF309ABB.jpeg
 
Last edited:

Action

Well-known member
3,576
1,559
113
Location
East Tennessee
Well, I am one of those guys that needs to know what’s going on inside lol…if everything is automated and working correctly then is one less thing to worry about , but I feel better knowing, at least until I learn more about the truck and until I make/ install an automatic battery charging booster & balancer .
Here are some values with the engine running where the back battery charging voltage is higher by at least 0.15V while the front one is well below the AGM charging voltage of at least 14.5V, which over time will lead to sulfation and capacity loss:


View attachment 857338View attachment 857339

I installed it temporarily by the shifter until I find a good place for it along with other things I am planning to add.

View attachment 857340
Are you taking these readings with rpm at idle or at normal driving rpm?
 

T9000

Well-known member
Steel Soldiers Supporter
488
368
63
Location
California
Are you taking these readings with rpm at idle or at normal driving rpm?
Right now it's at idle in the garage, didn't drive it yet, but I will later today.
I am hoping the voltages to get higher, I think the manual says to test it around 1,500rpm?
 

T9000

Well-known member
Steel Soldiers Supporter
488
368
63
Location
California
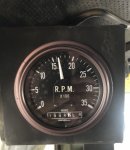
I just ran it around 1,600rpm with the throttle lock and the front battery voltage went up a little, by about 0.1V to 0.2V which brought them closer together, but still on the low side for AGM (great voltages for flooded batteries). I will test it more while driving at higher rpms and report back.


3202AA96-6B11-4A40-8C25-81BA29BE89C4.jpegFE1C16B1-70F4-44C1-9A6E-14A2A155284A.png2ED6B650-0C54-45C1-BA53-54B4DFCFB563.png0FA829BF-27F5-4ABD-A44C-2289417E58F0.png
 

T9000

Well-known member
Steel Soldiers Supporter
488
368
63
Location
California
BTW, my batteries were both manufactured in October 2021 so they are not that far apart, being newer and you may see larger deviations between the front and rear battery in older ones. Given how very basic the charging system is, with no active balancing, the numbers in my case are good and could be different for others. This is something to look at if anyone has to replace batteries more often than they think they should.
 

T9000

Well-known member
Steel Soldiers Supporter
488
368
63
Location
California
The voltage stays about the same or it gets lower at higher RPMs:
19D88FA3-0538-430E-B259-0B288725EA43.pngF22C2238-1EBE-4463-B2DE-83259350205E.pngAD23B08E-AB22-4D5C-9D4D-976DFEC23C75.png

And pardon the sand, I hosed it 3-4 times and still the amount of sand left inside and everywhere else is huge. I will eventually get it all out :)
 
Top
AdBlock Detected

We get it, advertisements are annoying!

Sure, ad-blocking software does a great job at blocking ads, but it also blocks useful features of our website like our supporting vendors. Their ads help keep Steel Soldiers going. Please consider disabling your ad blockers for the site. Thanks!

I've Disabled AdBlock
No Thanks