• Steel Soldiers now has a few new forums, read more about it at: New Munitions Forums!

  • Microsoft MSN, Live, Hotmail, Outlook email users may not be receiving emails. We are working to resolve this issue. Please add support@steelsoldiers.com to your trusted contacts.

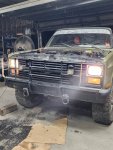
Dark Seas M1008 Project

DarkSeas

Well-known member
201
309
63
Location
Leland, N.C.
Think I had a eureka moment at work thinking about my ground situation. I don't recall a cable going from negative bus to frame, likely why a jumper cable from starter to frame allowed my GEN1 light and starter to work again - I don't think I had any other ground path from motor to batteries, and these were all grounding through the ground strap we made at the back of the motor. The starter burning it last weekend may have finally did the temporary ground strap in.

I might need to ground from intake stud to negative bus bar, negative bus bar to frame, and replace the ground strap from intake stud to firewall (cab). Will check these connections tonight. Going to get back at it and try and get her idling to temperature so I can make line-width adjustments to the IP. Will be taking lots of pictures and videos, should be fun.
 

WWRD99

Well-known member
Steel Soldiers Supporter
1,111
1,704
113
Location
York Pa
Think I had a eureka moment at work thinking about my ground situation. I don't recall a cable going from negative bus to frame, likely why a jumper cable from starter to frame allowed my GEN1 light and starter to work again - I don't think I had any other ground path from motor to batteries, and these were all grounding through the ground strap we made at the back of the motor. The starter burning it last weekend may have finally did the temporary ground strap in.

I might need to ground from intake stud to negative bus bar, negative bus bar to frame, and replace the ground strap from intake stud to firewall (cab). Will check these connections tonight. Going to get back at it and try and get her idling to temperature so I can make line-width adjustments to the IP. Will be taking lots of pictures and videos, should be fun.
You should have a ground going from the last intake post to the ground bar on the firewall. The body ground goes off the same stud to the body.

Sent from my SM-S906U using Tapatalk
 

DarkSeas

Well-known member
201
309
63
Location
Leland, N.C.
Got it. Fabbed up a thick 2ga ground I had in the bed of the truck from the old battery wiring. Worked perfect and no more smoking. Amazing.

Got her fired up and warmed up. Let her sit and idle for a few minutes then began making IP adjustments.

IP adjustments smoothed out my idle by about 80% and cleared the smoking issue by about 80%. I will need to compile my videos and pictures somehow to show how the motor ran at each timing adjustment.

Even with adjustments she was still puffing out diesel in her exhaust. A bit of throttle really smoothed the motor out - you'll be able to see once I've got the video(s) posted.

20231011_191329.jpg
 

DarkSeas

Well-known member
201
309
63
Location
Leland, N.C.
Okay, here are the adjustments and videos. The links go to YouTube videos I posted.

1. Pre-adjustment. IP alignment photo:

Screenshot_20231012_115122_Gallery.jpg
Looks spot on, maybe a hair toward the driverside.

I took this VIDEO while we got her fired up and were keeping throttle on her to keep the motor alive. You can see the smoking.

I took THIS video once she was warmed up and idled without throttle.

2. Adjusted the IP to the driverside. Line image:
20231011_185328.jpg

Likely advanced it too far forward here, but it ran much nicer this way. See following videos.

This is the video of the the motor idling/running with this timing setup.

We cut the motor off and just bumped the key, this is the video of it firing back up immediately. I did not like the quick knock at the start, but I was really impressed how easy it fired right back up.

3. We moved the IP to the passenger side, just to see what it would do. Likely adjusted too far, but we wanted to just check:
20231011_185607.jpg

Here is a video of us having a little difficulty starting up and the sounds of a clearly upset motor. This was immediately after the driverside adjustment startup video. We cut the motor off immediately and adjusted back to driverside again.

4. Adjusted back to driverside, and IP current timing:

No photo, will grab one at the garage when I get home next week.

This is a video of the motor running on its own. Idling, no throttle. Little clacking with hand throttle input at the start. You can clearly see the smoking issue is much better. Friend in cab says it felt smoosmoot with first driverside adjustment we had. Will have to grab a picture later and compare the two adjustments.

Final video I took last night. Driverside is smoking more than passenger side. Smoking is down a lot from the original position.


Enjoy, feedback welcome. She lives, cheers.
 

WWRD99

Well-known member
Steel Soldiers Supporter
1,111
1,704
113
Location
York Pa
Any chance the fuel is bad or has water in it? Fuel filter blocked up some? Could be loaded up on diesel in the cylinders might smoke for a bit.

Sent from my SM-S906U using Tapatalk
 

DarkSeas

Well-known member
201
309
63
Location
Leland, N.C.
Any chance the fuel is bad or has water in it? Fuel filter blocked up some? Could be loaded up on diesel in the cylinders might smoke for a bit.

Sent from my SM-S906U using Tapatalk
There's a possibility. I was going to siphon out some fuel from the tank to see what it looked like last weekend, but my rabbit decided he was going to help himself to some plastic and ate like 5 holes in the siphon.

Edit to mention: I say possibility because from spring-fall 2022 the truck sat outside in the yard. No gas cap (the fuel door is there but no cap on the filler neck). I bought some fuel in the spring of 2023 and we added fresh diesel to the tank, about 2-3 gallons. Trucks still in the garage. Not sure how quickly fuel can be contaminated in those conditions.

Other than that, the fuel filter is new, I replaced it earlier this year when we were firing it up in the spring. Not sure of the status of the water separator drain, it doesnt seem clogged up.

No clue on the status of the water in fuel light, either. It probably doesn't work, although it is plugged in on the motor side.

I did try and look up examples of water in fuel to see what a diesel motor would run like if it was having a water issue. Couldn't find any examples of what that looks like.
 
Last edited:

Mullaney

Well-known member
Steel Soldiers Supporter
Supporting Vendor
7,696
19,723
113
Location
Charlotte NC
There's a possibility. I was going to siphon out some fuel from the tank to see what it looked like last weekend, but my rabbit decided he was going to help himself to some plastic and ate like 5 holes in the siphon.

Edit to mention: I say possibility because from spring-fall 2022 the truck sat outside in the yard. No gas cap (the fuel door is there but no cap on the filler neck). I bought some fuel in the spring of 2023 and we added fresh diesel to the tank, about 2-3 gallons. Trucks still in the garage. Not sure how quickly fuel can be contaminated in those conditions.

Other than that, the fuel filter is new, I replaced it earlier this year when we were firing it up in the spring. Not sure of the status of the water separator drain, it doesnt seem clogged up.

No clue on the status of the water in fuel light, either. It probably doesn't work, although it is plugged in on the motor side.

I did try and look up examples of water in fuel to see what a diesel motor would run like if it was having a water issue. Couldn't find any examples of what that looks like.
.
Stick your siphon tube in the tank. Shove it all the way down to the bottom - since fuel floats on water - and pull a gallon or so then pour some into a glass jar. Let it sit overnight and it should separate back to water on one level and fuel on the other.

Might want to be extra careful that the rabbit doesn't knock over your sample jar. Don't want you to end up with the Great Chicago Fire in your garage! "There'll be a hot time in the old town tonight!"
 

DarkSeas

Well-known member
201
309
63
Location
Leland, N.C.
.
Stick your siphon tube in the tank. Shove it all the way down to the bottom - since fuel floats on water - and pull a gallon or so then pour some into a glass jar. Let it sit overnight and it should separate back to water on one level and fuel on the other.

Might want to be extra careful that the rabbit doesn't knock over your sample jar. Don't want you to end up with the Great Chicago Fire in your garage! "There'll be a hot time in the old town tonight!"
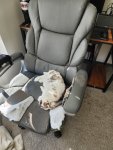
Can do. Will pick up a new siphon when I get home and try that out. Here's the evil rat:
20231009_162840.jpg
My desk chair is a lost cause, it's been broken for years though so I don't really care. He loves chaos.
 

dougco1

Well-known member
Steel Soldiers Supporter
867
647
93
Location
Cooperstown NY
Okay, here are the adjustments and videos. The links go to YouTube videos I posted.

1. Pre-adjustment. IP alignment photo:

View attachment 908059
Looks spot on, maybe a hair toward the driverside.

I took this VIDEO while we got her fired up and were keeping throttle on her to keep the motor alive. You can see the smoking.

I took THIS video once she was warmed up and idled without throttle.

2. Adjusted the IP to the driverside. Line image:
View attachment 908057

Likely advanced it too far forward here, but it ran much nicer this way. See following videos.

This is the video of the the motor idling/running with this timing setup.

We cut the motor off and just bumped the key, this is the video of it firing back up immediately. I did not like the quick knock at the start, but I was really impressed how easy it fired right back up.

3. We moved the IP to the passenger side, just to see what it would do. Likely adjusted too far, but we wanted to just check:
View attachment 908058

Here is a video of us having a little difficulty starting up and the sounds of a clearly upset motor. This was immediately after the driverside adjustment startup video. We cut the motor off immediately and adjusted back to driverside again.

4. Adjusted back to driverside, and IP current timing:

No photo, will grab one at the garage when I get home next week.

This is a video of the motor running on its own. Idling, no throttle. Little clacking with hand throttle input at the start. You can clearly see the smoking issue is much better. Friend in cab says it felt smoosmoot with first driverside adjustment we had. Will have to grab a picture later and compare the two adjustments.

Final video I took last night. Driverside is smoking more than passenger side. Smoking is down a lot from the original position.


Enjoy, feedback welcome. She lives, cheers.
I think bad/stuck injectors are causing most if not all of your issues.
You mentioned you installed new-remanufactured injectors in an earlier post and your assuming all is good.
I bought some rebuilt injectors on ebay a few years back "trying to save some money" and found them to be worse than my originals. It did the same thing to my truck as your videos show "smoking badly & running rough". You may want to have your original injectors rebuilt at a quality shop or buy new OEM injectors before you spring for a new injector pump. Just my humble opinion.
 

DarkSeas

Well-known member
201
309
63
Location
Leland, N.C.
I think bad/stuck injectors are causing most if not all of your issues.
You mentioned you installed new-remanufactured injectors in an earlier post and your assuming all is good.
I bought some rebuilt injectors on ebay a few years back "trying to save some money" and found them to be worse than my originals. It did the same thing to my truck as your videos show "smoking badly & running rough". You may want to have your original injectors rebuilt at a quality shop or buy new OEM injectors before you spring for a new injector pump. Just my humble opinion.
I mean it is good to check. I will see if the IP rebuild shop also does injector pop testing see if they can tell me if they're good.
 

DarkSeas

Well-known member
201
309
63
Location
Leland, N.C.
Some progress made over the weekend.

1. Smoking/motor/IP issue: I got a siphon and sucked some diesel out of the fuel tank (about 2 gallons), it didn't look cloudy. The fuel looked good. I set some in a powerade bottle on my toolbox to settle for a day see if I get any separation. I'm pretty much ready to say it's not a water in the fuel issue.

Leads still point to a dying IP or a timing issue. Timing adjustments are free, I might fool around with small increment adjustments to see if I can clear up the smoke and rough idle issue. Adjusting the timing last week really seemed to help, we may have adjusted too far. Is there any concern with running the motor with the TH400 in neutral and the transfer case off while I test these adjustments? Don't want to burn up a transmission on top of everything else.

2. Leaking transfer case: Picked up a transmission jack yesterday to pull off the NP208 this week when I find time. It was leaking pretty fierce before I pulled the driveshafts out - I will be getting a rebuild kit in the next month to redo the bearings and seals on the transfer case. Good news is the transmission dipstick had ATF on it. I know you're supposed to check it warm and running, but I was worried the transmission was draining out of the transfer case, I don't think that's the case.

I really hope I don't have a cracked housing or something, and a few seals will fix the leaks. Should be buying the rebuild kit and a small table within the next week to work on this.

Couple of sidenotes, I spent about 3 hours Sunday tidying up the shop, organizing the wrenches and sockets, sweeping the floors, throwing trash away. Crazy to see how much progress I've made and all I've done over the past year. While I haven't gotten to actually drive and enjoy the truck yet, it was a good feeling seeing just how far I am from where I was a year before.

Wedding is 348 days away, gotta get her running (AND DRIVING) as best as I can.
 

DarkSeas

Well-known member
201
309
63
Location
Leland, N.C.
I may have just had an epiphany thinking about what I found during the cleanup. I found a plastic baggie with copper washers that came with the injectors. If the injectors aren't seated properly, that might be a MASSIVE issue causing the problems I'm seeing..... I'm going to have to take off the fuel lines to get to the injectors and take them out..... aren't I.......

I just talked to my friend, he said the new injectors came with the copper washers already on them. So it's not that.
 
Last edited:

cucvrus

Well-known member
11,466
10,401
113
Location
Jonestown Pennsylvania
Transmission leaking fiercely scare me. I have seen more than one CUCV with the tail section of the transmission cracked and the transfer case front housing cracked from being carried around with a loader or forklift. Good Luck. The bolts that go into the transfer case are 15MM the bolts that go from the spacer to the transmission are 9/16" I recommend that if you do not have to "do not remove the bolts holding the spacer to the transmission flange. Bad things can happen with 40 years of electrolysis. Them steel bolts are there forever. And they don't like being messed with. Good Luck. I broke the flange on a few trying to get them separated.
 

DarkSeas

Well-known member
201
309
63
Location
Leland, N.C.
Transmission leaking fiercely scare me. I have seen more than one CUCV with the tail section of the transmission cracked and the transfer case front housing cracked from being carried around with a loader or forklift. Good Luck. The bolts that go into the transfer case are 15MM the bolts that go from the spacer to the transmission are 9/16" I recommend that if you do not have to "do not remove the bolts holding the spacer to the transmission flange. Bad things can happen with 40 years of electrolysis. Them steel bolts are there forever. And they don't like being messed with. Good Luck. I broke the flange on a few trying to get them separated.
Appreciate the insight. I don't believe the transmission itself is leaking, but I do worry the transfer case is cracked somewhere. Going to pull the transfer case in the next few days and inspect it before I order a kit to refresh the seals and bearings. Maybe I'll get lucky and she just needs some gasket maker between the halves and a new tailshaft seal and she's good to go. One can hope
 

87cr250r

Well-known member
1,267
1,988
113
Location
Rodeo, Ca
I dumped WAY too much ATF in my TH400 before I finally found the leak. The plug for the parking brake panel shaft had popped out. In fact, I rebuilt the transmission with my favorite Hughes kit and STILL had the leak 😢. I finally found it and hammered some copper tubing in the hole. Hasn't leaked a drop since.

I also cracked my NP208 transfer case. I attribute that to the splines on the front driveshaft seizing due to a hole in the boot. They crack right where the ribs for the front drive shaft bearing support.
 
Last edited:

DarkSeas

Well-known member
201
309
63
Location
Leland, N.C.
Been a bit since I posted. I got that transmission jack from harbor freight bout a month ago and got the transfer case off today myself.

I ended up bench pressing the transfer case cause it wasn't on the trans jack completely correct, live and learn.

Next step is getting a little fold up table from Lowes so I have a clean surface to tear the transfer case down and decide how big of a rebuild it needs.

Looked like rear seal was leaking and when I broke the 6 bolts loose from the transmission a good bit of trans fluid came out... makes me think the trans seal went bad.

Will have to do a good bit of cleaning to make sure there's no case cracks first.

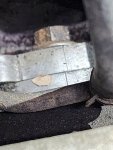
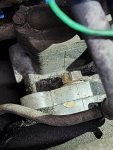
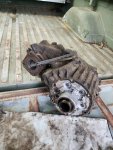
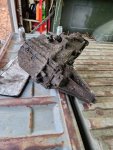
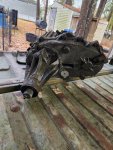
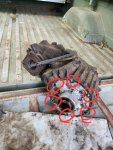
20231202_151715.jpg20231202_151720.jpg20231202_151725.jpg
 

WWRD99

Well-known member
Steel Soldiers Supporter
1,111
1,704
113
Location
York Pa
I'm curious if you pop a tiny amount of air in the expansion pipe outlet will you be able to find a leak with some soapy spray water? You'd have to block off the output shaft though. Maybe pop the drive shaft in it. I don't think trans fluid should come out of the trans bolts.

Sent from my SM-S906U using Tapatalk
 

DarkSeas

Well-known member
201
309
63
Location
Leland, N.C.
I'm curious if you pop a tiny amount of air in the expansion pipe outlet will you be able to find a leak with some soapy spray water? You'd have to block off the output shaft though. Maybe pop the drive shaft in it. I don't think trans fluid should come out of the trans bolts.

Sent from my SM-S906U using Tapatalk

When I removed these bolts where the tcase bolts up to the trans, the seam between the trans and tcase dumped like a quarter to half a quart of ATF down my arm :

20231202_151715.jpg

It wasn't coming from the bolt holes, when I loosened the bolts the tcase and trans separated and dumped ATF out of the seam. Maybe it came out of the input shaft part of the transfer case - I had drained the tcase before so that's why I assumed it was coming from a leaking trans seal.
 

DarkSeas

Well-known member
201
309
63
Location
Leland, N.C.
It's been a while since an update. Planning a wedding, exhausting work.

I got the transfercase to my house, it sat on my back deck for about a month or so (I coated the shafts with some grease so they wouldn't rust). Got the money together for some specialty tools and a rebuild kit for the NP208. Planned to just clean, reseal, and check bearings while I'm in there.

Easter Sunday I got everything set out on the tailgate of my truck to break it all down and clean her up. Got into the case and found a thick washer had actually detonated inside the case (I've got some pictures on my phone I'll post later). The re-seal job got a little bit tougher, but the case seems OK and the gears and chain seem OK. Just need to put new washers/bearings back in... in the correct order. I think someone had gone through the case before and put that thick washer in the wrong spot. I noticed some wear where the input shaft race sits against the case, might've been where they used the thick washer that was meant for the front output shaft - I think the case is still viable if I put it back together correctly. Might last me 2 months, might last me 15 years, but I'm going to give it a shot. I also broke the 4x4 sensor accidentally while cleaning the case - RockAuto had a new one under electrical switch and relay for a K30 - 4WD light indicator switch for $30 if anybody else is lookin for one.

Some general info I've found while getting into it - the front shaft nut is a 28mm and you need an impact to shake her loose, the case bolts are 15mm, I got them with a normal ratchet. I used a hand seal puller ($15 Duralast one from Autozone) to get the stubborn seals out. Punch set and a small sledgehammer to tap out a couple of bad bearings I had. Didn't need to use my blind hole bearing puller - that bearing was totally good. Went through a good amount of brake clean to get all the nasty old metal shards and grit out of the case, some 400/600 grit sandpaper to clean off the seal surfaces and case halves for sealant. TM for the breakdown and rebuild of the transfercase is TM 34 pages 496-518.

Rebuild kit I went with was the USA Standard ZBTK208 - it has gaskets, seals, bearings (incl. 120 needle bearings), and o-rings. Got it off Amazon for around $120. Pretty sure it didn't come with the rear shaft seal so I picked one up off of RockAuto for cheap (< $10). Will update by the weekend how the kit does. Sealant I'm using is Permatex Ultra Grey, works good with ATF and high torque applications. Picked up some vaseline for the needle bearings, etc. (100% petroleum, will dissolve with ATF).

Pictures and updates to follow.
 
Top