• Steel Soldiers now has a few new forums, read more about it at: New Munitions Forums!

  • Microsoft MSN, Live, Hotmail, Outlook email users may not be receiving emails. We are working to resolve this issue. Please add support@steelsoldiers.com to your trusted contacts.

M275A2 DOA but now RUNS!

Shrapnel

Just a Hoosier stuck out west!
Steel Soldiers Supporter
384
0
16
Location
Delta, UT
For future readers : make sure you block the small inner port on the air cleaner if you think you might need to suffocate the engine.
I didn't know that was there, but mine was already blocked off (luckily).

I like the air compressor tie-in idea quite a bit.
 

Shrapnel

Just a Hoosier stuck out west!
Steel Soldiers Supporter
384
0
16
Location
Delta, UT
First test drive!


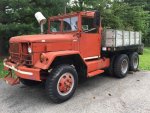
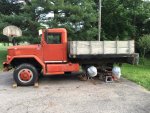
Drove my deuce for the first time today!


I still don't have brakes so i was just putting around my back yard in low range but I did get all the way through 3rd gear! Seems to shift OK, clutch seems good, no crazy sounds, etc.

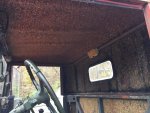
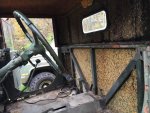
I decided to shift gears from mechanical repairs to clean-up duty after the successful test drive. Started removing all of the old insulation (looks like carpet padding) that was glued onto my cab and hardtop. Yes, those moldy-looking green strips are indeed live mold!

IMG_1127.jpgIMG_1128.jpg

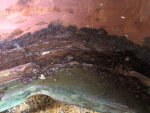
In case you were thinking about insulating your leaky-cab and using lots of silicone on all your seems, here is a good reason to rethink that approach:

IMG_1130.jpg

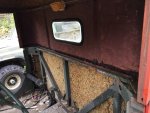
Is starting to look better as I peel it off. I have to scrape it off, kind of feels like skinning a deer. Slow going, got this much done then got called into work. Unfortunately, there are some spots where the top has rust holes in it due to all the trapped moisture.

IMG_1132.jpg
 

gimpyrobb

dumpsterlandingfromorbit!
27,786
755
113
Location
Cincy Ohio
WOW, sorry someone was dumb enough to think that was a good idear. Looks like your doing a great job on it though.
 

Shrapnel

Just a Hoosier stuck out west!
Steel Soldiers Supporter
384
0
16
Location
Delta, UT
Winter Update

So, I haven't done a lot to the truck for a bit but figured I'd update this thread a little.

I drove it in a circle around my house the other day and moved it onto my asphalt driveway. That kind of scared me to do (still have no brakes) but with my wife's help and pre-placed wheel chocks I was able to get it where I wanted it. Now I'm on a more level and harder surface so I can put it up on jackstands eventually.

Went down to C&C Equipment last week and purchased new exhaust J-tube and oil, air, and fuel filters for the truck. I installed the new J-tube last weekend and changed the oil in balmy single-digit temperature today. For being in the engine at least 10 years the oil looked pretty decent! I don't think it had a lot of runtime on that oil. Regardless, it's got new oil and filters in it now (hour meter just passed 700 hours).
 

olly hondro

Well-known member
Steel Soldiers Supporter
881
521
93
Location
tucson AZ
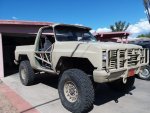
I like your Blazer on "tons'

Started to get excited that I didn't seem to have anything nasty in the tank. Maybe this would be an easy start after all! So, I stole my batteries from my M1009 to see what would happen.

View attachment 704959


Installed batteries, turned on ACC, no sound at all. Fuel pump wasn't doing anything. Very tediously pulled the fuse cover off of the pump (not easy to do with tank location on the tractor, very tight). Fuse was blown. Tried finding the right fuse at NAPA, had no luck (their smallest slow-blow was 8 amps). So, bought 3 amp fuses off of Amazon. Also went ahead and ordered an Airtex E8131 from Amazon as well as I wasn't feeling very lucky and hate waiting forever for snail mail. It was inexpensive, and would serve as a spare if the old pump didn't work.
I'm kinda partial toward such things ;)


blazer new doors.jpg
 

Karl kostman

Well-known member
Steel Soldiers Supporter
2,308
893
113
Location
Fargo ND
Cory thanks for posting I have not had to do this in a long time but your write up brought back some good memories! Thanks again!
KarlK
 

Shrapnel

Just a Hoosier stuck out west!
Steel Soldiers Supporter
384
0
16
Location
Delta, UT
The spring weather has brought me back outside to work on the truck after a winter hiatus. I have recently dropped off my M135 wheels for sandblasting, purchased a set of 12.00R20 Michelin XML tires, and today got the brakes working.

I first inspected the master cylinder and found that it was wet inside but I didn't have any visible fluid level. I filled the master cylinder and then used my air compressor to power bleed the brakes through the vent fitting in the master cylinder cap. I used somewhere between 15-25 psi on it, worked OK. I had trouble getting the bleeders on the rear axle to spit any fluid out at that pressure. I completely removed the bleeders to make sure fluid was getting there, then upped the pressure to around 35-40psi.

That still didn't get the bleeders going so then I drafted help and had to use pedal power with the air-pack assist to finally clear the bleeders out. Made a pretty good splash when they finally opened up!

Brakes work. Pedal has good feel. I've still only driven in low range around the yard, but brakes seem to grab well. Good progress for the day! Many more brake-related checks to come, but feels good that the system works on any level as-is. [thumbzup]
 

Shrapnel

Just a Hoosier stuck out west!
Steel Soldiers Supporter
384
0
16
Location
Delta, UT
Getting ready for outpatient axle surgery...

I'm hoping to get the rear axles of my Deuce up in the air tomorrow to start the hub flip procedure. I'm not planning to go any deeper than I have to on the axles, hoping to just pull apart, inspect brake cylinders, then flip and reassemble. Probably grease bearings while I'm in there. I don't have any parts on hand, just see what I find when I tear into it. It can stay in the air for a bit if I have to order parts.

I was worried about breaking the lugs loose but purchased a Harbor-Freight 3/4 drive impact and even with my little 3/8" air line feeding it the lugs broke loose without any drama. I tired standing and jumping on a 3/4 breaker bar and it didn't budge, so go HF!

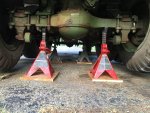
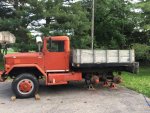
I also have the normal LHT / RHT combo that is stock on the Deuce, so no surprises so far. Here she is in position for the upcoming work. I have to cut some pads for the jackstands to keep them from sinking into my driveway, then bottle-neck one side of an axle at a time until I get the rears off the ground. Hoping for good weather this week!

IMG_1380.jpg
 

Camel Driver

Member
81
8
8
Location
Gilberts Illinois
Status check:

1. Drive shaft between trans and transfer case is disconnected, so the truck isn't going to drive off on accident. Check.
2. Pulled air cleaner mushroom and laid a board big enough to suffocate the engine on the fender. Check.
3. Made sure that fuel shutoff rod was floating and not bound up. Check.

OK, put fuse back in fuel pump, turn on ACC, wait a minute, crank.

Nothing.

OK, give it a tiny bit of ether, crank, kind of fires but not really.

Go check engine bay, find fuel leak on HH (GOOD, IT'S GETTING FUEL). Fix leak.

Try again. Try stepping on fuel pedal this time. Nothing. Noticed that the fuel pedal doesn't really do anything. Found the connecting rod not attached. Reattached connecting rod. Cranked again and feathered the throttle. IT RUNS!

https://youtu.be/FokBWsrx1yU

https://youtu.be/pjM27TIop8U
#1 and 2. You are a smart man! I've seen a couple run aways that could have been handled safely and quickly had the mechanic done this very simple task that you did not overlook! Thank you for being the "Good example" we should all be paying attention to!

"It runs!" SWEET! I know the feeling, congratulations!
 

Shrapnel

Just a Hoosier stuck out west!
Steel Soldiers Supporter
384
0
16
Location
Delta, UT
More Progress...

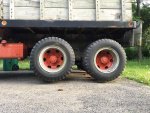
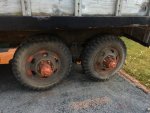
I was able to get the rear axles up in the air today and remove the outer wheels on both sides. I ran into a snag with my combo Budd socket. The 13/16 square is too deep in the socket to engage my short inner lugs. So, I have to purchase another socket for the square 13/16. There aren't any secrets to removing the inner lug nuts, right? I'm planning to just spin them off the same direction I did the outers.

Just not today, because my cheap Ebay socket doesn't work as advertised :(

IMG_1384.jpgIMG_1385.jpgIMG_1387.jpg
 

fasttruck

Well-known member
1,265
633
113
Location
Mesa, AZ
Inner and outer lug nuts are the same on each side of the truck. Problems occur when they have been on forever in that the inner and outer nuts seize and come of with the outer wheel. Hopefully this does not bugger up threads someplace. A variety of tools are available to separate therm. Kem makes a simple and cheap tool that slips over the outer lug and engages the next bolt hole in the wheel. Then get your square socket and turn the inner lug nut as to tighten it and it will spin out on the bottom so you need to put a block of wood under the wheel to make room for this.
 

Shrapnel

Just a Hoosier stuck out west!
Steel Soldiers Supporter
384
0
16
Location
Delta, UT
Baby steps

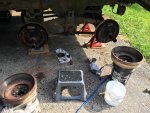
Not a lot of progress, but at least I got the inner wheels off. Some of the lugs were stuck on the wheels pretty good, but I was able to break them free by running the impact back and forth a few times.

Tomorrow I should have the hubs off and get a look at what needs to be dealt with inside the hubs and brakes.
 

Attachments

cattlerepairman

Well-known member
Steel Soldiers Supporter
3,256
3,353
113
Location
NORTH (Canada)
Open up the trunnion caps as well, do the grease zerk mod and see if you have bearings or bushings and if they are still ok! Easier with the wheels off.
 

Shrapnel

Just a Hoosier stuck out west!
Steel Soldiers Supporter
384
0
16
Location
Delta, UT
Teardown going well...

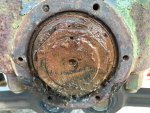
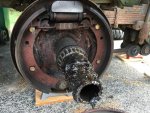
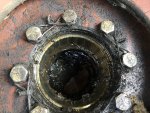
Got the driver side pulled apart. No evidence of oil or brake fluid leaks. Wheel cylinders look like they have been replaced before (shiny bolts on them, no corrosion when I pull back the dust boots). I took a picture of the trunnion, as well (2nd picture). Had grease in it, don't see anything stripped or loose (on this side). Is that good enough? Also, is the safety wire on the inside of the hub required? I wasn't expecting to see it. I would rather just put some lockwashers on it or something.

IMG_1401.jpgIMG_1402.jpgIMG_1397.jpgIMG_1399.jpg

The only problem I noticed was that the hub bearing nuts were only hand-tight. I literally used my hand to turn the 3" socket and they came right out (outer and inner nuts). The bearings don't have any wear or heat marking on them, so I'm not too worried, but will be putting it back together with the recommended torque.
 

Shrapnel

Just a Hoosier stuck out west!
Steel Soldiers Supporter
384
0
16
Location
Delta, UT
Studs flipped

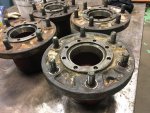
I wrapped the axles up in case it rains before I get the hubs back on. I then separated the hubs from the drums and took them to work to use our shop press to do the wheel studs. It was a lot easier than hammering.:roll:

IMG_1405.jpgIMG_1403.jpg
 

Shrapnel

Just a Hoosier stuck out west!
Steel Soldiers Supporter
384
0
16
Location
Delta, UT
Sharapnel, look at this thread regarding the trunnions: https://www.steelsoldiers.com/showthread.php?71520-preventable-rear-suspension-failure
Post #30 in that link has more info, including a link to gringeltaube's pic on putting a grease zerk in the cap.
Yes, I read all of those threads when you mentioned checking the trunnion earlier. I actually didn't know what the trunnion was, so found those posts searching about it after your suggestion.

I plan to move the grease zerk to the trunnion cap (but not today). I just want to make sure I don't need to torque anything down or disassemble anything in the trunnion right now. I'm not set up to jack the frame up to get weight off of it, so I don't want to loosen anything.
 
Top