• Steel Soldiers now has a few new forums, read more about it at: New Munitions Forums!

  • Microsoft MSN, Live, Hotmail, Outlook email users may not be receiving emails. We are working to resolve this issue. Please add support@steelsoldiers.com to your trusted contacts.

My m925a1 build "Brutus"

muthkw25

Well-known member
Steel Soldiers Supporter
491
583
93
Location
Sayre, PA
Truck did fantastic going to Redball Military Show this year. Truck drove 320 miles round trip give or take and did flawless. Truck was a dream to drive. At 50 mph I'm at 1450 rpms. I get more noise from the tires then I do from the engine. Feels like it's idling. Truck towed the m105a2 with no issues. Heater core I replaced works like a charm. Very pleased with the trucks performance. All the parts are being purchased for the turbo build. Essentially waiting on the downpipe and I can start the turbo build this weekend.


Here's some photos from the show.
 

Attachments

muthkw25

Well-known member
Steel Soldiers Supporter
491
583
93
Location
Sayre, PA
After getting back home I drove the truck and noticed fuel leaks coming from the pump. I decided to "bite the bullet" and had a pump rebuilt by premco. Put the same 27 fuel button but all new gaskets and internals to get rid of old leaking seals and make sure the internals of the pump are good for the next 40 years.

Truck is significantly more responsive to throttle and feels like I gained some power. Very pleased with the pump. Warren and the guys at Premco are top notch. Highly recommend them. If you are on the fence about it, just do it. You won't regret it.
 

Attachments

muthkw25

Well-known member
Steel Soldiers Supporter
491
583
93
Location
Sayre, PA
One of my best friends turboed his m925 and has had nothing but positives about it. I decided to follow suit. Overall I am looking for lower temps on mountains and hills and a little bit of power gain. I decided to get a brand new pulse manifold. I went with a Borg Warner BHT3B. More photos to come. It has a 26cm rear housing.

I am also going with larger injectors from Premco. Plan is to order some 20% overs. This will flow more fuel and drop the fuel pressure so if I go up in a smaller button down the road my fuel pressure will still be safe. I also want to check the screens on the injectors anyway so while I'm in there I might as well make some improvements while I'm there.

I am also running a big cam aftercooler. Plan is to run it without the heat exchanger inside for now.

Had the parts powdercoated at my local shop. Check out Gillotts Blasting and Powder Co. They can do any color you want. Super nice guy. Great quality and pricing. Here's some before and after photos of the parts. I also decided to powdercoat some tow bar brackets. (More photos coming up)

Bought a catch can for the truck as well. Wanted it vented and didn't want dirt and grime getting sucked back into the engine. Got a universal kit with 5/8" inlet and outlet. More photos on that soon.

Once the turbo and aftercooler are installed I can work on the piping for rest of intake and exhaust.
 

Attachments

muthkw25

Well-known member
Steel Soldiers Supporter
491
583
93
Location
Sayre, PA
Got the Down pipe for the turbo build. It's off a freight liner. Ordering my new injectors tomorrow. Plan on starting the turbo build end of this week. Lots of photos and videos to come showing the difference in power, temps, etc
 

Attachments

muthkw25

Well-known member
Steel Soldiers Supporter
491
583
93
Location
Sayre, PA
I painted up the towbar. I have some tow bar clamps I powder coated black and is mounted to the front bumper. I'll have some photos tomorrow of it mounted up.
 

Attachments

muthkw25

Well-known member
Steel Soldiers Supporter
491
583
93
Location
Sayre, PA
Removed the stack and pipe under the cab in preparation for the turbo. Also received my injectors from premco. 10% overs. Based on my pump settings, Warren from Premco said this would be a nice upgrade and still give me reliability and not stress the engine. Not looking for a big powerhouse but some whistles, lower temps and some power wouldn't be a bad thing.

Sgt Tibbs wants to know what I got him.
 

Attachments

muthkw25

Well-known member
Steel Soldiers Supporter
491
583
93
Location
Sayre, PA
Removed the S pipe exhaust and the intake manifold to make room for the big cam aftercooler. I need to figure out how to get that S shaped fuel line away from the block. I don't know if the aftercooler will fit there without rubbing. Will need to dig deeper when I get closer to assembly.

Next is to drain the coolant and remove the surge tank. Surge tank is getting moved behind the cab, possibly moved to the spare tire mount. Haven't figured out exactly where yet. It will be one of the last parts of the build so I'll have time to think It over.
 

Attachments

muthkw25

Well-known member
Steel Soldiers Supporter
491
583
93
Location
Sayre, PA
Made some progress today.

Removed the coolant resevoir tank. Going to clean that up and set aside for the re-assembly.
Removed exhaust manifold. Looks like mocking up the pulse manifold I will need to get the front piece of exhaust on first to help with the clearance.

I primed the exhaust manifold with a high temp primer. Once painted ill tap for a Pyro in cylinder 5. Will be easier to get to and still give a good reading for temps.

Mocked up the first piece of the air intake. I got a 5" 90 elbow on to see what angles I'm going to deal with, ordered some boots and getting the rest of the intake piping next few days.

Now that the after cooler parts are back from powdercoating, I was able to start re-assembly. I got some 5/16 bolts with washers, o-rings and lock nuts. Normally, the aftercooler has the heater core and on this style, the 5/16 bolts normally thread in and hold the core. Since I'm not using it I need to plug the holes. Putting o-rings on either side and adding rtv to the inside under the washer and on the o-ring should seal this up. Once I get the aftercooler on the block I'll add the top half.

I still don't understand why you would use the heater core, running compressed air over 180 degree coolant doesn't seem like an effective way to cool air.
 

Attachments

Superthermal

Well-known member
Steel Soldiers Supporter
314
858
93
Location
Utah, Murray, United States
I still don't understand why you would use the heater core, running compressed air over 180 degree coolant doesn't seem like an effective way to cool air.
When determining what to do if I do a turbo, I researched the air to air inter coolers and the water to air units. It is good to visualize that the compressed air leaving the turbo is going to be 250-400 degrees typically. The water to air in my opinion has the best advantages due to the efficiency of the exchange and the significantly smaller size needed to obtain the same results when at normal operating temperature and getting the engine up to temperature if you are in a cooler climate via the heated air bringing the water temp up to the thermostat set-point. These seemed like a win win.
Truck is looking awesome. Can't wait to see how this modification turns out for you! I'm thinking your going to be very pleased.
 

muthkw25

Well-known member
Steel Soldiers Supporter
491
583
93
Location
Sayre, PA
Thanks Superthermal. My other fear was if that heat exchanger was to fail, it would dump water, rust and whatever else in the engine. So I'm trying to eliminate any future issues. I also do have a methanol kit as well I can run. It won't run all the time but when I need it, it will help.


When determining what to do if I do a turbo, I researched the air to air inter coolers and the water to air units. It is good to visualize that the compressed air leaving the turbo is going to be 250-400 degrees typically. The water to air in my opinion has the best advantages due to the efficiency of the exchange and the significantly smaller size needed to obtain the same results when at normal operating temperature and getting the engine up to temperature if you are in a cooler climate via the heated air bringing the water temp up to the thermostat set-point. These seemed like a win win.
Truck is looking awesome. Can't wait to see how this modification turns out for you! I'm thinking your going to be very pleased.
 

muthkw25

Well-known member
Steel Soldiers Supporter
491
583
93
Location
Sayre, PA
I decided to get some 316 stainless metal lock nuts from McMaster Carr. I don't want the nylon breaking down if the temps are high enough to melt the nylon in the aftercooler. Ill change those out before the cooler is all assembled. I also got the manifold painted today. Now just gotta start assembly on the block.
 

Attachments

muthkw25

Well-known member
Steel Soldiers Supporter
491
583
93
Location
Sayre, PA
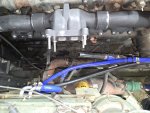
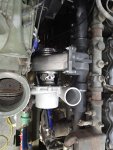
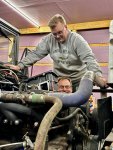
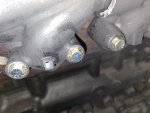
Well yesterday one of my best friends who turboed his m925 came up and helped me with my build. Got the manifold drilled and tapped for pyros for #5 and #6. The 5th one is in case I get a controller for the methanol. I will put a pipe plug in the manifold. Got the manifold torqued to 40ft lbs.

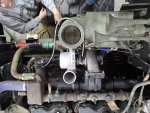
Once that was done we tried doing some fitment for the turbo.
On my buddies build the heater bracket hits the snail and he's running a HT60. He doesn't know his housing dimensions off top of his head.
The bht3b is 26cm.
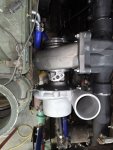
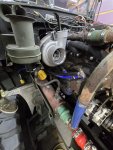
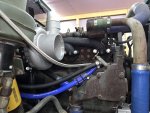
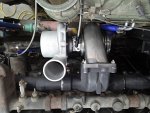
Turns out the snail does hit the heater bracket. I don't think the 23cm housing would make much of a difference. We got the studs mounted up and undid the bolts on the heater and pulled to the side. Turbo was tortured up and the photos show it touches on a tiny part of the exhaust housing. I'm adding a blanket so that will stop heat transfer.

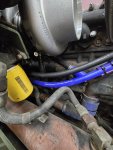
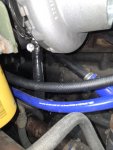
I got the downpipe installed. I am trying this high motor oil temp silicone hose. It's made my HPS. It's very expensive. Looks like some of the line that fleece performance uses for some of the drain lines on smaller diesels.

Got the feed line connected to the oil cooler. Didn't cut the 2ft section I wanted it routed away from the manifold and it fit perfectly around the heater core. Tried pouring some oil in the turbo and spinning it by hand to pre lube it.

The hardest part so far is moving some of the return lines on passenger side of the block. Some lines might get replaced. There's not much room with the 900 deries trucks side to side because the engines recessed back so far.

We got alot done in a short time. I was blessed by The Lord we had no major issues. More to come.
20241103_192749.jpg20241103_192814.jpg20241103_192758.jpg20241103_200353.jpg20241103_200357.jpg20241103_200405.jpg20241103_210910.jpg20241103_210919.jpg20241103_210924.jpg20241103_210934.jpg20241103_210941.jpgMessenger_creation_AED92531-EE5D-422E-A322-4B7BAAA4B405.jpeg
 

muthkw25

Well-known member
Steel Soldiers Supporter
491
583
93
Location
Sayre, PA
Decided to mount the coolant tank on the passenger side front head rack next to where the stock exhaust would go. It's tucked in so the cab protects it somewhat. Installed new 1/4" to-4an fittings and 3/8 to -6an fittings. Bought 1" silicone hose for the feed to the oil cooler. Going to wrap it in some additional silicone hose to prevent wear and insulation incase it rubs. Coolant tank is high enough yoy can mess with it from the ground and you have to get on the toolbox or acces from the bed. Using that 30% vinegar and boiling water stripped the rust and paint off. Tank looks brand new.
The lines for coolant get tucked behind the exhaust bracket attached to the spare tire mount and run along the frame.
 

Attachments

muthkw25

Well-known member
Steel Soldiers Supporter
491
583
93
Location
Sayre, PA
Creating the downpipe was a bit tricky. There's not alot of room on these cabs in comparison to the 800 series trucks. Trying to route the exhaust down and under with a bend was challenging. My buddy had lifted his 925 cab when he did the mrap rad and intercooler install so he used a different pipe. You wouldn't think raising the cab 2" made a big difference but 2" is alot.

I tried using his pipe and the cab was simply to low and I couldn't get his downpipe he used to work. I decided to come with a different solution.

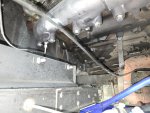
I got the shortest 5" 90 degree elbows I could get at the local truck shop and had them weld the t flange and weld the 2 elbows together. It fits and looked ok until I got under the truck. The photos show it looks like the cab cross member is right in the way of the exhaust path.
Turns out there's enough room to get the flex pipe on and have some room for clearance.

First photo is the elbows used but I needed the t flange welded on.
2nd photo looks like it was going to work with plenty of room, however I was convinced there wouldn't be enough room with the additonal photos posted below. It looked real close. My buddy came up and thankfully it worked and worked quite well. I didn't have to spend more money to fix my mistakes.
 

Attachments

muthkw25

Well-known member
Steel Soldiers Supporter
491
583
93
Location
Sayre, PA
Next was working on the exhaust stack. I chose to change the location of the stack. I didn't want it angled out from the old exhaust stack and wanted it farther from the coolant tank. My buddy and I decided that using the channel way for the convoy lights and running thread adapters would space away from the cab but still look close to stock form.

I decided to run a 6' stack and elbow. 3ft section under the cab to a 1' section of flex pipe. (Just for the record. 3 clamps is overkill on this. 2 clamps would have worked. But in historic fashion, we went overkill.) However I can guarantee that stack is not coming loose.

We did cut a little bit off the bottom of the cab where the exhaust runs to the elbow to give us some more room but without really looking close you can't tell.

The stack sits approx 15" above the cab. It still clears the garage. If iI decide to cut it down or put an elbow on it, I'll have the flexibility to add to it or take away. I thought a strait stack for awhile would work nicely.

I think personally the stack looks good.

I bought the titanium exhaust wrap, 2×50ft reels of it. It was enough to do the down pipe, flex pipe and pipe under the cab to protect from heat.

We used some wire clamps to hold the wrap in place rather than the metal zip ties. We felt it would hold up better.

I did re-run the coolant lines a bit to try and keep away from the heat. Before the lines ran on top of the bracket that holds the dip-stick. Now they go underneath it.
 

Attachments

Top