• Steel Soldiers now has a few new forums, read more about it at: New Munitions Forums!

  • Microsoft MSN, Live, Hotmail, Outlook email users may not be receiving emails. We are working to resolve this issue. Please add support@steelsoldiers.com to your trusted contacts.

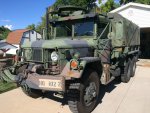
Valence's 1972 M35A2

Valence

Well-known member
Steel Soldiers Supporter
2,112
555
113
Location
Davis County, UT
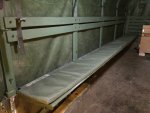
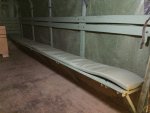
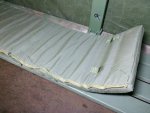
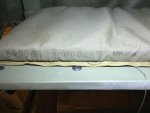
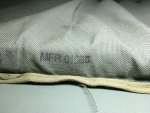
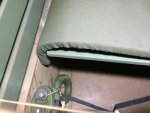
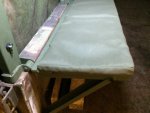
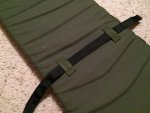
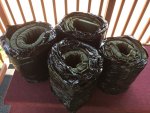
I now have troop seat bench pads, and they are still military surplus and a pretty dang good fit and the perfect color! I will need to make tie down straps, but that should be easy with some buckles and 1" nylon straps.

Dimensions: 74.5" long x 13" deep x 1" thick
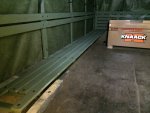
  • So they're a little long (2 * 74.5 = 149") as the troop seats are only about 143" long, or 6" excess seat pad material. Unless I decide to bother shortening 2 of the pads, I will just tuck the excess at the front of the bed.
  • The depth is almost perfect as the troop seat bottom is about 13-3/4" deep, and you really can't even sit on the very back of the seat anyway.
  • Even though they're only 1" thick, the pad is firm and doesn't compress to nothingness.
I think anyone who sits in the back will appreciate these! So far I'm very happy with them.

I purchased them from my all-time favorite surplus store that I have been going to since I was a child. I still always visit in person when I'm in the area.
http://www.armysurpluswarehouse.com/us-gi-issue-seat-cushion.html
  • Web page description:
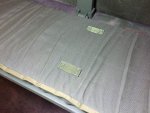
    • SEAT CUSHION FSN # 2510-01-109-5028 2600308 * U.S. GOVERNMENT ISSUE * WIDTH 13 INCHES * LENGTH 74.5 INCHES * THICKNESS 1 INCH * COVER MATERIAL - NYLON MIL-C-20696, TYPE 2, CLASS 3 * PADDING MATERIAL - PLASTIC, MK-P-15280 * COLOR - OLIVE DRAB * NEW THIS SEAT CUSHION IS ORIGINALLY MADE FOR THE ASSAULT AMPHIBIOUS VEHICLE - COMMAND OR PERSONNEL. IT WOULD BE A GREAT CUSHION TO USE ON A BENCH OR PICNIC TABLE OR WHEREVER YOU WANT SOME ADDED COMFORT. IF YOU HAVE A MILITARY VEHICLE THIS MIGHT BE AN EXCELLENT CUSHION FOR YOUR BENCHES IN THE BACK. THIS HAS 6 TIE DOWN SPOTS ON THE BACK OF THE CUSHION.

Apologies, it's a bit dark in the bed and pictures always suffer for it.
2017-08-08 15.45.28.jpg 2017-08-08 21.38.14.jpg 2017-08-08 21.50.44.jpg 2017-08-08 21.50.55.jpg
2017-08-08 21.39.09.jpg 2017-08-08 21.43.09.jpg 2017-08-08 21.40.12.jpg 2017-08-08 21.40.20.jpg 2017-08-08 21.48.58.jpg 2017-08-08 21.50.35.jpg

Edit:
The backside loops (there are 3 pairs), fit 1" nylon webbing perfectly.

2017-08-11 19.35.13.jpg
 
Last edited:

Another Ahab

Well-known member
18,006
4,577
113
Location
Alexandria, VA
I just finished installing the M103 chassis shocks. I purchased these used from Big Mike's in October 2015. They came from a mobile kitchen trailer. In spring of 2016 I sand blasted and had them powder coated. It was a pretty straight forward install, with the upper shock mounts using the rear cargo bed to frame mount and only required drilling 2 new holes on each side.
Powder coating is great stuff.
 

rustystud

Well-known member
9,297
3,070
113
Location
Woodinville, Washington
I now have troop seat bench pads, and they are still military surplus and a pretty dang good fit and the perfect color! I will need to make tie down straps, but that should be easy with some buckles and 1" nylon straps.

Dimensions: 74.5" long x 13" deep x 1" thick
  • So they're a little long (2 * 74.5 = 149") as the troop seats are only about 143" long, or 6" excess seat pad material. Unless I decide to bother shortening 2 of the pads, I will just tuck the excess at the front of the bed.
  • The depth is almost perfect as the troop seat bottom is about 13-3/4" deep, and you really can't even sit on the very back of the seat anyway.
  • Even though they're only 1" thick, the pad is firm and doesn't compress to nothingness.
I think anyone who sits in the back will appreciate these! So far I'm very happy with them.

I purchased them from my all-time favorite surplus store that I have been going to since I was a child. I still always visit in person when I'm in the area.
http://www.armysurpluswarehouse.com/us-gi-issue-seat-cushion.html
  • Web page description:
    • SEAT CUSHION FSN # 2510-01-109-5028 2600308 * U.S. GOVERNMENT ISSUE * WIDTH 13 INCHES * LENGTH 74.5 INCHES * THICKNESS 1 INCH * COVER MATERIAL - NYLON MIL-C-20696, TYPE 2, CLASS 3 * PADDING MATERIAL - PLASTIC, MK-P-15280 * COLOR - OLIVE DRAB * NEW THIS SEAT CUSHION IS ORIGINALLY MADE FOR THE ASSAULT AMPHIBIOUS VEHICLE - COMMAND OR PERSONNEL. IT WOULD BE A GREAT CUSHION TO USE ON A BENCH OR PICNIC TABLE OR WHEREVER YOU WANT SOME ADDED COMFORT. IF YOU HAVE A MILITARY VEHICLE THIS MIGHT BE AN EXCELLENT CUSHION FOR YOUR BENCHES IN THE BACK. THIS HAS 6 TIE DOWN SPOTS ON THE BACK OF THE CUSHION.

Apologies, it's a bit dark in the bed and pictures always suffer for it.
View attachment 694137 View attachment 694138 View attachment 694146 View attachment 694147
View attachment 694139 View attachment 694142 View attachment 694140 View attachment 694141 View attachment 694143 View attachment 694145


All I can say is WOW ! I never knew the military had padded bench seat covers for the deuce. All those miles on my poor tired "behind" and it could have been helped with just a little padding ! Of course in the Marines they never did care a fig about your "comfort" .
 

Valence

Well-known member
Steel Soldiers Supporter
2,112
555
113
Location
Davis County, UT
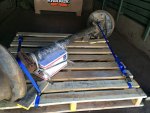
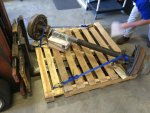
On Thursday, August 10th I noticed that the water pump was leaking out on my daily driver 2001 Dodge Dakota pickup, but I needed to get an axle from an M101A1 trailer axle to Fastenal to ship to Florida on Friday. The deuce saved the day. It was actually probably a better choice to haul the pallet than my little Dakota.

2017-08-11 16.24.40.jpg 2017-08-11 16.57.46.jpg 2017-08-11 17.31.27.jpg

Ending odometer: 3368.6 miles
Ending hour meter: 354.0 hours
 

Valence

Well-known member
Steel Soldiers Supporter
2,112
555
113
Location
Davis County, UT
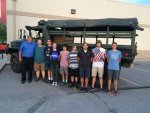
A coworker and friend asked me to bring my truck to the church youth group that he leads tonight. I talked about my M35A2, answered questions, and told a couple of stories. A stranger was driving by as I was showing my truck to the youth and he had to stop and talk too. He was a nice fellow and a Vietnam Navy Veteran. Before it was too late, I taught the boys how to set up the troop seats and properly roll up the cargo cover. Then I took them all for a ride to Farmington, UT, brief off-roading in some dirt, then back to Wendy's for frosties.

One comment I received was "This is the best night of my life!"

They loved it! :^)

2017-08-16 20.26.33.jpg 2017-08-16 20.27.48.jpg 2017-08-16 20.13.57.jpg

One of the boys was very enthusiastic about the evening. I'm sure everyone can pick him out in his shirt and helmet he brought. He said he owns a Garand and 1911 and even a German helmet too. Great kid.

Ending odometer: 3382.0 miles (13.4 miles)
Ending hour meter: 354.6 hours (0.6 hours)
 
Last edited:

rustystud

Well-known member
9,297
3,070
113
Location
Woodinville, Washington
A coworker and friend asked me to bring my truck to the church youth group that he leads tonight. I talked about my M35A2, answered questions, and told a couple of stories. A stranger was driving by as I was showing my truck to the youth and he had to stop and talk too. He was a nice fellow and a Vietnam Navy Veteran. Before it was too late, I taught the boys how to set up the troop seats and properly roll up the cargo cover. Then I took them all for a ride to Farmington, UT, brief off-roading in some dirt, then back to Wendy's for frosties.

One comment I received was "This is the best night of my life!"

They loved it! :^)

View attachment 695358 View attachment 695359 View attachment 695360

One of the boys was very enthusiastic about the evening. I'm sure everyone can pick him out in his shirt and helmet he brought. He said he owns a Garand and 1911 and even a German helmet too. Great kid.

Ending odometer: 3382.0 miles (13.4 miles)
Ending hour meter: 354.6 hours (0.6 hours)


Great job Valence ! You wouldn't think so but it's moments like this that actually help shape a boys life.
 

gentrysgarage

Active member
553
118
43
Location
Lost Angels, CA
A coworker and friend asked me to bring my truck to the church youth group that he leads tonight. I talked about my M35A2, answered questions, and told a couple of stories. A stranger was driving by as I was showing my truck to the youth and he had to stop and talk too. He was a nice fellow and a Vietnam Navy Veteran. Before it was too late, I taught the boys how to set up the troop seats and properly roll up the cargo cover. Then I took them all for a ride to Farmington, UT, brief off-roading in some dirt, then back to Wendy's for frosties.

One comment I received was "This is the best night of my life!"

They loved it! :^)


One of the boys was very enthusiastic about the evening. I'm sure everyone can pick him out in his shirt and helmet he brought. He said he owns a Garand and 1911 and even a German helmet too. Great kid.

Ending odometer: 3382.0 miles (13.4 miles)
Ending hour meter: 354.6 hours (0.6 hours)
Very Cool thing to do!
 

Valence

Well-known member
Steel Soldiers Supporter
2,112
555
113
Location
Davis County, UT
As noted earlier, in October 2015 (about 1490 miles, 48.4 hours ago), I added a 12V alternator. This required one of the belts from the 24V alternator. With the addition of a pair of 24V air compressors this year, I found out that at full, or near full, load the 24V alternator requires both belts to not induce more drag than a single v-belt can handle without undo tension also putting more force/wear on all other bearings/pulley components.

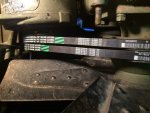
I removed the 12V alternator and associated components and returned to the stock configuration. Even though I already had one belt in the stock configuration, I replaced it with two new belts because it had been slipping and likely would not tighten up the same as a new belt.

Again, I used Gates #9465 v-belts. The belts are a bit of work to get on as the bottom alternator bolts are hard to get to and I had to fully remove two of the three mounting bolts to get enough movement. This belt is the exact width for the pulleys and length in that I can get it on without removing the radiator and fan, but short enough that I can properly tension it with the limited alternator travel.

As can be seen during installation, the belts were not sequential but seemed to tighten up about the same. I don't think it'll be any problem.

2017-08-28 19.59.20.jpg 2017-08-28 21.01.21.jpg

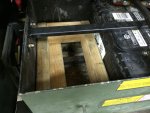
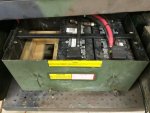
I hadn't yet wired up anything to the dedicated 12V system so its removal was of little consequence, besides feeling like a red neck in adding 2x4 wood blocks to the battery box to take up the extra space. They're screwed together and a very tight fit. The batteries are quite secure! Maybe at another time I'll go with a battery balancer or converter/isolator for a dedicated 12V system.

2017-08-28 21.39.28.jpg 2017-08-28 21.39.31.jpg
 

Valence

Well-known member
Steel Soldiers Supporter
2,112
555
113
Location
Davis County, UT
On Wednesday, August 30th, 2017, I drove the deuce to a Car Show at work and back with no belt squeals. I had show the gun to work's security to prove it was non operation, and the "loaded" bullets were blanks.

2017-08-30 13.41.06 HDR.jpg 2017-08-30 13.41.18.jpg 2017-08-30 13.41.26.jpg

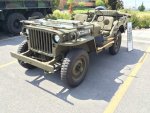
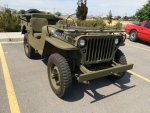
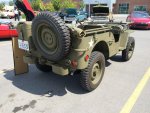
Chris Davis' 1945 Willys MB Jeep:
2017-08-30 13.07.39 HDR.jpg 2017-08-30 13.07.50.jpg 2017-08-30 13.08.03.jpg 2017-08-30 13.08.14.jpg 2017-08-30 13.08.22.jpg 2017-08-30 13.08.31.jpg

The rest of the show photo's can be seen in Another Ahab's Nice NON-MV's Spotted (Cars, Trucks, Motorcycles, etc.) (post #446) thread.

Ending odometer: 3419.2 miles (37.2 miles)
Ending hour meter: 355.7 hours (1.1 hours)

I must comment though, that there is an external fuel leak in the booster pump region. I haven't looked into it but I know it's getting on the winch PTO shaft and, depending on angle of the ground, will drip at the front of the PTO shaft, or run down the PTO shaft and drip behind the front axle.
 
Last edited:
Valence

Well-known member
Steel Soldiers Supporter
2,112
555
113
Location
Davis County, UT
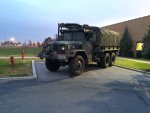
Unfortunately the poor deuce hasn't moved since work's car show over 2 months ago.

I wasn't able to do any Veteran's Day parades this year, but I was invited by work again to bring the deuce as a "static display" during their annual flag raising ceremonies on Friday, November 10th, 2017. They were kind enough to give me a $25 Kroger foods gift card for doing so. That was very nice and unexpected of them.

As part of my pre-trip inspection, I started it on Thursday night (11/09/2017) to make sure it was good to go the next morning. A bit smokey and deadly even when briefly running inside structures, and that's with almost a whole wall open (the 16' x 10' garage door). The exhaust pointing back into the garage doesn't help, I'm sure. This is part of the reason I added the supplemental electrical air compressors to reduce the in-garage idle time (but they're far more useful than just that!).

2017-11-09 17.31.30.jpg

It was a good flag raising ceremony and one of the higher-ups wanted to look at the truck afterward. That was fun showing him a bit.

I then gave my Lead a short ride in the truck and he asked me, "What girl would _not_ be interested in going for a drive in this thing!?" Sadly, I had to tell him, "Nearly all of them." :lol:

2017-11-10 06.56.16.jpg 2017-11-10 06.57.27.jpg

Ending odometer: 3456.0 miles (36.8 miles)
Ending hour meter: 356.8 hours (1.1 hours)

Unfortunately the dash camera suction cup mount has failed and I can't get it to stay attached to the left windshield. I believe I'll be able to use the 3M adhesive mount on the fixed windshield frame, I'll report back on that when I actually do it, but the deuce is now nestled into the corner of the garage to sleep for a few months. I added a little extra Diesel Power Service and biocide (I forget the brand/name on the later) to the fuel tank.

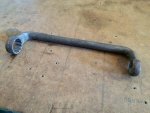
I also purchased a Snap-On M4276A (7/8" box end with 1/2" drive) that popped up on eBay. I'm sure I'll need it for those head bolts, eventually. ;)

2017-11-18 11.03.17.jpg
 
Last edited:
Valence

Well-known member
Steel Soldiers Supporter
2,112
555
113
Location
Davis County, UT
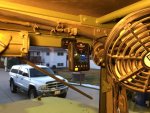
On January 12th, 2018 I addressed my dash camera problem (that I installed in June 2017, back on Post #6). For whatever, reason the suction cup mount failed and nothing I did would keep it adhered to the glass. Given the various shapes of the camera mount arms, and the near vertical windshields in the deuce and a half, I had to remove the polarizing lens body to use the included 3M adhesive mount. Unfortunately, one of the features I liked (having a swivel camera) no longer works as the camera body hits the windshield when turned, still, with two hands I can unclip (or unscrew the mount arm) and move the camera, but it is not as quick.

I opted to put the camera as high as possible, so I placed the adhesive mount on the top of the windshield frame. It is very solid. Given the height, the camera actually looks slightly downward and should continue to provide excellent front-end visibility.

2018-01-12_17.25.00.jpg

-----

On Friday (01/26/2018 ) I took a quick trip to Cache Valley to buy an entire pallet of concertina (razor) wire, and then to spend the night at my mother’s place. :D

After dinner she needed to get her car out of the garage so we could go spend the evening with my brother but my truck was in the way. So I went to move the deuce, but when I hit the start button but there was nothing; no click, no response what-so-ever. Even though I could hear my in-tank pump running, I thought something might have been wrong with the battery disconnect I added 6 years ago, but no, it was properly set. I pulled the plug from the back of the start switch and used part of a coat hanger from my mother’s garage to jumper the pins and the truck fired right up on my second try (it didn’t seem to want to make a connection right away, but I was in the dark trying to manage with a flash light).

I felt pretty confident that it was just the in-cab momentary push button start switch that had failed. I'm glad it didn't fail literally one start earlier when I was picking up the wire in a gated area of aircraft hangers!

2018-01-26 18.25.25.jpg 2018-01-26 18.25.31.jpg 2018-01-26 18.09.20.jpg

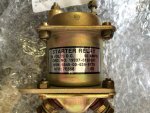
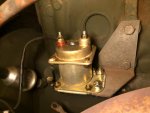
However, the next day when I tried to leave, the coat hanger in the start switch plug did not work. I removed the air cleaner and listened under the hood while my mother pushed the start switch and did not hear the start relay click. I had read before about jumpering (bypassing) the starter relay and some nice folks on Facebook gave me a tip on which wires to jump, which I determined to be #3 (wire #74R) to #18 (wire #214). More info here about the relay and my tests and conclusions (failed starter relay):
https://www.steelsoldiers.com/showt...r-Relay-help&p=2100416&viewfull=1#post2100416

TM 9-2320-361-20_maintenance_section 4-6.jpg

The extension cords seen below are to the 400W Katz coolant heater on the water pump (the plug is behind the bumper) and the battery tender for the batteries. It was about 36 degrees F outside and I wanted the truck to start as easily as possible.

2018-01-27 15.36.24.jpg

Bypassing the relay as described above worked perfectly. After we got my deuce started, it, of course, ran fine all the way home. I'm very thankful at being blessed with the truck not having this issue earlier and also starting the night before so we could go enjoy watching a movie with my brother.

My brother loaned me his retractable spool of test leads with alligator clips (identical to what is pictured below, 10' Kastar retractable leads) in case I had to jumper the relay again on my way home. (since the wires were only 18 gauge, I connected both red and black from #3 to #18 above). Now, adding spare wire, connectors, and an electrical crimp tool to my truck’s tool box is a much higher priority for me ;^)
https://www.amazon.com/Kastar-Retractable-Test-Leads-1140/dp/B003177PWK/
61F1m9IcnVL._SL1286_.jpg

Ending odometer: 3573.8 miles (117.8 miles)
Ending hour meter: 360.1 hours (3.3 hours)


Also notable, the truck still has a fuel leak originating somewhere on the driver's side of the engine (my current guess is the booster or injection pump). Fuel also gets on the winch PTO shaft and, due to the slope of that shaft, fuel will also drip right before where it connects to the transmission PTO output. I really need to find that fix that leak.
 
Last edited:
rustystud

Well-known member
9,297
3,070
113
Location
Woodinville, Washington
On January 12th, 2018 I addressed my dash camera problem (that I installed in June 2017, back on Post #6). For whatever, reason the suction cup mount failed and nothing I did would keep it adhered to the glass. Given the various shapes of the camera mount arms, and the near vertical windshields in the deuce and a half, I had to remove the polarizing lens body to use the included 3M adhesive mount. Unfortunately, one of the features I liked (having a swivel camera) no longer works as the camera body hits the windshield when turned, still, with two hands I can unclip (or unscrew the mount arm) and move the camera, but it is not as quick.

I opted to put the camera as high as possible, so I placed the adhesive mount on the top of the windshield frame. It is very solid. Given the height, the camera actually looks slightly downward and should continue to provide excellent front-end visibility.

View attachment 717107

-----

On Friday (01/26/2018 ) I took a quick trip to Cache Valley to buy an entire pallet of concertina (razor) wire, and then to spend the night at my mother’s place. :D

After dinner she needed to get her car out of the garage so we could go spend the evening with my brother but my truck was in the way. So I went to move the deuce, but when I hit the start button but there was nothing; no click, no response what-so-ever. Even though I could hear my in-tank pump running, I thought something might have been wrong with the battery disconnect I added 6 years ago, but no, it was properly set. I pulled the plug from the back of the start switch and used part of a coat hanger from my mother’s garage to jumper the pins and the truck fired right up on my second try (it didn’t seem to want to make a connection right away, but I was in the dark trying to manage with a flash light).

I felt pretty confident that it was just the in-cab momentary push button start switch that had failed. I'm glad it didn't fail literally one start earlier when I was picking up the wire in a gated area of aircraft hangers!

View attachment 716951 View attachment 716952 View attachment 716950

However, the next day when I tried to leave, the coat hanger in the start switch plug did not work. I removed the air cleaner and listened under the hood while my mother pushed the start switch and did not hear the start relay click. I had read before about jumpering (bypassing) the starter relay and some nice folks on Facebook gave me a tip on which wires to jump, which I determined to be #3 (wire #74R) to #18 (wire #214). More info here about the relay and my tests and conclusions (failed starter relay):
https://www.steelsoldiers.com/showt...r-Relay-help&p=2100416&viewfull=1#post2100416

View attachment 716956

The extension cords seen below are to the 400W Katz coolant heater on the water pump (the plug is behind the bumper) and the battery tender for the batteries. It was about 36 degrees F outside and I wanted the truck to start as easily as possible.

View attachment 716953

Bypassing the relay as described above worked perfectly. After we got my deuce started, it, of course, ran fine all the way home. I'm very thankful at being blessed with the truck not having this issue earlier and also starting the night before so we could go enjoy watching a movie with my brother.

My brother loaned me his retractable spool of test leads with alligator clips (identical to what is pictured below, 10' Kastar retractable leads) in case I had to jumper the relay again on my way home. (since the wires were only 18 gauge, I connected both red and black from #3 to #18 above). Now, adding spare wire, connectors, and an electrical crimp tool to my truck’s tool box is a much higher priority for me ;^)
https://www.amazon.com/Kastar-Retractable-Test-Leads-1140/dp/B003177PWK/
View attachment 716958

Ending odometer: 3573.8 miles (117.8 miles)
Ending hour meter: 360.1 hours (3.3 hours)


Also notable, the truck still has a fuel leak originating somewhere on the driver's side of the engine (my current guess is the booster or injection pump). Fuel also gets on the winch PTO shaft and, due to the slope of that shaft, fuel will also drip right before where it connects to the transmission PTO output. I really need to find that fix that leak.
At work I used to have a 50ft spool of 10 gauge wire with soldered alligator clips on it. It worked great to test for bad wires with my Digital meter and running power to circuits.
 

Valence

Well-known member
Steel Soldiers Supporter
2,112
555
113
Location
Davis County, UT
I am hesitant to post this large wall of text, as I have no intent or interest in creating a discussion about auto insurance (I have that well in hand). However, I did still want to share it as it is part of the experience of owning this truck.

-----

Last month (February 2018) I was discussing with my Farm Bureau insurance agent some the coverage details on my, now, 46 year old M35A2. The discussion primarily centered around a notice I’d received in the mail that read, in part:

  • “In the event of a loss, we would pay the lesser of the stated amount or the actual cash value at the time of loss.”
I have a stated amount on my policy for my truck. I was concerned with how Farm Bureau determined “actual cash value” on a relatively uncommon truck. Especially since I have a fairly large amount of extra equipment, restoration, and upgrades to the truck that add significant value over a base “M35A2”. As is well known, it is very easy to get a base M35A2, soft top, no winch, no troop seats or cargo cover for *much* less than one with those basic, stock options, especially if it's a rusty one, let alone one with upgraded tires, air ride seat, light bar, air-assist steering, many safety upgrades, and an M66 gun ring. My insurance agent said the underwriters don’t like guns mounted to vehicles and quickly drop those policies. I did clarify that there is no gun mounted to the truck.

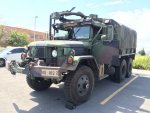
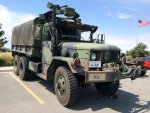
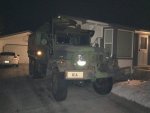
My agent came over to my place and took pictures of the truck, and he even brought his little boy, which of course I was more than happy to let him get pictures of his boy in the driver's seat or running around in the bed. The kid loved it and said "Wow! A real army truck!". My agent was going to talk to the underwriters to help them understand the extra value of the truck but he made it clear to me that it was up in the air whether or not Farm Bureau was going to not renew my policy at the end of May. In my opinion, it was a knee jerk reaction to the words “gun ring”. So, word of the wise now, call it an “equipment ring”, because plenty of other things can attach to those pedestal mounts. (PS: I utterly detest such word games).

Several weeks passed without word back so I reached out to my agent and he immediately called the underwriter since she hadn't gotten back to him either. Her exact wording was that the truck was too "militarized". My agent pressed her and the (IMO, the non-political reason) is that they weren’t suppose to insure anything over 2 tons.

My agent is an upright, decent, hard working human being, and I really appreciate all that he's helped me with over years. However, because of this I will never again support Farm Bureau, even if they were the cheaper option.
 
Last edited:
rustystud

Well-known member
9,297
3,070
113
Location
Woodinville, Washington
I am hesitant to post this large wall of text, as I have no intent or interest in creating a discussion about auto insurance (I have that well in hand). However, I did still want to share it as it is part of the experience of owning this truck.

-----

Last month (February 2018) I was discussing with my Farm Bureau insurance agent some the coverage details on my, now, 46 year old M35A2. The discussion primarily centered around a notice I’d received in the mail that read, in part:

  • “In the event of a loss, we would pay the lesser of the stated amount or the actual cash value at the time of loss.”
I have a stated amount on my policy for my truck. I was concerned with how Farm Bureau determined “actual cash value” on a relatively uncommon truck. Especially since I have a fairly large amount of extra equipment, restoration, and upgrades to the truck that add significant value over a base “M35A2”. As is well known, it is very easy to get a base M35A2, soft top, no winch, no troop seats or cargo cover for *much* less than one with those basic, stock options, especially if it's a rusty one, let alone one with upgraded tires, air ride seat, light bar, air-assist steering, many safety upgrades, and an M66 gun ring. My insurance agent said the underwriters don’t like guns mounted to vehicles and quickly drop those policies. I did clarify that there is no gun mounted to the truck.

My agent came over to my place and took pictures of the truck, and he even brought his little boy, which of course I was more than happy to let him get pictures of his boy in the driver's seat or running around in the bed. The kid loved it and said "Wow! A real army truck!". My agent was going to talk to the underwriters to help them understand the extra value of the truck but he made it clear to me that it was up in the air whether or not Farm Bureau was going to not renew my policy at the end of May. In my opinion, it was a knee jerk reaction to the words “gun ring”. So, word of the wise now, call it an “equipment ring”, because plenty of other things can attach to those pedestal mounts. (PS: I utterly detest such word games).

Several weeks passed without word back so I reached out to my agent and he immediately called the underwriter since she hadn't gotten back to him either. Her exact wording was that the truck was too "militarized". My agent pressed her and the (IMO, the non-political reason) is that they weren’t suppose to insure anything over 2 tons.

My agent is an upright, decent, hard working human being, and I really appreciate all that he's helped me with over years. However, because of this I will never again support Farm Bureau, even if they were the cheaper option.
It really sickens me to hear and see such hypocrisy going on. On one hand people will come up to you and say "thank you for your service" and in the next sentence breath say "your too military for my sensibilities" . Basically saying "We love you when your protecting us but go away after you come home" ! This same attitude is present here. Any business that acts like this should be totally boycotted by all those who love the military and those that served, including the "Steel Soldiers" !!!
 

wallew

Active member
Steel Soldiers Supporter
2,520
18
38
Location
San Angelo, Tx USA Planet Earth
Valence,

Just finished with the thread.

THANK YOU. I've bookmarked it and I might even print it out. LOADS of good info here.

I just bought another deuce after thinking I was 'getting out' of MV's - not so much now.

I use Gulf State insurer's who use Travelers as their carrier. I've used them for years from my first deuce back in 05 to my numerous CUCV's over the past ten years and now my second deuce.

https://www.steelsoldiers.com/showt...ile-got-a-new-truck-finally-she-got-new-shoes

Again, great thread and big THANK YOU for serializing your deuce ownership

This thread should be stickied for all NEW DEUCE OWNERS. Or labeled 'things that you might encounter in owning a deuce and half' (or something like that)

just sayin....
 
Last edited:
Valence

Well-known member
Steel Soldiers Supporter
2,112
555
113
Location
Davis County, UT
Haha, well I don't know about a sticky but thanks wallew! I'm very glad to hear my journey has been useful to someone else!
 
Last edited:
Trinity

New member
1
0
0
Location
Fort Worth, Texas
Well, my first post here, and I would like to say thanks for posting this thread. I just finished reading the entire thread and I found it full of info. Thank you.

Sent from my SM-G955U using Tapatalk
 

Valence

Well-known member
Steel Soldiers Supporter
2,112
555
113
Location
Davis County, UT
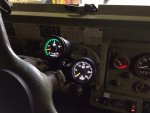
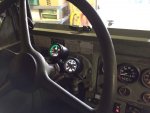
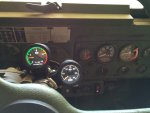
A project I meant to do last year, but ran out of time before my Idaho trip (then subsequently put off) was to install pyrometer (Exhaust Gas Temperature, EGT) and boost gauges. I ordered from www.DieselManor.com the following:

  • R-12021 - ISSPRO EV2 Pyrometer 1600F Black, white illumination (2-1/16" diameter gauge), w/ 1/8" NPT thermocouple and 10 ft. lead wire ($167.48 )
    • I did end up cutting off well over 3 ft of this lead wire, but I wanted to make sure I had enough, so I had ordered the longer length.
  • R-12133 - ISSPRO EV2 Boost Gauge 0-30 PSI Black, white illumination, red pointer (2-1/16" diameter gauge), including sender (1/8" NPT) ($138.25)
  • TAP18 - 1/8" NPT x 27 TPI Pipe Tap with 1/4" square drive, requires size "R" drill bit (0.339" or 21/64") ($15.65)
  • BIT-716 - [SIZE=-1]Size "R" Drill Bit for 1/8"NPT Tap ($8.79)[/SIZE]
    • [SIZE=-1]As you can see, this is not the drill bit the tap calls for, I believe I called Diesel Manor and spoke to them on the phone to order all of this and they were out of size "R" drill bits but the fellow said the 7/16" would work fine (but it's been a while so my memory may be wrong!)[/SIZE]
  • AM-2204 - Auto Meter Mounting Cup for 2-1/16" Gauges qty 2 ($49.90) (FYI: these can be found many places)

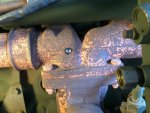
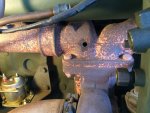
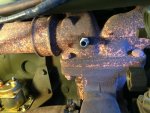
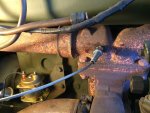
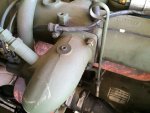
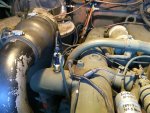
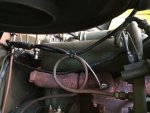
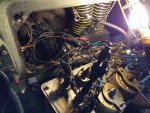
In April of this year I got the most delicate part done, and that was drilling and tapping the exhaust manifold. I used a magnet and red high-temperature grease on my drill-bit and tap (cleaned and re-greased frequently) to capture metal shards. As can be seen, I opted to put my single sensor in the rear 1/2 of the manifold. I also put copper anti-seize on the probe threads.

2018-04-01 17.07.01.jpg 2018-04-01 17.30.49.jpg 2018-04-01 18.16.57.jpg 2018-04-01 18.22.04.jpg

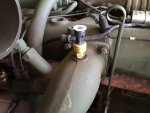
Of course, the boost sensor was easy to just put in this existing 1/8" NPT port on the air intake. :-D

2018-04-01 16.17.01.jpg 2018-04-01 16.26.43.jpg

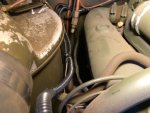
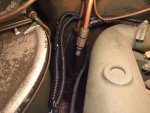
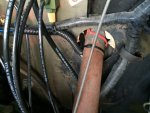
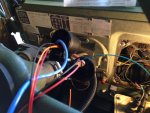
I then covered the sensor wires in 1/4" and then 3/8" split loom tubes when they joined together and ran the wire bundle behind the engine and followed the existing wire harness and then up the steering column.

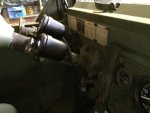
2018-04-10 19.31.02.jpg 2018-04-08 19.33.11.jpg 2018-04-10 19.30.29-1.jpg 2018-04-10 19.30.40.jpg 2018-04-08 19.33.33.jpg 2018-06-01 14.52.19.jpg

Some atrocious wiring behind the instrument cluster (I need better power splitters than just daisy chaining 'Y' splitters, but they'll work, for now). These EV2 gauges are powered with a three wire setup:
  • Red ("ignition")
  • Orange ("dimmer") (the gauge lights will not illuminate unless both red and orange lines are powered)
  • Black (ground)
I connected the red wire to the instrument cluster's #27 wire (that is powered when the "Accessory" power switch is enabled) but since this power source is not fused I had to add the provided 1A in-line fuse. The orange wire I connected to one of the gauge lights to act as a dimmer via the 3-lever switch. "Low" is 22v and "High" is max voltage (24-28v) and ground I added to my ground bolt bundle on the dash from my supplemental electrical air-compressor install. I did daisy-chain the the power from one gauge to the next (they're designed for this and the instructions recommend it).

This setup works just fine, but I notice no illumination difference on the EV2 gauges for dash lights low or high. So I'm thinking of also wiring the orange line directly to power as I feel like I want the EV2 gauges illuminated even during broad daylight, but I guess it's not a big deal if the instrument cluster lights are on too, I'll just be replacing bulbs more often - or switch to LEDs. I'm not sure if the EV2 gauges will be too bright at night. If they are, then I'll have to move that orange wire, or insert a real dimmer.

2018-06-01 14.52.29.jpg 2018-06-01 20.43.00.jpg 2018-06-01 20.43.57.jpg 2018-06-01 20.44.07.jpg

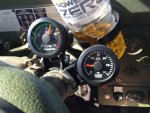
After start, the exhaust was about 250 F, zero boost of course.

2018-06-01 15.57.47.jpg

Cruising down the highway was at about 50 MPH the exhaust was around 900 F - 1000 F with 5 lbs of boost. The hottest I was able to push the exhaust was to ~1125F with 8 lbs of boost while lugging 4th gear up a mile incline. There probably is a little room to "turn up the fuel" if I so desired.

2018-06-01 17.02.36.jpg

I finished this install too late to attend a large, annual "Historic 25th Street" car show in Ogden, UT, but I still drove up to test my truck and gauges.

I picked up a few groceries on my way home. :roll::jumpin:
2018-06-01 19.37.07.jpg

Ending odometer: 3607.0 miles (+33.2 miles)
Ending hour meter: 361.4 hours (+1.3 hours)


I forgot I still have a fuel leak. Shoot. I think that's going to require dropping the winch PTO shaft to get room to investigate... and possibly fuel dye and a black light to trace it down more easily. Blarg.
2018-06-01 20.35.04.jpg
 
Last edited:
Top
AdBlock Detected

We get it, advertisements are annoying!

Sure, ad-blocking software does a great job at blocking ads, but it also blocks useful features of our website like our supporting vendors. Their ads help keep Steel Soldiers going. Please consider disabling your ad blockers for the site. Thanks!

I've Disabled AdBlock
No Thanks