• Steel Soldiers now has a few new forums, read more about it at: New Munitions Forums!

  • Microsoft MSN, Live, Hotmail, Outlook email users may not be receiving emails. We are working to resolve this issue. Please add support@steelsoldiers.com to your trusted contacts.

What have you done to your HMMWV today/lately

Thumper580

Active member
269
210
43
Location
Virginia
Installed new battery cables. Got them from BatteryCablesUSA. Great site. You specify every part of the cable based on your application. I swear the truck starts better.... Also installed a 24-12v converter and a USB/cigarette lighter console. Will mount the console tomorrow.
IMG_20210105_160106968.jpgIMG_20210105_160242281.jpg
 

Milcommoguy

Well-known member
Supporting Vendor
1,710
2,265
113
Location
Rosamond, CA
Installed new battery cables. Got them from BatteryCablesUSA. Great site. You specify every part of the cable based on your application. I swear the truck starts better.... Also installed a 24-12v converter and a USB/cigarette lighter console. Will mount the console tomorrow.

How do you keep the batteries from bouncing around and how do you turn on and off the converter?

Rocking and a sparking, CAMO
 

WhoMe08721

Active member
191
123
43
Location
Bayville/NJ
Final Got The New Heat All Finished. The new heater pumps out so much heat it melt the hose. So back to the drawing board and this is my new idea for it. But the heater pumps out so much heater I can drive with no doors in the winter now, which is crazy;)
 

Attachments

Bulldogger

Well-known member
Steel Soldiers Supporter
1,330
586
113
Location
Quantico VA
Final Got The New Heat All Finished. The new heater pumps out so much heat it melt the hose. So back to the drawing board and this is my new idea for it. But the heater pumps out so much heater I can drive with no doors in the winter now, which is crazy;)
Any drawings or other information on your new heat setup WhoMe?
BDGR
 

rcamacho

Well-known member
770
843
93
Location
Bainbridge Island Wa
Final Got The New Heat All Finished. The new heater pumps out so much heat it melt the hose. So back to the drawing board and this is my new idea for it. But the heater pumps out so much heater I can drive with no doors in the winter now, which is crazy;)
Wow, what heater retrofit is this?
Is there any leg room for the passenger position?


Sent from my iPhone using Tapatalk
 

WhoMe08721

Active member
191
123
43
Location
Bayville/NJ
The heater first started as a (Bergstrom 24v Heater KIT MRAP LVSR Military LVS TRUCK MK48). But after receiving it I found out it did not fit. So not a big deal, all I thought I had to do is cut one side off, make it smaller and reweld it back on. But that did not work. So I scrapped that whole thing and started from scratch. The only thing I used from this kit was the blower motor and heater coil. Every thing else I hand made. I did 3D model every thing and made carboard model to test fit and work out the finally design. There is still passenger leg room. The heater is just deeper to the fire wall and a little deeper to the floor. I am 6'-2" and I still fit with leg room.
 

Attachments

WhoMe08721

Active member
191
123
43
Location
Bayville/NJ
Right now this is a one off heater maybe a retrofit kit in the future if there's interest . Also to note this design innovation dose not use fresh air from outside. Which I am ok with, cause every hmmwv I have ever been in are not air tight and leak enough fresh air in. Also in the summer time to use the blower as a fan dose not work where I live, when it get up to around 95°F in the summer, that why I don't rock doors doing the summer.
 

Daves86

Active member
139
80
28
Location
Manassas/VA
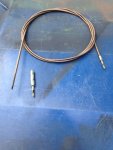
Busy week, had to replace speedo cable
Speedo cable 1.JPG
Note: pay attention to the manual. INCH POUNDS not foot pounds.
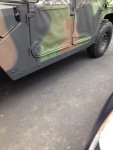
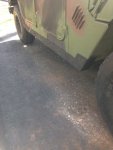
Got my rock rails installed
rock rails 5.JPGrock rails 7.JPG
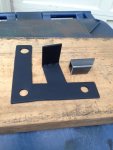
Finished moving my backup camera after adding Rhino Tire Carrier. Tire blocked rear view when camera was mounted in the body below the tailgate. Mounting plate acts as spacer behind tire to allow wire to go behind rim without getting pinched. This set up allows the camera to stay on the carrier if you need to use the spare.
Rhino Camera mount 2.JPGRhino Camera mount 5.JPG
Rhino Camera mount 7.JPG
Just need to tap the square tube with the camera in it and mount that to the plate, rather than use the zip tie. A few days work, thankfully the last few days were mot awful weather wise.
 

TOBASH

Father, Surgeon, Cantankerous Grouch
Steel Soldiers Supporter
Supporting Vendor
3,579
3,488
113
Location
Brooklyn, NY
Just received new radiator, oil/tranny cooler, water pump, power steering cooler from Mac Motors. Gonna go in as soon as I can, then I guess I have to make sure the shroud gets re-aligned prior to starting her up.

Then I will re-core the original radiator and keep as an emergency spare. Same with original water pump. I will look for the leak in the oil cooler and see if I can seal it, or I will junk the 33 yrs old unit. Original power steering unit seems good and I will keep as emergency back-up.
 

Ajax MD

Well-known member
1,569
1,414
113
Location
Mayo, MD
I'd finally had enough of leaves and trash blowing into the cab underneath the 2-man canvas curtain. I obtained a 2-man cargo partition this weekend for a fair price and met a nice forum member.

I'm looking forward to painting this thing up and sealing out the water and debris (as much as a old, canvas HMMWV can be sealed.)
 

Inspector 1

Active member
105
73
28
Location
Spring Texas
"Battery Hold Down Bracket"
"Potential Electrical Fire"
I posted this Battery Hold Down picture earlier. I wanted to thank all who advised me of the potential electrical hazard. I turned the batteries 90 degrees. I tried to modify the original HMMWV hold down bracket. I notched the sides of the bracket to fit into the grooves on the Optima Batteries. Big Mistake as now the bracket is to flimsy to tighten down without bending the bracket. I ended up using 1/8" flat bar, sleeved with pipe insulation, and wrapped with electrical tape. Not the prettiest set up but the batteries are tightly secured and no risk of electrical hazard.
 

Attachments

Last edited:

MattNC

Well-known member
222
270
63
Location
Raleigh, NC
I built an easily removable drawer system to take in and out as needed. I leave in my rubber pads under it to deaden the sound then it slides in and uses concealed turnbuckles to attach to the tie downs already in the bed. I aimed for under 100lb to move it by myself or easily with a friend. I put it in myself in about 10 minutes including fastening it down. It’s plywood and dimensional lumber, roller skate bearings and aluminum c channel for the slides. The top is also covered with the lightest truck bed pad I could find. Aluminum angle scrap was used for the edges for reinforcement. The main drawer is 5.5’ long and has already housed my fire sticks on trips out hunting. I’ve also put 800 lbs of lumber on top of it and didn’t break it. When I padlock the tailgate the drawers can’t be accessed. Last is I made a locking compartment at the very front to hold my intercom set and headsets so they stay clean and not stolen if I stop for gas or whatever.
 

Attachments

Daves86

Active member
139
80
28
Location
Manassas/VA
My Christmas present showed up today!!
DWF 1.JPG
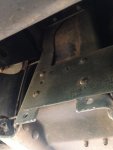
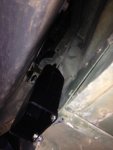
My Wife got ahold of my Mom and Kids and they went in together to get my next project/upgrade. Still need the Stack bracket, but we'll see when that shows up. I got the exhaust bracket in place today.
DWF Bracket 3.JPGDWF Bracket 2.JPG
DWF Bracket 1.JPG
Will update as the project progresses
 

Daves86

Active member
139
80
28
Location
Manassas/VA
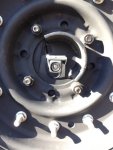
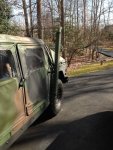
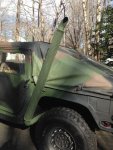
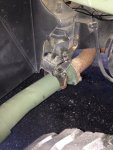
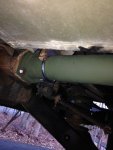
Another nice day here in Northern VA. Got the Deep Water Fording Exhaust on. Had to get two bolts to hold the exhaust pipe to the side of the truck. These were not listed in the instructions. I used the same bolts as the 3 that hold the assy to the muffler.
DWF EX 1.JPGDWF EX 2.JPG
DWF EX 3.JPGDWF EX 4.JPG
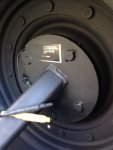
Also had time to plumb the hose from the Sensor Cup into the engine bay and install the cup. Instructions don't seem to make sense, but as soon as you get under the truck it makes sense where the cup goes. The two holes under the A pillar are the give away. Also a 5mm camera (endoscope) showed the path in the A pillar is toward the front of the truck for routing the hose. Stay between the insulation and the outer part of the pillar. Tight fit but doable.
DWF Sensor Cup 1.JPGDWF Sensor Cup 2.JPG
 

Ajax MD

Well-known member
1,569
1,414
113
Location
Mayo, MD
@Daves86 Ah, at last! Good photos of the sensor cup.

My truck appears to have all fording components in place except for the intake stack, exhaust and sensor cup. The hose leading to the sensor cup is still in place. Now I know how it installs and what it looks like.
 
Top