• Steel Soldiers now has a few new forums, read more about it at: New Munitions Forums!

  • Microsoft MSN, Live, Hotmail, Outlook email users may not be receiving emails. We are working to resolve this issue. Please add support@steelsoldiers.com to your trusted contacts.

What have you done to your HMMWV today/lately

Coug

Well-known member
Steel Soldiers Supporter
3,003
4,420
113
Location
Olympia/WA
Thanks for your view. That bit on hot for the disconnect is what I would have done too but it seems a number of 4WD sites say negative. I am going to disregard that nonsense as internet stupidity.

And I am in the camp of "no" on breaker or fuse. With potentially a 500 A load at peak, I feel like I will trip the fuse/breaker no matter what happens.
24V has half the amps.
My 12k lb milemarker electric is rated for 185 amps on 24V at full load. The 12V version is 370 amps.

On a 12V system, especially if it's a single battery, you're going to be drawing it down quite a bit on a longer pull, and the more the voltage drops, the higher the amps will be. On 24V it's not going to be as bad with the dual batteries to make 24V.

I've done a few pulls, but haven't maxed it out, and have enough rigging that it's unlikely that I will need to (4 pulley blocks, 150 feet extra line, multiple straps, etc)
 

Autonomy_Lost

Well-known member
687
1,537
93
Location
Pennsylvania
Thanks for your view. That bit on hot for the disconnect is what I would have done too but it seems a number of 4WD sites say negative. I am going to disregard that nonsense as internet stupidity.

And I am in the camp of "no" on breaker or fuse. With potentially a 500 A load at peak, I feel like I will trip the fuse/breaker no matter what happens.
If someone says disconnect the negative they are probably just confusing the fact that you are supposed to do so for a battery disconnect as Coug said.

If you are gonna opt for no fuse, I suggest that you install the disconnect as close to the battery as possible (electrically speaking) and leave it off when not in use. Any length of live +24V cable thats not fused is a risk of your truck burning down, so keep that length as short as possible.
 

Coug

Well-known member
Steel Soldiers Supporter
3,003
4,420
113
Location
Olympia/WA
So when I go out wheeling with a group I use a GMRS walkie talkie.
Problem is, the truck is so loud I can't really hear when other people are talking, or at least not clearly.

I didn't see anything obvious in the radio section and web search didn't show a whole lot specific to what I was searching (it's probably out there but I couldn't find it)

I'm wiring up a 671 speaker and H250 handset to my walkie talkie in order to be able to hear it. Speaker/handset came in the mail today, and the cut off end of the cable for the speaker showed up saturday. The plug was from the wrong end of the cable or something, as it was missing a wire for pin J the "push to talk" circuit.

Found some wiring diagrams on this site for the speaker/connector.

For the walkir talkie side it's a Baofeng, which uses a K1 connector (Kenwood type 1 connector)
diagram for it was here:


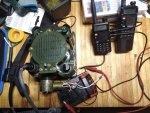
Picture below is from my quick and dirty testing. bought a cheap cable with a 3.5mm plug on one end a 2.5mm plug on the other, and cut it in half to give me the two cables I needed out of the radio. A milwaukee 18V battery for a power supply, and my son walking around outside for testing purposes. Everything worked how it is supposed to, from the speaker, handset earpiece, microphone, and PTT button. Can't wait to get it properly spliced together
All the wiring is just temporary for testing purposes. I'm not used to working with this small of wires, so I have some low temp solder heat shrink connectors for it on order, as well as regular solder and heat shrink.
b0375f9daacde6535ff613b261c6a7ccc3cfe07a-2.jpg

Now just to figure out where to mount it that it won't be in the way of all the other crap I've put in there, but still be readily usable.
 

Coug

Well-known member
Steel Soldiers Supporter
3,003
4,420
113
Location
Olympia/WA
So when I go out wheeling with a group I use a GMRS walkie talkie.
Problem is, the truck is so loud I can't really hear when other people are talking, or at least not clearly.

I didn't see anything obvious in the radio section and web search didn't show a whole lot specific to what I was searching (it's probably out there but I couldn't find it)

I'm wiring up a 671 speaker and H250 handset to my walkie talkie in order to be able to hear it. Speaker/handset came in the mail today, and the cut off end of the cable for the speaker showed up saturday. The plug was from the wrong end of the cable or something, as it was missing a wire for pin J the "push to talk" circuit.

Found some wiring diagrams on this site for the speaker/connector.

For the walkir talkie side it's a Baofeng, which uses a K1 connector (Kenwood type 1 connector)
diagram for it was here:


Picture below is from my quick and dirty testing. bought a cheap cable with a 3.5mm plug on one end a 2.5mm plug on the other, and cut it in half to give me the two cables I needed out of the radio. A milwaukee 18V battery for a power supply, and my son walking around outside for testing purposes. Everything worked how it is supposed to, from the speaker, handset earpiece, microphone, and PTT button. Can't wait to get it properly spliced together
All the wiring is just temporary for testing purposes. I'm not used to working with this small of wires, so I have some low temp solder heat shrink connectors for it on order, as well as regular solder and heat shrink.
View attachment 903630

Now just to figure out where to mount it that it won't be in the way of all the other crap I've put in there, but still be readily usable.
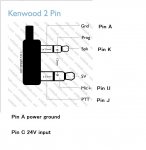
To add to the above, here is where everything goes without having to figure out the wiring diagrams for yourself:

Pinout.jpg

Side note, the H250 handset is noise cancelling or something like that (it's just not very loud when speaking into it, but I've heard it said other places it's "noise cancelling") so you have to have it actually touching your lips when you're talking into it or you won't be heard on the other end.
 

Coug

Well-known member
Steel Soldiers Supporter
3,003
4,420
113
Location
Olympia/WA
Figured I'd drop this:

https://www.disco32.com/

I have a few of their components, good quality stuff, I run their PTT setup for my Peltors to work a Baofeng UV-5/8 comms setup. They might have something worth looking at.
I just went through their site. Lots of great products, but also a lot of them are kind of spendy.
I didn't see anything that would function the same as what I did above, but it's a great resource for other types of setups.
 

Mogman

Moderator
Staff member
Moderator
Steel Soldiers Supporter
7,018
9,700
113
Location
Papalote, TX
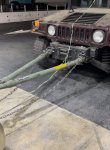
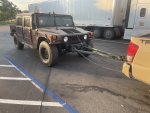
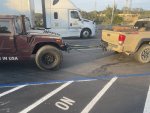
Made the trip to pick up the M1097A1 it was a very uneventful trip, it was 102 on the highway so I cut the old girl some slack and ran only 70 loaded on the way home, with over 300K on her she has nothing to prove, Diggy Dog enjoyed the ride.
I don't think we will be seeing any more HMMWVs come out of Lytle in the near future as this was the only one there, lots of generators.
EDIT I am really starting to like that ATTBAR top, although not as heavy duty as the AMTECH tops.
 

Attachments

Last edited:

Mogman

Moderator
Staff member
Moderator
Steel Soldiers Supporter
7,018
9,700
113
Location
Papalote, TX
Made the trip to pick up the M1097A1 it was a very uneventful trip, it was 102 on the highway so I cut the old girl some slack and ran only 70 loaded on the way home, with over 300K on her she has nothing to prove, Diggy Dog enjoyed the ride.
I don't think we will be seeing any more HMMWVs come out of Lytle in the near future as this was the only one there, lots of generators.
EDIT I am really starting to like that ATTBAR top, although not as heavy duty as the AMTECH tops.
Things are a little clearer now, I knew the harnesses had been cut in many places and she was picked over pretty well.
I found paperwork showing the Harris County Sheriff's DPT had turned in this M1097A1 into DLA for disposal.
So they just went out and stripped anything they thought they could use on other HMMWSs and cut every wire in the process which is not the norm with trucks coming out of the military, although I am sure it does happen.
But I did see the damage, I picked it up mostly for the top and back doors, but the body is straight as a pin and the rolling chassis is in nice shape!
 

CharlieB

New member
Steel Soldiers Supporter
15
8
3
Location
IL
95% of transfer cases are aluminum housing,
As far as chain goes, it’s just a connector between two gears nothing else, in fact if you examine 242, it would have been so much easier, tiny bit costly and probably forever solid unit. If they added the 3rd sprocket to make it a gear drive instead of chain drive.

see attached picture, take the chain out of occasion and imagine another gear in between those two

View attachment 902783
Would need 2 more gears, with only one it would spin wrong direction. That could be nice though!
 

CharlieB

New member
Steel Soldiers Supporter
15
8
3
Location
IL
Its my understanding that chains are stronger than gears. When two gears interface, they only make contact with 1-2 teeth at a time. Whereas a chain wraps completely around a gear and utilizes many more teeth.

Edit: google says I'm wrong, but not sure why. Maybe the chain itself is the weakness.
Probably that or the fact that it stretches as pictured earlier 🤷🏻‍♂️
 

frauhansen

Well-known member
Steel Soldiers Supporter
276
538
93
Location
switzerland
few reasons why I chose gear oil instead of ATF,

i drive a lot, my transfer case gets hot, I had to replace the ATF every 15 to 20.000 miles, it was cooking inside and envaporating
I had enough of that, gear oil a lot more heat tolerant than ATF.

gear oil is also a lot quieter than super thin ATF

Gear oil has cushion factor, AFF does not.

I have thoroughly checked and inspected the 242 transfer case before I made the decision to go with Gear oil, this transfer case is no different than any other transfer case that uses gear oil,

In California warm weather conditions ATF doesn’t do the job for me, gear oil is much better for all the gears and bearings inside, and that’s all it has in there .

I am using generic gear oil form NAPA

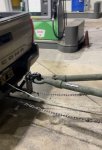
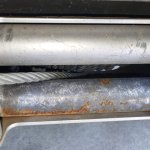
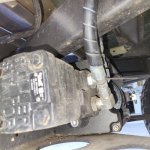
I put a brand new transfer case in 2020, last week it has about 60.000 miles on it, you see chain was stretched, it also destroyed the cooling loop inside, thankfully I always bypass the cooling loop on all my trucks, otherwise all that aluminum shavings would of killed my transmission.
Without a cooling loop, it’s a 100% isolated unit, no need to keep using ATF.
View attachment 902746View attachment 902747View attachment 902748
If I may come back to this topic again briefly.
What viscosity do you use in the case of the GearOel?
Any additional specifications? Or do you take there 80W90 from the axles?
 

Mainsail

Well-known member
Steel Soldiers Supporter
1,512
1,696
113
Location
Puget Sound, WA
I renewed my hatred for split-loom this week, finally getting the radio installed.

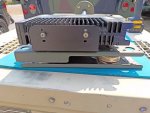
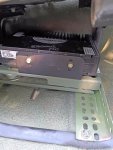
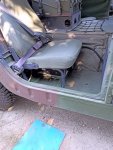
Harris XG-100M multiband. I was gifted this radio rack with shock isolation. The radio didn't fit between the uprights so I took the top off an flipped it upside-down and mounted to the flat surface. The radio went into the bracket, and the whole assembly went under the right rear seat. I had to fab up some way to mount the assembly to the seat bolts to keep it up off the floor to stay dry.

The antenna cable was run from the Duke, through the rear wheel well, and through the antenna cable grommet behind the seat.

RadioRack01.jpg

RadioRack02.jpg

RadioRack03.jpg

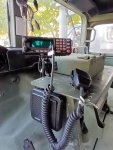
After that I remembered how much is dislike running wire. I put the control head on the shelf with a ram mount and mounted the speaker under the shelf.

RadioRack05.jpg

Made a few contacts on 146.52, and hit a few repeaters. I had to adjust the mic gain a bit, and fixed a few programming bugs I introduced. On the road the radio has the punch to be heard over the noise, but I'll be wiring in some headsets. Still working out where to hang the mic.
 

rcamacho

Well-known member
774
858
93
Location
Bainbridge Island Wa
Preparing another X door for paint. Upper corner of window frame was damaged. Rebuilt the structure with resin & glass mat. Got very close to original lines and finished off the low spots with filler.

Pulled off the supplemental armor to get after corrosion before final paint.


Sent from my iPhone using Tapatalk
 
Last edited:

rcamacho

Well-known member
774
858
93
Location
Bainbridge Island Wa
Completed reinstalling the rear differential assembly post rebuild. Lots of work on a spare time basis.

Replaced rear driveline universal joints.
New pads and rotors. Rotors were warped.
Took the opportunity to replace RR brake line which was compromised.
Flushed and bled all 4 corners with DOT5. Existing fluid tested partially silicone so figured it was safer to just flush everything. Lots of contamination in the system (particulate).


Sent from my iPhone using Tapatalk
 
Last edited:

M1165A1

Well-known member
423
873
93
Location
The High Country, CO
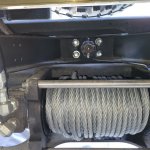
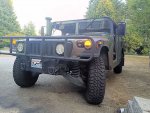
Finally completed my winch installation, the wiring.

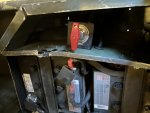
The hardest part was deciding where to hook in to tap power. Two obvious choices: under the vehicle on the starter, or back in the battery compartment under the commander's seat.

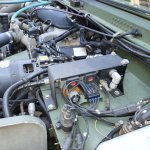
I opted to run the positive lead back to the 24V post on the second battery. Doing so allowed me to install a Flaming River 500A disconnect switch, meaning the winch wiring has no power unless I am using the winch. That seemed like a prudent safety precaution.

IMG_3492.jpg


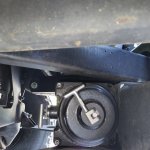
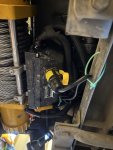
The winch (Sherpa Steed 17K model in 24V) comes supplied with a control box that mounts on the back of the winch itself. I attached the control box and ran the power and ground wiring along the right frame rail, up and over and down via the radiator compartment. Ground went to the ground on the starter.

IMG_3490.jpg

Note that Sherpa supplies the winch with 25mm2 wiring, equivalent to 4 AWG, and the wires are nowhere near long enough to work on a HMMWV given the distance to the battery. So I upgraded the 25mm2 to 2 AWG (32mm2) tinned marine wire by Ancor. It kind of fit into the control box with a little persuasion and seems very nice high quality stuff.

Sealed all the connections and also the control box wire entrances with some healthy globs of RTV 734.

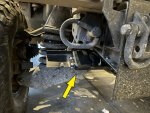
For control, I splurged on the wireless controller. An old license plate frame laying around the garage provided a mounting plate to some existing holes on the frame extension. At some point I will have to trim off the extra 3" on the plate holder with a grinder.

IMG_3491.jpg


Remote for the unit, which allows you to be mobile while winching and also stay safely out of the winch danger zone:

IMG_3493.jpg


I tested it by winching HMMWV #2 across the driveway using HMMWV #1 as an anchor. It was a lot of fun.

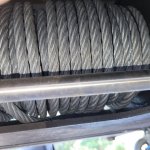
One last thing to do tomorrow after I change the oil on my SUV: I need to take some of the used oil and soak the winch cable to prevent rust over the winter.
 
Top
AdBlock Detected

We get it, advertisements are annoying!

Sure, ad-blocking software does a great job at blocking ads, but it also blocks useful features of our website like our supporting vendors. Their ads help keep Steel Soldiers going. Please consider disabling your ad blockers for the site. Thanks!

I've Disabled AdBlock
No Thanks