• Steel Soldiers now has a few new forums, read more about it at: New Munitions Forums!

  • Microsoft MSN, Live, Hotmail, Outlook email users may not be receiving emails. We are working to resolve this issue. Please add support@steelsoldiers.com to your trusted contacts.

M925a2 Power Surge

74M35A2

Well-known member
4,145
330
83
Location
Livonia, MI
Truck engine and pump is fully stock. Never got around to turning up either fuel rate, governor springs RPM, or injection timing. Studied all deeply, installed EGT ports and probes, then found the ISL for sale.

Still have a sliding pane broken out of my rear window if that is any reference, and an LWS on a shelf at work, and a Recaro seat at my cubicle, A frame crane extensions laying in my garage, and a rooftop A/C unit on another shelf, and HEMTT front rims to transport in, and 53" XZL tires to pick up, and.....UGH !!!
 
Last edited:

Jbulach

Well-known member
Steel Soldiers Supporter
2,655
2,172
113
Location
Sunman Indiana
Hmm... didn't think he ever got around to any of that?

I know it's apples, oranges and bananas, but it would be interesting to see what stock; vs fuel screws, gov. springs, and timing; vs 8.9 with chrome turbo?

You know just some "quick simple" data, oh say like EGT, boost, RW horse & tq, 0-60, 1/8 & 1/4 mile, MPG, and of course miles per transfer-case, once he starts practicing that whole reverse shifting jake-brake thing...
 

74M35A2

Well-known member
4,145
330
83
Location
Livonia, MI
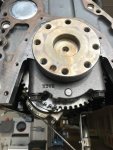
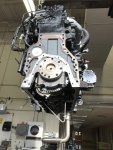
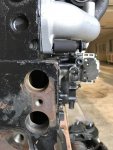
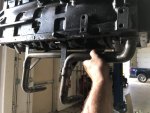
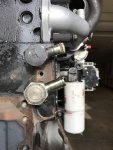
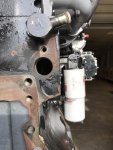
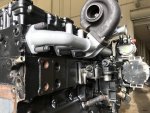
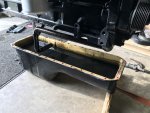
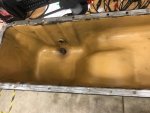
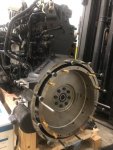
Oil pan and pickup tube swap from RV rear sump to mil front with depression. Bolted right in. Added a fitting on rear of block for heater core return since I added the factory coolant filter and took those ports.

IMG_4146.jpgIMG_4147.jpg IMG_4153.jpgIMG_4150.jpg IMG_4138.jpgIMG_4136.jpg IMG_4141.jpgIMG_4131.jpg
 
Last edited:

simp5782

Feo, Fuerte y Formal
Supporting Vendor
12,122
9,367
113
Location
Mason, TN
Truck engine and pump is fully stock. Never got around to turning up either fuel rate, governor springs RPM, or injection timing. Studied all deeply, installed EGT ports and probes, then found the ISL for sale.

Still have a sliding pane broken out of my rear window if that is any reference, and an LWS on a shelf at work, and a Recaro seat at my cubicle, A frame crane extensions laying in my garage, and a rooftop A/C unit on another shelf, and HEMTT front rims to transport in, and 53" XZL tires to pick up, and.....UGH !!!
I can send you a good rear window unit if you need one.
 

74M35A2

Well-known member
4,145
330
83
Location
Livonia, MI
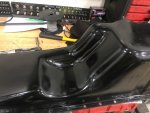
Oil pan installed. I did a couple of shots to show how the 8.3 mil oil pan has a curved depression in it for front axle clearance. Also I peened out the bolt holes before install so they were not high points.

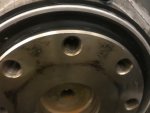
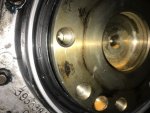
Rear seal installed. I'm not very happy with the rear seal. I wish I would have thought it through better. The seal carrier floats on the bolts, and is not dowel located. I should have installed the seal into the carrier, then slid the carrier onto the block, bolted it to the block firmly so it self centers, and then tighten up the 4 pan bolts from underneath. Instead, I did the 4 pan bolts from underneath first, which drew the carrier down pretty low, and the seal was not centered. The instructions suck, they say to install the carrier and then press seal into carrier. That's it. I loosened everything up, but I may redo this seal with a new one once more, and same with the oil pan gasket. I really want a zero drip engine, and these engines are if right. I would be furious if the rear main was just pouring oil after the swap. I can see part of the dust lip of the seal is touching the crank, and part is not. Now is the time to make it right. So yep, another $86 real main seal please. &#@%. I am going to install the seal into the carrier first, install the carrier onto the block, setting the carrier lower edge even with the block bottom edge (hopefully this centers the seal), bolt it to the block, then install the oil pan. I expected better from Cummins, this is a ridiculous design. I think even the rear main crank seal carrier on an old SBC 350 is dowel located.

I had to do it once just to learn how to do it right. That was time and $. Ugh!

OP1.jpgOP6.jpgOP2.jpgOP33.jpgOP4.jpgOP5.jpg
 
Last edited:

Jbulach

Well-known member
Steel Soldiers Supporter
2,655
2,172
113
Location
Sunman Indiana
That sucks, but I'm sure your making the right call on pulling it back apart. I would think you would just want to let the seal self center, and not worry if the carrier did not come out perfectly flush in the bottom? Pan gasket/dab of RTV "should" make up for if?
 

74M35A2

Well-known member
4,145
330
83
Location
Livonia, MI
Yep, and it is now easy to see that once I screwed it up. I thought Cummins would have a more positive location on that seal carrier, but they actually do the opposite. Like you and Will said, let it center itself, bolt carrier to block, and then bring the pan up to it, RTV the corners like on anything else. I may rip it apart today so once the parts come in tomorrow I can have another go at it during a more reasonable time. I can't reuse the gasket because I put sealant on the corners. I don't know if I damaged the seal by forcing it to the bottom side with the pan bolts first. So, all new and we'll have at it again. It was late, I was full of sealant and Lock Tite, I should have studied it more like I usually do. Lesson learned. At least the engine is not in the truck yet. The carrier gasket is extra long, and it looks like you are supposed to trim the tails that hang down, before you put the pan on. This should have made me pay more attention to this area. $100 mistake. Anybody looking for a really nice genuine name 100A 24v alternator? On sale right now...... This will be the third rear main I am putting on this engine. First ordered was over-sized for a spedi-sleeve, second I screwed up, and let's see how the third one goes...

Really glad I am not doing this while both engines are out of the truck and trying to move my 6CT pan over to the ISL. I bought an extra mil 6CT pan specifically to do this ahead of time. Entire weekend would have been taken up with this silliness, and no weekend parts available. I'm going to test run it again to make sure it is not leaking once I get it together, and before I stick the trans on it. Run it, yank the fly, check for leaks, then stab the 13 on its a@@.
 
Last edited:

Buffalobwana

Well-known member
Steel Soldiers Supporter
1,394
177
63
Location
Frisco Texas
Thanks for making that mistake for the rest of us to learn. I'm secretely two steps behind you doing the same engine swap. Just kicked back watching you make the mistakes.

JK. That sucks dude. Carry on.

But, when you do get it all together, your AC compressor will keep you mighty cool, while you work through your 13 speed learning phase.
 

74M35A2

Well-known member
4,145
330
83
Location
Livonia, MI
*Scary music playing*.....

JB1.jpgJB2.jpg IMG_4180.jpg JB3.jpg JB6.jpg

That helps make up for the 2 hours of sleep I'm on.

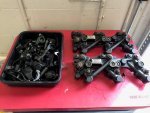
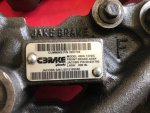
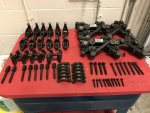
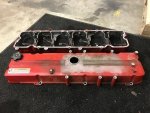
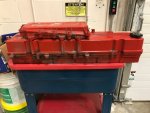
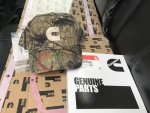
Shipping goons found the other box. Rocker box with pass through wire bulkhead for Jake actuators, raised valve cover for clearance, and 2 piece stacked breather filter. Seller was great, included everything. This would have been a financial nightmare to piece together all the small necessary parts. These are kind of rare. Fits and works on 4 valve ISC (8.3) and ISL (8.9L) engines only. Is available as option from Cummins on new engines or aftermarket add-on kit.....or from eBay as a u-build-it-and-hope-it-works deal.

The Jake is 2 stage. Turns 3 or 6 cylinders into an air compressor. Uses engine oil pressure to pop one of the two exhaust valves per cylinder open at the top of the compression stroke on decel.

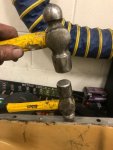
Is there a way to not have this bump to the top with every update? I want to keep details going for those interested, but don't want to drown out others.
 
Last edited:

Buffalobwana

Well-known member
Steel Soldiers Supporter
1,394
177
63
Location
Frisco Texas
No, it keeps going to the top. I always figure, "Hey bwana, If you don't want to read it, don't click on it."

I think its interesting. I learn something every time you make a mistake, or even when you do it right.
 

Another Ahab

Well-known member
17,993
4,541
113
Location
Alexandria, VA
No, it keeps going to the top. I always figure, "Hey bwana, If you don't want to read it, don't click on it."

I think its interesting. I learn something every time you make a mistake, or even when you do it right.

I think Thomas Edison had something to say about that once.

I'll have to go look and see if I can find that...
 

Another Ahab

Well-known member
17,993
4,541
113
Location
Alexandria, VA

74M35A2

Well-known member
4,145
330
83
Location
Livonia, MI
Just relax, it is progressing forward. If you want to sign up for a task, put the seven 16.00 XZL's on my truck and five on the trailer. That should keep you busy for a while. Otherwise, next update will be in a day or so about the second attempt at the rear main, and then test fit assembly of clutch stack, trans, and all that. Going to fit up the Jake actuators also, won't take long. Just a change of 8 rocker studs/nuts (2 intake as oil feed and 6 exhaust), 6 rocker adjusting nuts, and a few knick-knacks. Stay tuned...
 

74M35A2

Well-known member
4,145
330
83
Location
Livonia, MI
Switching engine ECM from 12v to 24v. This is done with a software switch inside (feature selectable), and by changing the engine mounted lift pump from 12v to a 24v one. Also need to change the Jake actuator solenoids from 12v to 24v.

At the same time, confirming the engine cal is 400hp. 450hp is not available for this year of ISL, but 400hp should be enough put grendel and Simp in their places.
 

74M35A2

Well-known member
4,145
330
83
Location
Livonia, MI
Here we go again....rear main, part III.

Ordered the 24v engine mounted fuel lift pump and (2) 24v Jake brake solenoids. Engine will be full 24v system.

Small alternator pulley is in. Hopefully the $ spend is nearing the end. I get free stainless braided Teflon hoses and -AN fittings for the turbo air, oil, and coolant. Charge air cooler already acquired, all I can think of at this point is air and coolant plumbing once installed.
 

Attachments

Last edited:

Another Ahab

Well-known member
17,993
4,541
113
Location
Alexandria, VA
Small alternator pulley is in. Hopefully the $ spend is nearing the end. I get free stainless braided Teflon hoses and -AN fittings for the turbo air, oil, and coolant. Charge air cooler already acquired, all I can think of at this point is air and coolant plumbing once installed.
How did you work THAT deal?!
 

74M35A2

Well-known member
4,145
330
83
Location
Livonia, MI
It is really not free. Guy that owns the place is big into minibikes, so I gave him an 18hp Briggs Vanguard V-Twin for his minibike, now he pulls wheelies and 1st place trophies at shows with it.
 
Top
AdBlock Detected

We get it, advertisements are annoying!

Sure, ad-blocking software does a great job at blocking ads, but it also blocks useful features of our website like our supporting vendors. Their ads help keep Steel Soldiers going. Please consider disabling your ad blockers for the site. Thanks!

I've Disabled AdBlock
No Thanks