• Steel Soldiers now has a few new forums, read more about it at: New Munitions Forums!

  • Microsoft MSN, Live, Hotmail, Outlook email users may not be receiving emails. We are working to resolve this issue. Please add support@steelsoldiers.com to your trusted contacts.

M1010 fire rig to camper conversion

richingalveston

Well-known member
1,715
120
63
Location
galveston/Texas
you might consider just putting the exchanger in the line from engine to heater core. As long as your fresh water pump is not running then cold water will not circulate through the fresh water side and there probably will not be much heat loss. You can insulate the heater core to help. This would make the system very simple.

You might want to insulate the tank also. With out an insulated storage tank, the water will probably not stay hot for very long.

you could always add valves later if it does not work to your satisfaction.
 

cruzer747

Active member
218
145
43
Location
California
you might consider just putting the exchanger in the line from engine to heater core. As long as your fresh water pump is not running then cold water will not circulate through the fresh water side and there probably will not be much heat loss. You can insulate the heater core to help. This would make the system very simple.
You might want to insulate the tank also. With out an insulated storage tank, the water will probably not stay hot for very long.
you could always add valves later if it does not work to your satisfaction.
You are totally right!That would be the best and most hassle free way to do it. I was planning on insulating the exchanger and water lines and eventually the tank will get a winter jacket. In summer it should stay hot without it as long as there is sun. Thankyou for the insight... time to figure out where it mounts in the engine bay.
 

cruzer747

Active member
218
145
43
Location
California
one other thought, you need a vent on that system, you cant heat water without a place for it to expand or you will break something.
did not spell it out but in the sketch near the outlet I drew an overpressure relief valve (OPRV.... just looked and I guess the correct term is just pressure relief valve but I have heard people call it an overpressure relief valve) that will go near the quick connect fitting. I will check the abs pressure rating but will likely go with something pretty low (~60 psi or so)

Thankyou again for looking out
 
Last edited:

cruzer747

Active member
218
145
43
Location
California
about done with the winch bumper

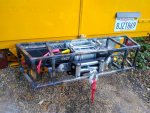
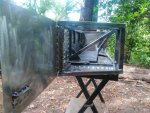
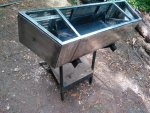
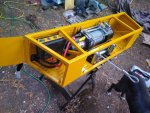
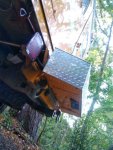
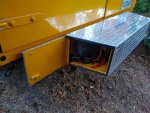
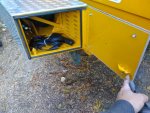
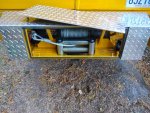
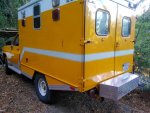
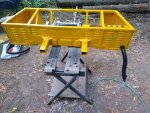
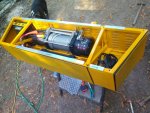
So it has been about a month and a half of free time but I am getting close to calling it complete. Hidden winch bumper with storage... I know it is a little bling but the fire department trim is what I am working with at the moment so I am working with that. Things can be painted easily when they are ready. I am not a welder by trade and for the thicker things I had to rely on oxy acetylene and then used my mig w gas for the stainless paneling. Kind of used what I had laying around and found the stainless louvered cheap locally. The frame to diamond plate needed shimming due to warpage from OA welding. All of the latch pins "stainless bolts" work well... I am hoping at a glance nobody wants to try and gain access. I still need to implement a locking pin or something that can be used front or back, one thing that added a degree of difficulty was the fact that the FD (prior owner) installed the receivers out of plane by about 3/16 of an inch!! I had to slop out the holes to account for this situation in the rear. The width of the dual receivers is also off by 1/16th front to back.... belt sander was my friend here. Considering sleeving the inside of the tubes and sleeving the true pin locations as well but I will wait on that aspect until I see how well it wears after some pulling. All panels fastened with ss pop rivits to avoid corrosion... Time will tell. I have more time than money so the HF winch was what I chose. The wireless addon works but not great (delay, run on.. slight signal dropping at distance) but hey... nice to control from 30' away. Wired with a 400A slow blo fuse to truck batteries to a 300A shutoff switch then 2/0 wire + and - all the way back. Will run the front connector soon. My guestimate is about #160-#180 so in an emergency I could figure it out on my own but definitely a 2 person move if possible. To finish it off there will be a blinky led in the cab to remind me that the winch supply is on so I do not leave it hot. Second step to lower receiver in the rear is in the works.

IMG_20190904_183139.jpgIMG_20190927_145428.jpgIMG_20190927_145531.jpg
IMG_20190929_175742.jpgIMG_20191001_171009.jpgIMG_20191001_171039.jpgIMG_20191001_171050.jpgIMG_20191001_171206.jpgIMG_20191001_171259.jpgIMG_20191001_171358.jpg
 

Attachments

Last edited:

cruzer747

Active member
218
145
43
Location
California
Another 700r4 conversion

I think I am ready to start doing more camping in this thing but the lack of OD is really making for long excursions.... so I read until I have a fairly good idea about what all is required and am %95 made up to go with the conversion kit from PATC for simplicity but just wanted to run it by you all to make sure I am not missing anything. Here is what the kit includes:
  • level 2, 700 Raptor Junior transmission,
  • #2 special low stall diesel torque converter(#2 special?)
  • special low RPM diesel governor (special?)
  • special adapter (seriously what is this one...?)
  • special output shaft #50-6901(for my special splines on my np 2 0 8
  • Beast shell upgrade
  • dip stick
  • throttle valve cable (surely the correct one? FK 25515599 36.1")
  • bracket (must be aftermarket bracket w/ correct geometry?)
  • stud
  • special Humvee to 700R4 flexplate (special!)
  • plastic dust cover
  • no core charge

So I know I will also need a tranny cooler and lines (the deal includes either a small cooler or deep pan), I also have wired a temp gauge that is waiting to be hooked up, also the OD shift indicator is sourced easily enough. I am a little fuzzy as to whether I will need a different mount or not. I hope the would toss the proper speedo gear in there for me. Also I saw no mention of lockup in the kit?

I will be calling them with these questions, I tried to answer all of my own questions using the search here but there are so many ways to skin this cat that there are still some details I had a hard time becoming clear on. Any advice is welcome!

 
Last edited:

chevymike

Well-known member
597
463
63
Location
San Diego, CA
I am curious what you find out. What pricing are they doing for this? I am tossing between something like this or a Gear Vendors unit. Pros and cons to both.
 

Sharecropper

Well-known member
Steel Soldiers Supporter
1,836
987
113
Location
Paris KY
I think I am ready to start doing more camping in this thing but the lack of OD is really making for long excursions.... so I read until I have a fairly good idea about what all is required and am %95 made up to go with the conversion kit from PATC for simplicity but just wanted to run it by you all to make sure I am not missing anything. Here is what the kit includes:
  • level 2, 700 Raptor Junior transmission,
  • #2 special low stall diesel torque converter(#2 special?)
  • special low RPM diesel governor (special?)
  • special adapter (seriously what is this one...?)
  • special output shaft #50-6901(for my special splines on my np 2 0 8
  • Beast shell upgrade
  • dip stick
  • throttle valve cable (surely the correct one? FK 25515599 36.1")
  • bracket (must be aftermarket bracket w/ correct geometry?)
  • stud
  • special Humvee to 700R4 flexplate (special!)
  • plastic dust cover
  • no core charge

So I know I will also need a tranny cooler and lines (the deal includes either a small cooler or deep pan), I also have wired a temp gauge that is waiting to be hooked up, also the OD shift indicator is sourced easily enough. I am a little fuzzy as to whether I will need a different mount or not. I hope the would toss the proper speedo gear in there for me. Also I saw no mention of lockup in the kit?

I will be calling them with these questions, I tried to answer all of my own questions using the search here but there are so many ways to skin this cat that there are still some details I had a hard time becoming clear on. Any advice is welcome!

Cruzer; I am almost ready to begin the install of my P400/700R4. I have a few more things I want to get done, such as braze a couple of aluminum bungs on the P400 oil pan to accept the oil temperature thermocouple and pick-up for the pre-oiler pump. If you are subscribed to my rebuild thread you will see an update soon.

Regarding the 700R4 install, I pretty much have worked through everything necessary to get the project done. I am not familiar with PATC and their kit, but not sure you really need to buy somebody else's kit. I will herein provide a few comments on my experiences:

When I made the decision to replace my TH400 with a 700R4, the first order of business was to settle on a source for the transmission. I studied every transmission builder I could find, and came to the conclusion that there were/are many reputable shops offering quality units. I settled on Bowtie in California because of 2 reasons, first, the drag racing crowd swore by the Bowtie transmissions, and second, the owner of Bowtie, Chris Gardner, drives a 6.2 CUCV as his daily driver and has a 700R4 in it. Chris knew exactly what was needed for my application. I purchased a Level 2 rated at 450 HP and 450 FPT. The transmission came with the correct torque converter and brake-pedal unlock wiring. Chris also built the unit with the correct govenor and Advance Adapters rear output shaft to properly mate to my NP208. If I remember correctly, including freight costs from CA to KY the total cost was somewhere around $2500. But that was in 2016 so I suspect the pricing will be higher now. Chris will speak with you on the phone. His number is 909-528-8901. Nice fellow to do business with.

The 700R4 will fit in the same space as the TH400. Same length, but you will need the taller all-cast adapter. GM14038663. Almost always available on Ebay. It will work on the OEM crossmember.

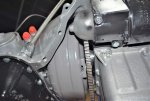
I have never been a fan of a thin flywheel cover, so I watched Ebay and found a nice used cast aluminum 700R4 cover. After bead-blasting, it looked brand new. I had to modify the starter hole slightly to accomodate the larger diesel starter nose. Remember all those holes are metric, as are the bolts which hold the transmission to the block. Buy new metric flange bolts from McMaster Carr.

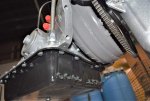
I removed the Bowtie transmission pan and replaced it with a Derale #14204 cooling pan https://derale.com/product-footer/transmission-pans/cooling-pans/14204-detail . This pan has cooling tubes built into it which draw fresh air from underneath the truck when moving and funnels that ambient air througjh special tubes with spiral fins which are submerged inside the transmission. The design effectively removes heat from the transmission fluid. Whether it will be enough or not, I'll just have to wait and see. If not, I will then add an auxillary cooler, but not until I see. If I can keep the transmission fluid temperature down without an auxillary cooler, then I have eliminated a part which can fail.

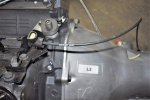
The single most difficult part to source is the factory GM TV bracket for the 6.2. These things are as scarce as hen's teeth and getting more scarce by the day. I may have an extra one in my spare parts bin, I'll have to look. The TV cable is readily available, GM25515599, 36.1" overall length. Proper adjustment of this cable is paramount to correct operation and safety of the transmission. Kinda scary at first, but after I understood how it was supposed to be it was easy. There are numerous publications which attempt to explain the procedure, but in its simplest form, you mount the bracket and attach the cable to the injection pump throttle (there is a place for it), then wedge the IP throttle in the WOT position, then press the little half-moon button on the cable to relase the cable from the bracket, then pull the cable as far rearward as possible while releasing the half-moon button. You also should make sure your IP throttle is really moving to WOT position when you floor the accelerator pedal. If it is not, you will need to modify the pedal linkage inside the cab. The 700R4 gets its orders from one source - the position of the TV cable. If your accelerator pedal is not retracting the cable fully at WOT, the transmission will not operate correctly. This is very important.

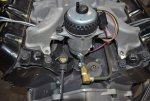
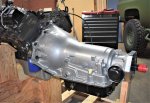
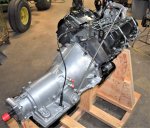
Well, that about covers it. Hope this helps. Here are a few photos -
 

Attachments

cruzer747

Active member
218
145
43
Location
California
Awesome, for some reason I thought you had went with a PATC kit but too much reading and too late of a night. I like the sound of the kit as there is less legwork and from what I have read here (heard no negative feedback) I would guess their product is on par. Thankyou for the detailed writeup, I will call them today, chevymike... I will follow follow this process here so I will let you know how it goes. Curious to know what the "special adapter" was in their parts list. I also like the cooling pan vs lines and radiator. Will probably follow suite here.
 

Sharecropper

Well-known member
Steel Soldiers Supporter
1,836
987
113
Location
Paris KY
Awesome, for some reason I thought you had went with a PATC kit but too much reading and too late of a night. I like the sound of the kit as there is less legwork and from what I have read here (heard no negative feedback) I would guess their product is on par. Thankyou for the detailed writeup, I will call them today, chevymike... I will follow follow this process here so I will let you know how it goes. Curious to know what the "special adapter" was in their parts list. I also like the cooling pan vs lines and radiator. Will probably follow suite here.
As a follow-up, anytime I can eliminate a possible source of failure and still achieve the same or similar result, I will eliminate it. If I can achieve acceptable transmission fluid temperatures without an extra front-mounted radiator, I will do it. If the Derale pan does not provide sufficient cooling, especially when towing, then Derale also offers an inline heat sink model https://derale.com/product-footer/fluid-coolers/transmission/heat-sink which mounts on the frame rail beside the transmission. If all else fails, I'll add the remote radiator kit later.

Regarding the PATC kit, I will encourage you to read everything you can about PATC to make sure their advertising is not all bells and whistles. They may be the best 700R4 builder on the planet, but i would certainly want to be convinced of it before making such a sizable investment in such an important component. I've heard too many horror stories about engine and transmission builders who were supposed to "be the best" but in the end, their product would not last and they would not stand behind their product. I believe there is a similar thread on SS now about Bostic Motors I recommend you read.

Good luck. Let me know how I can help.
 

cruzer747

Active member
218
145
43
Location
California
Good luck. Let me know how I can help.
I read enough and talked with both sources. While PATC may have been able to build a good 700r4 the intimate knowledge that chris had about components for this specific application was enough to sway my decision. We outlined all the parts and components and he is starting on it. Now I will just need to source the bracket or make one as he did. It does not sound too hard but it would be great to just find one, I have set up an alert for it on ebay and hope to find it in the next week or so... I do have some junkyards I can go search but time is precious with winter approaching. Thankyou for your insistence, that has helped greatly.
 

Sharecropper

Well-known member
Steel Soldiers Supporter
1,836
987
113
Location
Paris KY
I read enough and talked with both sources. While PATC may have been able to build a good 700r4 the intimate knowledge that chris had about components for this specific application was enough to sway my decision. We outlined all the parts and components and he is starting on it. Now I will just need to source the bracket or make one as he did. It does not sound too hard but it would be great to just find one, I have set up an alert for it on ebay and hope to find it in the next week or so... I do have some junkyards I can go search but time is precious with winter approaching. Thankyou for your insistence, that has helped greatly.
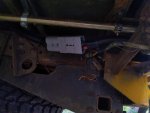
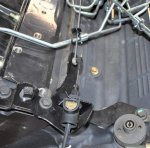
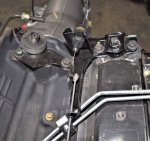
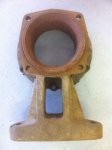
If you cannot find the bracket, let me know. I am sure I have an extra one somewhere, I just need to find it. Also, if you do find one on Ebay, make sure it is the correct one with the cable extension running straight, not on an angle. Also, make sure the plastic bushing that the cable extension runs in is still intact. If it is not, you will have metal-on-metal which will lead to a short cable life. Post a photo if necessary and I will be able to verify. While you are on Ebay also search for that tall 14038663 adapter. Here is what it will look like -
 

Attachments

Sharecropper

Well-known member
Steel Soldiers Supporter
1,836
987
113
Location
Paris KY
there is one straight cable bracket but the pics are so blurry I can not see the plastic bushing

Ahh, Chris missed the detail for the tall adapter. I suppose this is needed in addition to this?

https://www.summitracing.com/parts/add-50-6901


-edit- chris said this adapter kit eliminates the need for the tall adapter.
There are actually 2 adapters required - one internal gear adapter and one external mounting adapter. I believe Chris will include the internal gear adapter which must be installed during the rebuild (you should verify this with him) however I don’t think he will furnish the the taller external mounting adapter. And I don’t see where that Summit kit has the mounting adapter either.
 

cruzer747

Active member
218
145
43
Location
California
however I don’t think he will furnish the the taller external mounting adapter. And I don’t see where that Summit kit has the mounting adapter either.
He said the aluminum tail that is in that kit is shaped like the tail of the th400 so it will bolt right up.
 

Sharecropper

Well-known member
Steel Soldiers Supporter
1,836
987
113
Location
Paris KY
He said the aluminum tail that is in that kit is shaped like the tail of the th400 so it will bolt right up.
Yes it will bolt right up like he said, but the whole end of the transmission and the transfer case must be supported above the crossmember. If you crawl under your truck you will see what I’m talking about.
 

cruzer747

Active member
218
145
43
Location
California
Yes it will bolt right up like he said, but the whole end of the transmission and the transfer case must be supported above the crossmember. If you crawl under your truck you will see what I’m talking about.
Ahh. well, indeed you are correct. I heard having money is overrated anyways.... :shrugs: at least they are available. thankyou again.
 

cruzer747

Active member
218
145
43
Location
California
Ok, so I went and reassessed what we were talking about and I thing Chris is correct about it bolting right up without that tall 14038663 adapter when the advance adapter kit 50-6901 is used. the th400 tail has 6 bolts. The np208 has 6 bolts. The 50-6901 corrects the length of the shaft and flange and uses 4 cap screws to bolt to tranny and then gives 6 bolts for the stock adapter to thread into.

I would need that adapter if I were using a regular 7004r and dealing with the slight different length.
 
Top
AdBlock Detected

We get it, advertisements are annoying!

Sure, ad-blocking software does a great job at blocking ads, but it also blocks useful features of our website like our supporting vendors. Their ads help keep Steel Soldiers going. Please consider disabling your ad blockers for the site. Thanks!

I've Disabled AdBlock
No Thanks