• Steel Soldiers now has a few new forums, read more about it at: New Munitions Forums!

  • Microsoft MSN, Live, Hotmail, Outlook email users may not be receiving emails. We are working to resolve this issue. Please add support@steelsoldiers.com to your trusted contacts.

GovPlanet Humvee Arrival and Inspection

jake20
Well-known member
433
846
93
Location
Illinois
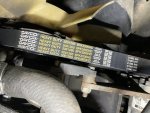
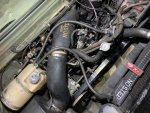
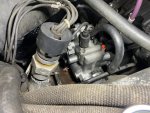
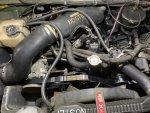
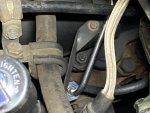
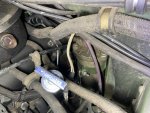
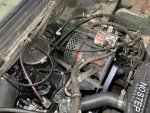
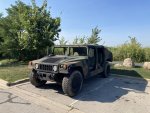
Yippee, engine is all back together and running!

2 things:

- In which position does the cold advance fail if the sensor is unplugged? I finally plugged mine back in since the cables were chewed up when I got it. Seems to be less black smoke when I plug it in. I read somewhere that the cold advance is 5 degrees worth of advancement?

- I’ve got a new start switch coming from Kascar as I suspect mine is faulty. It only turns a small amount towards the start position compared to the other truck I’m dealing with. The truck also likes to crank until I slightly let off the “start” position sometimes. Feels almost like the fuel solenoid doesn’t open until it’s in the “run” position


Other than that, I can now make more noise than speed. Onwards to the next tasks awaiting completion..
 

Attachments

jake20

Well-known member
433
846
93
Location
Illinois
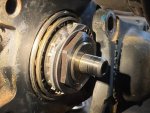
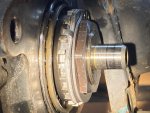
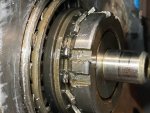
Got started on installing the Bluehummer spindle lock nuts yesterday. Finished the front right hub, was pretty painless and smooth.

Only real problem is that I dropped my drain plug and the magnet separated from it. I wasn't sure if they were glued on or just held magnetically. I re-installed it without the magnet while I wait for new plugs, didn't want to risk having it dance around inside the hub. Have new ones coming anyway since these are pretty rusty on the exterior.

The other thing I couldn't find a straight answer on was the gear oil. I used castrol conventional 80w-90 oil, nothing fancy. Only thing I wasn't sure about is that the bottle says "limited slip" implying that it has additives for limited slip differentials. Don't know if this makes a difference or matters for the hubs at all.


EDIT: I also just realized, my hub looks different than some other people's hubs. I think it may be equipped for CTIS? It has a shield on the front and the steering arm cover has a slot with a seal that the spindle goes into.
 

Attachments

Last edited:

Coug

Well-known member
Steel Soldiers Supporter
2,975
4,356
113
Location
Olympia/WA
Got started on installing the Bluehummer spindle lock nuts yesterday. Finished the front right hub, was pretty painless and smooth.

Only real problem is that I dropped my drain plug and the magnet separated from it. I wasn't sure if they were glued on or just held magnetically. I re-installed it without the magnet while I wait for new plugs, didn't want to risk having it dance around inside the hub. Have new ones coming anyway since these are pretty rusty on the exterior.

The other thing I couldn't find a straight answer on was the gear oil. I used castrol conventional 80w-90 oil, nothing fancy. Only thing I wasn't sure about is that the bottle says "limited slip" implying that it has additives for limited slip differentials. Don't know if this makes a difference or matters for the hubs at all.


EDIT: I also just realized, my hub looks different than some other people's hubs. I think it may be equipped for CTIS? It has a shield on the front and the steering arm cover has a slot with a seal that the spindle goes into.

the friction modifiers shouldn't do any harm.

the hubs on A2 and newer trucks are all CTIS versions.
 

jake20

Well-known member
433
846
93
Location
Illinois
Doing some minor work while waiting on a new starter, that tangent can be found here: https://www.steelsoldiers.com/threads/humvee-starter-flexplate-teeth.210931/

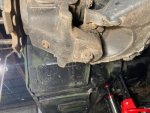
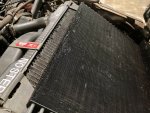
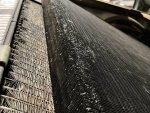
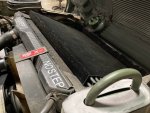
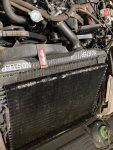
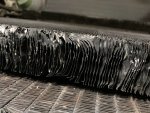
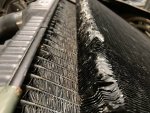
Spent some time unbending radiator fins, quite tedious but I'm satisfied with the result. Used 2 flathead screwdrivers and just slowly and gently pried them back into position. Then gave that section the rust-oleum rattle can dazzle. Turned out pretty decent.

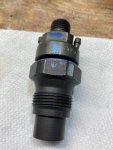
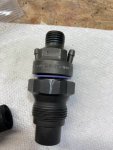
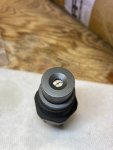
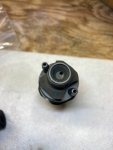
I've had a suspicion that one of my injectors isn't working right, had a new one come in from Kascar, but I'm having quite the time trying to torque it down. I ended up ordering the narrow-walled 30MM injector socket from Kascar to deal with it. The 30MM deep socket I have fits the injector fine, but the valve cover on the engine is in the way. Hopefully the thinner socket fits fine.

I could alternatively try to torque it using the square sides and a crows foot, that's actually how I got the old one out. Not sure if this would over torque the two halves of the injector itself though.

I've got the front spindle lock nuts completed. Just need to do the rears now. I ordered new drain plugs for the hubs since mine are on the rusty side, and I don't want to be drilling them in the future.
 

Attachments

jake20

Well-known member
433
846
93
Location
Illinois
Replaced one of the rear spindle lock nuts today and realized it was a bit more of a pickle than the front ones.

I realized this as soon as I saw that the steering arm cover connection only pivots up and down, so I couldn’t get the cover out of the way enough to fit a socket on the spindle nut.

So I had 2 options:

1: remove the rear parking brake line and drop the half shaft

2: unbolt the ball joint from the steering cover

I had no idea what I’d be getting into dealing with a ball joint, never touched one before, so I chose #1. Half shaft was super easy to pull once I figured it out.


I have the final hub to do tomorrow, and my question is how the rest of y’all prefer to do it
 

Attachments

jake20

Well-known member
433
846
93
Location
Illinois
Yippee, last hub done and good to go.

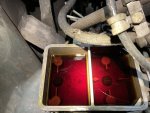
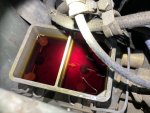
Next step is doing a brake bleed to flush out any old gunk or water. I checked my brake fluid, it’s most certainly dot5. I sampled some and mixed it with water, they repelled each other. For anyone reading this that hasn’t dealt with military brakes before, do NOT trust the labels on anything, sample the fluid. My reservoir cap says “dot3 only” yet the system is dot5.

You can take a small sample and try to mix it with water to test it. If the water will not mix and makes bubbles instead, it’s dot5. If the water mixes and the fluid looks uniform, it’s dot3/4. See attached pictures. You can NOT mix dot3/4 with dot5.

It looks fairly clean, but my experience with dot5 is that water likes to settle along the bottom throughout the system. I’d like to do a basic bleed and just get some fresh fluid in there. Does anyone know if regular commercial silicone dot5 is fine? Or if the military had some sort of special spec dot5? I assume the former but figured I’d check.
 

Attachments

Dieselmeister

Well-known member
Steel Soldiers Supporter
195
273
63
Location
Flagstaff, Az
I used to use commercial silicone fluid, until it became difficult to find at the local stores (Harley-Davidson is one of the few users of silicone fluid). The small bottles were also getting too expensive.
I recently bought a 1 gallon jug from one of the mil parts dealers on epay, and that is working out well.
One annoying phenomenon with silicone fluid is, that it will absorb air. When I spend time along the coast, and then return home (7000 ft elevation), the air bubbles out, and I have to pump the brakes multiple times to get them to work again, or bleed them at the higher altitude.
 

mgFray

Well-known member
Steel Soldiers Supporter
711
982
93
Location
Southern Minnesota
I've had no problem getting DOT 5 from the local O'Reilly's. Military stuff in mine was yellow, but was DEFINITELY DOT 5, the O'Reilly's stuff was a red-ish/purple.. put together no issues at all, mixed just fine. My suspicion is it may have started the same color and turned yellow over time.
 

jake20

Well-known member
433
846
93
Location
Illinois
I ordered some stuff off the Amazon, will be bleeding it later today hopefully. I’ve got a vacuum bleeder so we’ll see how quickly (or not) this process goes lol.
 

Mainsail

Well-known member
Steel Soldiers Supporter
1,502
1,676
113
Location
Puget Sound, WA
Replaced one of the rear spindle lock nuts today and realized it was a bit more of a pickle than the front ones.

I realized this as soon as I saw that the steering arm cover connection only pivots up and down, so I couldn’t get the cover out of the way enough to fit a socket on the spindle nut.

So I had 2 options:

1: remove the rear parking brake line and drop the half shaft

2: unbolt the ball joint from the steering cover

I had no idea what I’d be getting into dealing with a ball joint, never touched one before, so I chose #1. Half shaft was super easy to pull once I figured it out.


I have the final hub to do tomorrow, and my question is how the rest of y’all prefer to do it
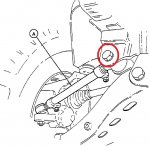
I just ran into this last weekend when I was going through my hubs. I removed the one bolt holding the inboard end of the radius rod and popped it down with a mallet. Seems like a lot less work than pulling the half-shaft.

Maybe I don't understand the problem right?

Looks like the previous owner(s) were pretty enthusiastic with the sealant.

RR.jpgRadius Rod.jpg
 

jake20

Well-known member
433
846
93
Location
Illinois
I just ran into this last weekend when I was going through my hubs. I removed the one bolt holding the inboard end of the radius rod and popped it down with a mallet. Seems like a lot less work than pulling the half-shaft.

Maybe I don't understand the problem right?

Looks like the previous owner(s) were pretty enthusiastic with the sealant.

View attachment 878609View attachment 878610
Nope I think you understand it just fine, good idea! Doing the rears on my friend’s truck soon and will try this instead of the whole other ordeal hehe
 

jake20

Well-known member
433
846
93
Location
Illinois
On another note, further progress has been made:

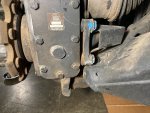
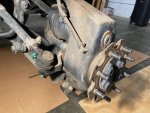
- Brakes bled with 2 bottles of fresh fluid. Fairly uneventful and as you’d expect a bleed to go. Only thing of note is that I learned the fluid reservoir is split. The front half is fluid for the rear brakes, the rear half is fluid for the front brakes. Is this system redundant? Will at least 2 wheels brake in the event of a leak from one side of the system?

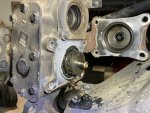
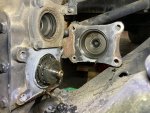
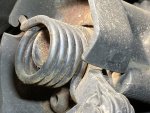
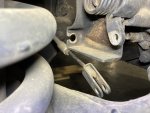
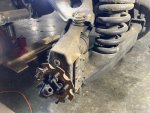
- During the bleeding, I noticed that the front left caliper was actually loose and jiggling on the differential mount bolts. This is obviously bad, so I embarked on an adventure to take it apart and re-torque it all. Here’s a vid:

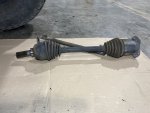
My jack and jack stands were actually in use, but I was able to drop the inboard side of the half shaft, loosen the rotor off the diff, remove the 2 bolts that hold the caliper sliding mechanism, drop the rotor, and then finally get access to the 2 massive bolts that hold the caliper to the diff, where I then proceeded to do pull-ups with a wrench to torque them

It was a bit of a challenge and I had to roll the truck back and forth a few times to get to all the half shaft bolts, but overall I think I’m good now

Remaining items on my primary list:

- maybe receive my sf97 at some point this year
- doors
- turret ring
- fix AC
- paint
- tires

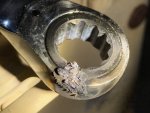
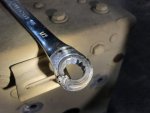
Some pics attached. Friend also joined the surprise welding club today with my 1/2 ratcheting wrench :p
 

Attachments

Coug

Well-known member
Steel Soldiers Supporter
2,975
4,356
113
Location
Olympia/WA
all modern brake systems are split,so that if something does happen you don't lose all braking power.
Typically though it's a diagonal split, so right front and left rear and left front and right rear.

I had a couple of my caliper mounting brackets that were loose. I haven't heard of it happening very often, but if you're in there it's definitely something to check and lock-tite/nordlock for the extra security, as having them back out and contact the halfshaft bolts is pretty annoying.
 

jake20

Well-known member
433
846
93
Location
Illinois
all modern brake systems are split,so that if something does happen you don't lose all braking power.
Typically though it's a diagonal split, so right front and left rear and left front and right rear.

I had a couple of my caliper mounting brackets that were loose. I haven't heard of it happening very often, but if you're in there it's definitely something to check and lock-tite/nordlock for the extra security, as having them back out and contact the halfshaft bolts is pretty annoying.
See I’m used to my deuce where it’s all a single circuit, so that was definitely interesting to see with the divided reservoir.

It’s funny, I couldn’t tell you anything about my daily driver because I never touch it, but at this point I’ll rattle off quite a bit of info about my “actual” trucks 🤣
 

juanprado

Well-known member
Steel Soldiers Supporter
5,614
2,922
113
Location
Metairie/La (N'awlins)
Some pics attached. Friend also joined the surprise welding club today with my 1/2 ratcheting wrench :p
If it is a gearwrench, they don't want it back for a warranty exchange. Just fill out a form online, take a picture ( I would flip it over ;-) ) and they will send you a new one and tell you to environmentally friendly dispose of the other one. They also upgraded me from a 72 tooth to a 92 tooth ratcheting wrench. YMMV
 

Milcommoguy

Well-known member
Supporting Vendor
1,710
2,265
113
Location
Rosamond, CA
If it is a gearwrench, they don't want it back for a warranty exchange. Just fill out a form online, take a picture ( I would flip it over ;-) ) and they will send you a new one and tell you to environmentally friendly dispose of the other one. They also upgraded me from a 72 tooth to a 92 tooth ratcheting wrench. YMMV
Naaaaa Just keep it as a box end for battery work. ⚡⚡

Let the sparks fly, CAMO
 

jake20

Well-known member
433
846
93
Location
Illinois
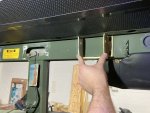
Do the rest of you folks have wiper mounts that look like these photos?

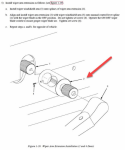
At first, I thought it was an extension since I likely had armored windows. There’s even a TM page that shows an extension. I scraped mine looking for that Allen head grub screw but I saw absolutely nothing.

I then realized that there may be a different type of extension: https://www.easternsurplus.net/PartDetails/9684/HM-1548-Wiper-Extension-Shaft

Basically, are my wipers splines stock or do I need to remove what looks to be some sort of spacer? I’ve tried whacking it several ways but it’s definitely on there.

I could of course just put my wipers on as-is but it just looks too far out.
 

Attachments

  • Like
Reactions: OBX
Top