• Steel Soldiers now has a few new forums, read more about it at: New Munitions Forums!

  • Microsoft MSN, Live, Hotmail, Outlook email users may not be receiving emails. We are working to resolve this issue. Please add support@steelsoldiers.com to your trusted contacts.

Valence's M66 Gun Ring

277
4
18
Location
Belton, SC
Thanks Mr. Ahab. I appreciate the compliments. It's no small time investment for me to take the time to take pictures and post, but I like to share the journey. I hope enough others enjoy reading it.
I look forward to reading them and seeing the pics. Learned a bit, too. Much appreciated!

Sent from my SAMSUNG-SM-G930A using Tapatalk
 

Valence

Well-known member
Steel Soldiers Supporter
2,112
555
113
Location
Davis County, UT
I look forward to reading them and seeing the pics. Learned a bit, too. Much appreciated!

Thank you very much! Made my day. ;)


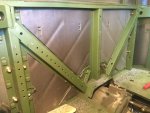
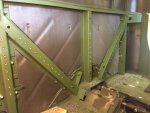
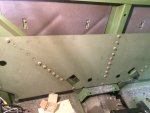
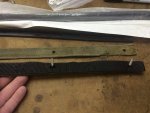
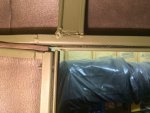
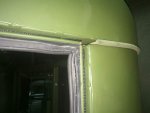
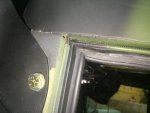
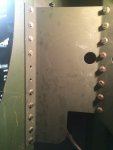
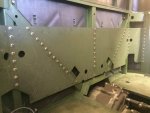
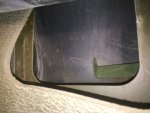
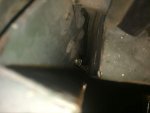
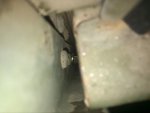
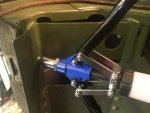
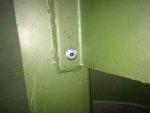
The new side window weather stripping with the polyester isolators are all in. Honestly, I have no idea how effective the isolaters will be. As you may recall from earlier, one of the old weather stripping channels had a canvas isolator so I thought it'd be cool/good idea to do similar on all 4. The window certainly rolls with more resistance due to the new, thicker rubber but tips out at the top. At the moment I'm leaving it as it might be resolved with the new window channels in the door that I'll put in at a later date. If not, it's not hard to adjust the top weather stripping outwards.

I will also need to plug the gaps between the back and the roof (later I suppose).

Apolgies for for all the close ups, but the lighting is bad in my garage when so late in the evening. This weekend I hope to get some proper shots of the whole, completed project. ;)

image.jpg image.jpg image.jpg image.jpg
 
Last edited:

Another Ahab

Well-known member
17,989
4,532
113
Location
Alexandria, VA
Apolgies for for all the close ups, but the lighting is bad in my garage when so late in the evening. This weekend I hope to get some proper shots of the whole, completed project.
Hey, Valence, you got nothing to apologize about. Your photo record is a treat. It's great. [thumbzup]
 

Valence

Well-known member
Steel Soldiers Supporter
2,112
555
113
Location
Davis County, UT
Hey Valance, where did you get that window weather-stripping . I need some real bad.
The weather stripping around the side door windows? Erik's Military Surplus. I ordered this, minus the weather stripping around the windshields since I had recently replaced them with new (and unless you want to tip your whole windshield frame forward towards the hood, you don't need the cowl seal either, unless it's leaking):

http://www.eriksmilitarysurplus.com/m3setrcabwes.html
(Erik's also sells each of these individually, though it's more expensive that route)

If you want to pay for shipping, you can have all my old cab door glass weather stripping (probably a medium flat rate box). It's not cracked at all, but was pretty loose (not sure how well it'd actually seal - my truck is babied and stored in a garage).
 
Last edited:

Valence

Well-known member
Steel Soldiers Supporter
2,112
555
113
Location
Davis County, UT
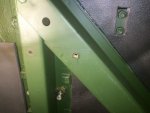
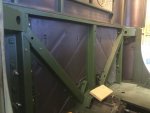
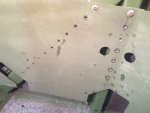
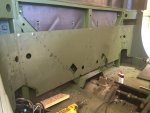
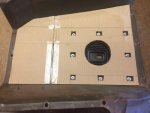
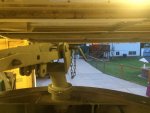
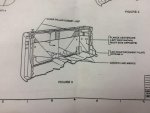
The cab reinforcement plate has been attached! The instructions call for a total of 74 holes to be drilled in it, I only had 73, and 2 of them aligned with existing, larger, holes in the pillars to I "only" have 71 bolts holding the plate in place. Yes, I did the nutserts and I'm honestly not sure if I'd recommend the process. It sure looks cool, and the plate is fully removable, but I think it tripled the amount of work. I had to put in the plate three times and remove it twice, which didn't do my paint any favors. The plate seems too long at first, but what I found worked to put it in was to start up higher and then press IN on the center, flexing the plate and the ends will pop into the side door gussets and you can work it in and slide it down into plajce. A rubber mallet comes in handy too.

The instructions called for the plate to be mounted exactly 7" down from the top of the back of the cab. The other plates I've seen installed just sat it flush with the drive train hump. That'd work but the hole cutouts for the u-bolt nuts align properly at 7" from the top - which meant I raised mine 3/4" from the top of the hump. A piece of wood and clamps on the side at the doors made this 1-man doable.
2016-06-30 10.52.25.jpg 2016-06-30 11.08.01.jpg 2016-06-30 11.21.27.jpg

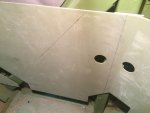
Once clamped in place, I marked the center line for each of the five rear cab pillars and where each of the holes would be drilled. The uppermost hole starts 1/2" from the top of the plate, and the rest follow, spaced evenly 1-1/2" apart with no hole within 1/2" of the seat belt cutouts or the bottom of the plate.
2016-06-30 11.55.16.jpg

One hole was drilled in each, 1/2" from the top of the plate. I then removed the plate, drilled the 5 "control" holes larger and put a nutsert in each.
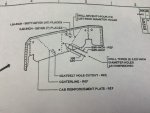
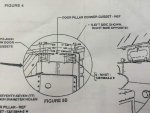
Note: For the initial holes to be drilled, the instructions said to refer to "A" in this figure, but I honestly could not figure out what in the world all the lines were pointing at or what it wanted me to do. So that's where I came up with my 5 "control" holes at the top idea.
2016-06-30 11.34.45.jpg 2016-06-30 12.18.42.jpg 2016-06-30 12.20.13.jpg 2016-06-30 12.22.02.jpg 2016-06-30 12.34.08.jpg

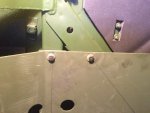
I then reinstalled the plate a second time, put in the 5 "control" bolts to hold the plate firm and steady, and drilled all the holes in the rear cab pillars only.
2016-06-30 12.45.43.jpg 2016-06-30 15.52.47.jpg 2016-06-30 16.30.34.jpg

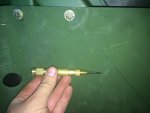
Tip #1: something I found out for myself a number of years ago when trying to drill holes in metal, when I struggled with drill bits "walking" on me. First mark where you want your hole then use a center punch (they're spring loaded) to create an indent in the metal. This will do a very good job of holding the drill bit where you want it. You'll almost always want to wear hearing protection when using the center punch on metal, it's quite loud. I worked the center punch 10 time on each mark to create the necessary divot.
2016-06-30 15.58.38.jpg

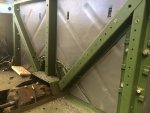
I removed the plate a second time and drilled all the rear cab pillar holes larger, put in nutserts, and reinstalled the cab plate for the third, and hopefully final, time.
Tip #2: A quick an easy way to debur holes is to use an even larger drill bit briefly on the hole. Such as using a 3/8" drill bit on 1/4" holes.
2016-06-30 16.35.36.jpg 2016-06-30 16.57.55.jpg 2016-06-30 18.25.25.jpg 2016-06-30 18.25.36.jpg

I have to admit here, I nearly broke my only 1/4" mandrel (I was sweating bullets and praying hard, this would have messed up everything!). I had the stroke set for 1/4" (maybe just a hair more) but on about the 7th nusert the threads tried to strip off the mandrel, getting stuck in a nutsert. After much prying and hammering with a chisel, I'm not sure how, but I managed to break/destroy the nusert and free the tool and madrel from the truck. I set the stroke for 3/16" sized nutserts and didn't have any problems on the remaining 60+ nutserts, or when the bolts were ran into place.

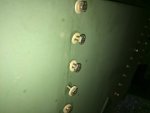
Bolt all the things! I decided to use a washer on the bolts and could have easily added a lock washer too (which I did, but only to the top 5 "control" holes).
2016-06-30 20.21.22.jpg 2016-06-30 20.21.34.jpg 2016-06-30 20.21.06.jpg

Tip #3: Have a good shop vac, because there's a deadly amount of metal shavings produced from all this! I may still wash down the floor because even after vacuuming I can run my hand on the floor and still come up with sparkly metal shavings. Also, gloves or good sliver removal system. I only had to remove 3 metal slivers (didn't wear gloves).

Tip #4: Every joint will ache the next day. Enjoy climbing stairs or getting out of bed. Knees, ankles, wrists, elbows, and shoulders. Your pectorals and triceps may ache too unless you're a more manly man than I.

Tip #5: To do everything you've seen in this thread, hard top sections, gun ring cutout cover, and cab reinforcement plate, buy the following (all in Grade 8):

  • 150, 1/4"-20 x 1" bolts (1" is a little long for bolting the hard top sections together, but eh, so what)
  • 200 washers (SAE sized, USS is looser)
  • 100 1/4"-20 nuts (or nyloc nuts if that's your preferred)
  • 100 lock washers (or 150 if you want lock washers on the bolts in the plate)
 
Last edited:

Valence

Well-known member
Steel Soldiers Supporter
2,112
555
113
Location
Davis County, UT
It was important to have all the bolts in the rear of the cab in place before drilling the holes in the ends, as I knew doing so would seat the plate back further against the wall then I would be capable of doing with clamps alone.

Then I drilled the end holes in the plate and door gussets, 3/4" from the edge of the plate, following the same pattern of 1/2" from the top and every 1-1/2" there-after. I did not use nutserts on the ends as the back was fully accessible (if awkward), so I just directly bolted them with washer, lock washer, and nut. I had to have my dear mother reach the back for two of the bolts on the passenger side, as my arms were too fat from the top and the slave cable was in the way from the bottom.
2016-06-30 21.36.41.jpg 2016-07-01 11.30.20.jpg

I'm really impressed with this Century 1/4" cobalt drill bit. I used 1 drill bit to drill all 73 holes in both cab and plate, and I did not even sharpen it once.
https://www.amazon.com/Century-Drill-Tool-26216-Cobalt/dp/B004UUFF6K/
 
Last edited:

Valence

Well-known member
Steel Soldiers Supporter
2,112
555
113
Location
Davis County, UT
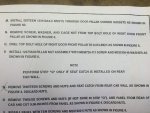
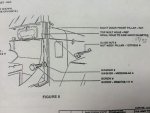
Then I installed the extra bolt on the passenger leg clamp. The instructions called to remove the top most bolt and its rear caged nut. How in the world am I suppose to reach the rear cage nut when it's inside the cab body panels?? :confused:
Steps 'N' through 'P'.
2016-07-01 11.22.06.jpg 2016-07-01 11.22.21.jpg

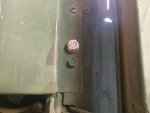
So I opted to just add it above the topmost bolt, as I believe it is just to add strength to the twisting and torquing of the clamp on the cab. 1/2" hole (even though the instructions state 17/32"), 2-1/4" down from the top of the clamp, 1-1/8" from the dash. The bolt probably could have went higher but there's some flanges inside the body that might have been in the way when maneuvering the nut into place.
2016-07-01 11.17.02.jpg 2016-07-01 11.20.44.jpg 2016-07-01 11.07.19.jpg 2016-07-01 11.07.36.jpg

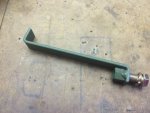
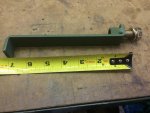
This is what that funny little bracket is for in the kit. It is a nut with a handle so you can reach putting the nut in place.

And the door still has no problems closing and it doesn't interfere with the door weatherstripping.
2016-07-01 11.09.36.jpg 2016-07-01 11.10.29.jpg
 
Last edited:

Another Ahab

Well-known member
17,989
4,532
113
Location
Alexandria, VA
I'm really impressed with this Century 1/4" cobalt drill bit. I used 1 drill bit to drill all 73 holes in both cab and plate, and I did not even sharpen it once.
This documentation is top-shelf, Valence; great pics and great write-up. [thumbzup]

About those cobalt bits:

- How would you even sharpen them; like what material is there in a grinding wheel that is hard enough to cut cobalt; is there anything?
 

Valence

Well-known member
Steel Soldiers Supporter
2,112
555
113
Location
Davis County, UT
This documentation is top-shelf, Valence; great pics and great write-up. [thumbzup]

About those cobalt bits:

- How would you even sharpen them; like what material is there in a grinding wheel that is hard enough to cut cobalt; is there anything?
Haha, thank you very much Mr. Ahab ;)
Wait, "top shelf"? As in "hard to reach for ye vertically challenged?" Lol j/k

I think that just the regular diamond abrasive wheels in those drill bit sharpeners would work. I actually bought one for this venture but didn't even need it!

https://www.amazon.com/gp/aw/d/B000BKTA00/
 
Last edited:

Valence

Well-known member
Steel Soldiers Supporter
2,112
555
113
Location
Davis County, UT
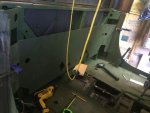
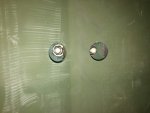
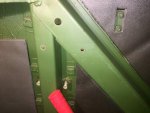
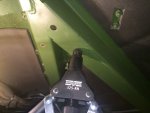
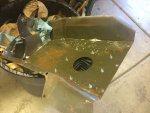
So I didn't have a rivet insert for my Marson tool so I tried buying a longer handled rivet tool from Harbor Freight, however, I tried to use the steel rivets included in this reinforcement plate kit but I don't think the center is supposed to pull out like this:

image.jpg image.jpgimage.jpg

Sooooo, I think I'm not going to rivet these corner gussets. Technically I could bolt one side of it as the back is, sort of, accessible. I'll have to drill out this rivet now though and put a bolt in its place. I think things will be fine without 8 rivets in each of the corner gussets (4 per edge). I hope.
 
Last edited:

rustystud

Well-known member
9,251
2,938
113
Location
Woodinville, Washington
So I didn't have a rivet insert for my Marson tool so I tried buying a longer handled rivet tool from Harbor Freight, however, I tried to use the steel rivets included in this reinforcement plate kit but I don't think the center is supposed to pull out like this:

View attachment 631301 View attachment 631299View attachment 631300

Sooooo, I think I'm not going to rivet these corner gussets. Technically I could bolt one side of it as the back is, sort of, accessible. I'll have to drill out this rivet now though and put a bolt in its place. I think things will be fine without 8 rivets in each of the corner gussets (4 per edge). I hope.
Actually I believe the rivets are for cab bodies that don't have the gusset already there. My old REO doesn't have them, but my M35A2 does.
 

Valence

Well-known member
Steel Soldiers Supporter
2,112
555
113
Location
Davis County, UT
Actually I believe the rivets are for cab bodies that don't have the gusset already there. My old REO doesn't have them, but my M35A2 does.
Oh well, now that's a world of good information! I didn't know there were bodies without the gussets. I wish I wouldn't have drilled the unnecessary hole or opened and used 2 rivets from that bag. Oh well, I suppose no harm has really been done. :neutral:
 

Valence

Well-known member
Steel Soldiers Supporter
2,112
555
113
Location
Davis County, UT
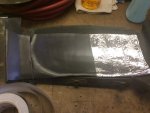
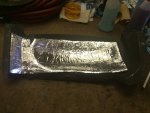
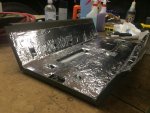
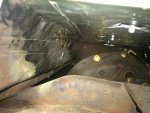
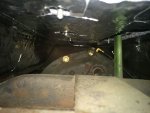
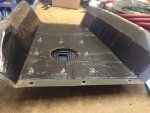
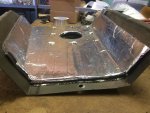
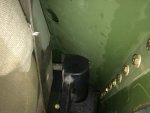
Sound deadening, insulation (2 layers), and reflective foil tape (in that order) have been added to the drive train tunnels. Not a lot to say here that hasn't been covered before except to say that the foil tape was super easy to put on and was very forgiving. Just tape it over whatever and cut out the holes for the bolts afterward. Also, there was plenty of clearance over the transfer case and transmission. The only thing to watch out for (and don't add anything to) are where the covers overlap each other and the lips on the floor of the cab. That's about it, and it doesn't have to look as pretty just clean the heck out of the bottom to ensure proper adhesion of the base (butyl) layer.

Oh, and also, the shiny foil tape made me feel like I was working on a space ship or related parts ;)
2016-07-01 12.32.46.jpg 2016-07-01 12.46.22.jpg 2016-07-01 21.45.23.jpg 2016-07-01 21.55.07.jpg 2016-07-01 21.55.02.jpg 2016-07-02 10.10.16.jpg 2016-07-02 11.27.58.jpg 2016-07-02 12.24.34.jpg 2016-07-02 14.34.35.jpg
 

Valence

Well-known member
Steel Soldiers Supporter
2,112
555
113
Location
Davis County, UT
The reinforcement plate kind of gets in the way of the driver's seat belt. Not sure what can be done about it. It's going to scratch some on the plate as the seat travels up and down.
2016-07-02 19.36.21.jpg


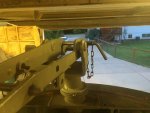
Sadly, I cannot leave the gun cradle on the truck, unless I want to damage it, truck and/or garage. :razz:
2016-07-02 21.11.23.jpg 2016-07-02 21.11.40.jpg
 

rustystud

Well-known member
9,251
2,938
113
Location
Woodinville, Washington

Thank you very much! Made my day. ;)


The new side window weather stripping with the polyester isolators are all in. Honestly, I have no idea how effective the isolaters will be. As you may recall from earlier, one of the old weather stripping channels had a canvas isolator so I thought it'd be cool/good idea to do similar on all 4. The window certainly rolls with more resistance due to the new, thicker rubber but tips out at the top. At the moment I'm leaving it as it might be resolved with the new window channels in the door that I'll put in at a later date. If not, it's not hard to adjust the top weather stripping outwards.

I will also need to plug the gaps between the back and the roof (later I suppose).

Apolgies for for all the close ups, but the lighting is bad in my garage when so late in the evening. This weekend I hope to get some proper shots of the whole, completed project. ;)

View attachment 630770 View attachment 630771 View attachment 630772 View attachment 630773
Hey Valance, you still haven't answered where you got those nice door window seals from. Those would work great on my truck which as I speak have no seals on them !
 

Valence

Well-known member
Steel Soldiers Supporter
2,112
555
113
Location
Davis County, UT
Hey Valance, you still haven't answered where you got those nice door window seals from. Those would work great on my truck which as I speak have no seals on them !
Yessir I did. Right after your post, in post #106, I said:
The weather stripping around the side door windows? Erik's Military Surplus. I ordered this, minus the weather stripping around the windshields since I had recently replaced them with new (and unless you want to tip your whole windshield frame forward towards the hood, you don't need the cowl seal either, unless it's leaking):

http://www.eriksmilitarysurplus.com/m3setrcabwes.html
(Erik's also sells each of these individually, though it's more expensive that route)
If you want to pay for shipping, you can have all my old cab door glass weather stripping (probably a medium flat rate box). It's not cracked at all, but was pretty loose (not sure how well it'd actually seal - my truck is babied and stored in a garage).
 
Top